Ultimate No Bake Chocolate Oat Bars Masterclass
These No Bake Chocolate Oat Bars redefine effortless dessert. They capture the essence of nostalgic American snacking—a hearty, chewy base made from quick oats and rich brown sugar, topped with a decadent layer of smooth, tempered chocolate. Unlike baked desserts that risk dryness, these bars guarantee moisture and a satisfying density in every square. They are the quintessential make-ahead treat, perfect for busy weeknights or when you need a show-stopping, no-fuss contribution to a potluck. This recipe focuses on achieving structural integrity through precise heating of the binder, ensuring they slice cleanly every single time.
restaurant_menu Ingredients
For the Chewy Oat Base
For the Glossy Chocolate Topping
hardware Essential Tools
8x8 inch baking pan
Parchment paper or aluminum foil
Medium saucepan
Heatproof mixing bowl
Rubber spatula
Offset spatula
Sharp chef's knife
format_list_numbered Preparation
Constructing the Base
Line your 8x8 inch pan entirely with parchment paper, leaving an overhang to lift the bars out later.
In a saucepan, melt the butter and brown sugar together over medium heat until fully combined, then bring to a rapid, rolling boil and maintain this boil precisely for 60 seconds to activate the binding properties of the sugar.
Immediately remove from heat, stir in the vanilla extract, and then quickly fold in the quick oats until they are completely coated in the syrup mixture.
Add the peanut butter to the oat mixture and fold until thoroughly combined, then press the entire mixture firmly and evenly into the prepared pan using the base of a measuring cup.
The Chocolate Finish
Gently melt the chocolate chips using residual heat (either in a double boiler or in 30-second microwave bursts, stirring well between each interval).
Pour the smooth, melted chocolate over the compacted oat base, spreading it carefully with an offset spatula to create an even layer right to the edges without digging into the oat layer beneath.
Refrigerate the entire pan for a minimum of 3 hours until the chocolate topping is completely firm and non-tacky before attempting to slice these wonderful No Bake Chocolate Oat Bars.
favorite You Might Also Love
Browse All arrow_forward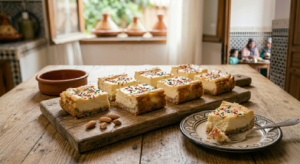
Easy 5-Ingredient Sugar Cookie Cheesecake Bars
Iconic Cherry Fluff Salad: Retro Comfort Elevated
Cloud-Light Whipped Pudding Frosting Masterclass
Rainbow Layer Cake: Ultimate Chaos Centerpiece
The Definitive Guide: What is Figgy Pudding? (Holiday Classic)
Hasty Pudding Dessert Recipe (Classic American Comfort)
Try These Variations
Elevating the Chocolate Layer
Instead of simple chips, create a ganache topping by heating 1/2 cup of heavy cream (ensure it is Halal-certified if necessary) until just simmering, then pour it over 1 cup of finely chopped dark chocolate (65% cacao). Let it sit for 5 minutes before stirring until silken. This creates a richer, more luxurious mouthfeel for your No Bake Chocolate Oat Bars, which sets slightly softer than a pure chip topping but offers superior flavor depth. You may need an extra 30 minutes of chilling time for this softer topping.
Citrus Zest Infusion
Introduce brightness to cut through the richness. Before pressing the oat mixture, zest one full orange or lemon directly into the hot butter/sugar mixture after removing it from the heat. The heat will release the essential oils beautifully. For the chocolate topping, stir in 1 teaspoon of orange zest or 1/2 teaspoon of lemon zest right before spreading. This adds a wonderful aromatic lift to the standard No Bake Chocolate Oat Bars profile.
Crunch and Texture Boost
For those who prefer more complexity than a simple oat bar, fold in 1/2 cup of chopped toasted pecans or walnuts into the oat mixture along with the peanut butter. Toasting the nuts lightly in a dry skillet over medium heat for 4 minutes beforehand maximizes their flavor and crunch. Alternatively, for a confectionary feel reminiscent of Homemade Samoas Bars, fold in 1/2 cup of finely shredded, unsweetened coconut along with the oats, adding a tropical chewiness to the base of these No Bake Chocolate Oat Bars.
Salted Caramel Swirl
After spreading the chocolate topping but before chilling, create a simple caramel sauce (melt 1/4 cup sugar with 1 tbsp water, cook to amber, then carefully whisk in 2 tbsp cream and 1/2 tsp salt). Drizzle this caramel over the chocolate and use a skewer to gently swirl it in, creating dramatic ribbons. This variation pushes the dessert into an almost candy-bar territory, making these No Bake Chocolate Oat Bars incredibly decadent.
Chef's Pro Tips
When combining the hot syrup mixture with the peanut butter, ensure the peanut butter is at room temperature. If it’s cold, it will rapidly cool down the syrup, preventing it from adequately coating the oats and leading to a crumbly, dry result where the binder doesn’t set correctly. Room temperature fat incorporates much more smoothly.
To ensure you get that clean, even layer of chocolate, always use a high-quality offset spatula. Hold the spatula almost parallel to the surface of the chocolate, using light, sweeping motions starting from the center and pushing outward. This technique minimizes air pockets and prevents you from accidentally scraping the oat layer underneath, which would compromise the structural integrity of your No Bake Chocolate Oat Bars.
If you live in a very humid climate, the setting time will increase significantly. Humidity introduces moisture into the sugar matrix, inhibiting crystallization. You might need to extend the chilling time to 4 or even 5 hours, or place the bars in the freezer for the last 45 minutes to guarantee a firm set before slicing. Humidity is the natural enemy of any no-bake recipe.
For an extra layer of flavor, lightly toast the quick oats in a dry skillet over medium-low heat for about 5 minutes until fragrant before adding them to the hot syrup. This toasting step awakens the starches and deepens the nutty flavor of the oats, which complements the chocolate and peanut butter beautifully in these No Bake Chocolate Oat Bars.
Storage Guide
Refrigeration is the preferred method for maintaining the ideal texture of these No Bake Chocolate Oat Bars. Place the fully cooled and cut bars into a rigid, airtight container. To prevent sticking and ensure clean edges, separate each layer of bars with a sheet of parchment paper or wax paper; never place them directly against each other. In the refrigerator, they will remain perfectly firm and delicious for up to seven days, as the cold temperature keeps the fats stabilized.
Freezing offers excellent long-term preservation for batch cooking. After cutting the bars, place them in a single layer on a baking sheet lined with parchment and freeze them undisturbed for about two hours until solid (this is called flash freezing). Once frozen solid, transfer them to a heavy-duty, zip-top freezer bag, pressing out all excess air to prevent freezer burn and oxidation of the fats. They maintain peak quality for up to three months.
For reheating or serving frozen bars, avoid the microwave entirely, as it ruins the texture by melting the fats unevenly. If serving straight from the fridge, allow them to sit on the counter for 10 minutes to slightly soften the chocolate topping. If serving from frozen, allow them to temper on the counter for about 20-30 minutes until they are firm but yielding to gentle pressure, perfect for a cold treat.
Avoid These Mistakes
✕ Failing to maintain the full, rolling boil for the entire 60 seconds when cooking the butter and brown sugar. Many home cooks stop as soon as the mixture liquefies, but that brief heating period is necessary for the Maillard reaction to begin subtly and for the sugar syrup to reach the correct concentration for setting. Stopping early leaves too much moisture, resulting in bars that remain tacky and greasy even after refrigeration, preventing a clean slice of your No Bake Chocolate Oat Bars.
✕ Using old or stale peanut butter. Peanut butter, like most fats, can go rancid, imparting a bitter, off-flavor that is magnified when concentrated in a no-bake bar. Furthermore, older peanut butter often has separated oils, which interfere with the emulsification process when mixed with the hot syrup, leading to an oily layer separating out between the oat base and the chocolate topping. Always check the smell and texture of your peanut butter before using it in these sensitive recipes.
✕ Pressing the oat mixture into the pan unevenly. If one side is packed densely and another is left loose, you will find that when you attempt to cut the finished product, the loose sections crumble away entirely while the dense sections hold firm. This creates an inconsistent eating experience. Use a heavy, flat object—like the bottom of a glass measuring cup—and apply uniform, significant downward pressure while rotating the object slightly to ensure every square inch of the base layer is compacted identically.
nutrition Nutrition Facts
Per serving: 1 bar
Nutritional information is an estimate based on 16 servings and standard ingredient brands.
flag Conclusion
There you have it—a masterclass in simplicity. These No Bake Chocolate Oat Bars are the perfect testament to the idea that world-class flavor doesn’t always require a high degree of difficulty. You have successfully leveraged basic culinary science—the controlled crystallization of sugar and fat—to create a dessert that rivals any sophisticated baked good. Take pride in serving this classic American treat; I know every person who tries them will ask for the recipe. Now, go forth, enjoy the sweet satisfaction of a perfect no-bake creation, and keep experimenting here at HomeRecipes.com!
sell Related Topics
Frequently Asked Questions
Why did my No Bake Chocolate Oat Bars turn out greasy and soft instead of firm? expand_more
This is the most common pitfall, and it almost always comes down to the cooking time of the butter and sugar. If you do not boil the mixture for a full 60 seconds, the sugar does not reach a high enough temperature to properly crystallize upon cooling. This leaves excess free fat (butter/peanut butter) that never fully binds with the oats, resulting in a greasy, unpleasantly soft bar that smears when you try to cut it. Remember, that minute of boiling is where the structural integrity of your No Bake Chocolate Oat Bars is established. Always use a timer!
Can I substitute the peanut butter with another nut butter or seed butter? expand_more
Yes, you absolutely can, but understand that you are altering the chemical structure of the binder. Almond butter or cashew butter work well, though they tend to be slightly less oily than standard peanut butter, potentially leading to a slightly looser bar. If using almond butter, I recommend increasing the total amount of chocolate chips by 1/4 cup to compensate for the reduced fat content and help firm things up. For a different flavor profile, sunflower seed butter is a great option, but be aware it imparts a distinct, earthy flavor that changes the classic profile of these No Bake Chocolate Oat Bars.
What is the best way to get perfectly clean, non-crumbly cuts? expand_more
Clean cutting requires two key elements: proper chilling and a warm knife. After the chocolate topping is fully set (at least 3 hours in the fridge), lift the entire block out using the parchment sling. Before cutting, run your sharpest chef’s knife under very hot tap water for about 20 seconds, then dry the blade completely with a clean towel. Slice down firmly, applying steady pressure down through the bar in one motion rather than sawing back and forth. Wipe the knife clean and re-warm it between every two or three cuts. This prevents the chocolate from shattering and the oat base from tearing, ensuring beautiful squares of your No Bake Chocolate Oat Bars.
I don't have quick oats; can I use old-fashioned rolled oats for my No Bake Chocolate Oat Bars? expand_more
While I strongly advise against it for the best texture, if you must use old-fashioned rolled oats, you need to process them first. Place the rolled oats into a food processor and pulse them until they are roughly chopped into pieces about half their original size. This mimics the smaller particle size of quick oats, allowing them to absorb the hot syrup more efficiently. If you use them whole, the bars will be much looser, chunkier, and significantly less dense, changing the entire mouthfeel of the classic No Bake Chocolate Oat Bars.
Can I add mix-ins to the oat base for more texture? expand_more
Absolutely! The oat base is a fantastic canvas. Before pressing it into the pan, you can fold in up to 1 cup of additions. Excellent choices include mini marshmallows for an extra chewy texture, chopped walnuts or pecans for crunch (if no allergies are present), or even 1/2 cup of shredded coconut for a tropical note. If adding large, dry items like coconut, consider tossing them in a tablespoon of the melted butter/sugar mixture first to ensure they adhere well to the main binder in your No Bake Chocolate Oat Bars.
More Recipes You'll Love
Velvet Chocolate Hazelnut Fudge Pops Recipe
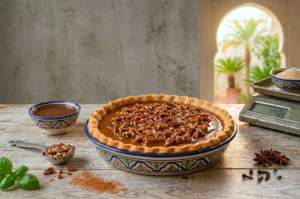
The Ultimate Homemade Pumpkin Pie Recipe with Caramel Pecan Topping
Golden Pecan Dandy Delights: A Homestyle Classic
Homemade Pecan Pie Bark: A Chef’s Guide
Community Kitchen