Rainbow Layer Cake: Ultimate Chaos Centerpiece
The spectacular Rainbow Layer Cake transforms humble pantry ingredients into a dazzling, multi-hued centerpiece. This recipe focuses intently on technique—proper creaming, precise batter division, and controlled cooling—to ensure every slice reveals perfectly defined, moist layers of cake. It’s the ultimate visual dessert triumph, perfect for making any holiday or celebration unforgettable, delivering both rich flavor and unparalleled aesthetic appeal.
restaurant_menu Ingredients
Dry Components
Wet & Dairy Components
Coloring Agents
hardware Essential Tools
Stand mixer with paddle attachment
Large mixing bowls (6 total)
Kitchen scale (highly recommended)
Three 8-inch round cake pans
Parchment paper
Wire cooling racks
format_list_numbered Preparation
Batter Creation and Division
Preheat your oven to 350°F (175°C) and prepare three 8-inch cake pans by greasing, lining with parchment discs, and lightly flouring the sides.Cream the softened butter and sugar on medium speed for 5 minutes until the mixture is pale, fluffy, and aerated, scraping down the bowl frequently.Add the room-temperature eggs one at a time, mixing vigorously for 30 seconds after each addition to ensure full emulsification.
Coloring and Baking
In a separate bowl, whisk together the sifted dry ingredients (flour, baking powder, salt). Gradually add the dry mixture to the wet ingredients in three additions, alternating with the room-temperature milk, mixing only until just combined to prevent gluten overdevelopment.Divide the batter evenly by weight (using a scale is ideal) into six separate bowls; add gel food coloring to each bowl until vibrant hues are achieved, folding gently until uniform.Spoon the colored batters into the prepared pans, alternating colors randomly to create the signature marbled look within each layer, then bake for 28-32 minutes until a skewer comes out clean.
favorite You Might Also Love
Browse All arrow_forward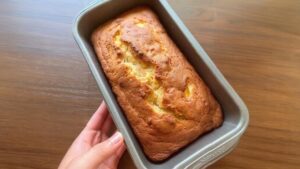
Divine Peaches Cream Cheese Loaf: Your New Favorite Dessert
Apple Cake Recipe (Classic British Delight)
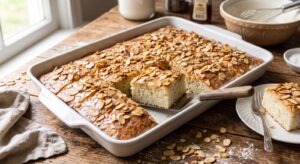
White Texas Almond Sheet Cake Recipe (Southern-Style)
The Ultimate Peach Pretzel Salad: A Retro Dessert Masterpiece
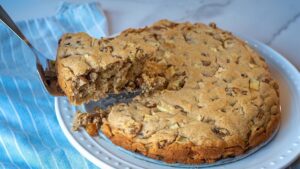
The Best No-Bake Peanut Butter Haystacks Recipe
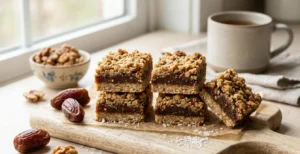
Mastering Flavorful Irish Coconut Date Bars at Home
Try These Variations
For a spiced holiday version, omit the vanilla extract and instead incorporate 1 teaspoon of ground cinnamon, 1/2 teaspoon of ground nutmeg, and a pinch of ground clove into the dry ingredients. This transforms the Rainbow Layer Cake into a subtly warm-flavored cake, pairing beautifully with a cream cheese frosting instead of plain buttercream.
To create a textural surprise, consider swapping out 1/2 cup of the flour for finely ground almond flour—this will add richness and moisture, reminiscent of the base structure found in a fine Chocolate Cake, lending a slightly nutty undertone to the layers.
Instead of baking three layers, you can bake two thicker layers and use the resulting extra batter to create colorful cupcakes. Bake the cupcakes at 350°F for 18-20 minutes. This gives you a beautiful centerpiece cake and dozens of individual, colorful treats for easy serving, much like preparing for a large event where diverse serving options are needed.
Chef's Pro Tips
When coloring, always start with less color than you think you need. Gel colors are highly concentrated, and adding too much can sometimes lead to a slightly bitter flavor profile or, worse, a sticky, underbaked texture in that specific layer because the coloring agent has altered the chemical balance. It is far easier to deepen a pale color than to fix an overly saturated one in the Rainbow Layer Cake.
Before leveling your cooled cakes, use a thin layer of simple syrup (equal parts sugar and water, heated until dissolved) brushed lightly over the top surface of each layer. This step, borrowed from professional pastry chefs, locks in moisture and ensures that even if the cake sits for a day, the crumb remains impossibly tender and won’t absorb the frosting moisture too aggressively.
If you are not using a scale, divide the batter visually into six equal portions before adding color. Once colored, use a measuring cup to ensure each pan receives an equal volume of batter. Consistency in volume translates directly to consistency in bake time, which is vital for level stacking your Rainbow Layer Cake.
Storage Guide
Room Temperature Storage
For the best flavor and texture, store the fully frosted Rainbow Layer Cake in a large, airtight cake dome or carrier placed on a cool, dry counter away from direct sunlight or heat sources (like the top of the refrigerator). At 68°F to 72°F, the buttercream remains stable, and the crumb stays soft for up to three days.
Refrigerator Storage
If your kitchen is very warm, or if you are using a delicate cream cheese frosting, refrigerate. Wrap the entire cake tightly in plastic wrap first, then cover with aluminum foil to block out cold air and prevent the cake from absorbing refrigerator odors. Before serving, you MUST allow it to sit on the counter, covered, for a minimum of 2 hours to allow the butter in the crumb to soften back to its original state.
Freezing Unfrosted Layers
For long-term storage, cool the layers completely, wrap each one individually first in plastic wrap, then in heavy-duty aluminum foil, pressing out all air. Freeze for up to three months. Thaw overnight in the refrigerator before leveling, warming slightly, and frosting.
Avoid These Mistakes
✕ Overmixing the batter after the flour is added is the single most common error. When flour meets liquid, gluten strands begin to form. Overmixing develops these strands too much, resulting in a tough, chewy cake texture rather than the light, tender crumb expected in a high-quality layer cake like this Rainbow Layer Cake. Mix only until the flour streaks have just disappeared, signifying the gluten network is minimally developed.
✕ Using cold ingredients, especially eggs and milk, will cause the creamed butter and sugar mixture to seize up or curdle when added. This breaks the emulsion you worked so hard to create, leading to pockets of unmixed fat and liquid that result in a greasy texture or small tunnels throughout the baked product. Always let dairy and eggs warm up on the counter for at least 30 minutes.
✕ Failing to properly prepare the cake pans results in disaster when inverting. If you skip the parchment paper insert, the bottom layer—which has the most direct, consistent heat—is highly likely to stick, tearing the cake surface when you try to release it. Always use the grease-parchment-flour method for guaranteed release.
nutrition Nutrition Facts
Per serving: 1 slice
Nutritional information is an estimate based on standard ingredient usage and a moderate serving size, assuming a standard vanilla buttercream frosting is applied.
flag Conclusion
The Rainbow Layer Cake is not just a dessert; it’s a statement about your skill and dedication in the kitchen. It proves that complexity in appearance can be built upon a foundation of simple, well-executed baking principles. Take pride in that perfect slice you serve. This cake is robust enough for any American holiday table, yet colorful enough to brighten any Tuesday afternoon. Go forth, bake boldly, and enjoy the applause!
Frequently Asked Questions
Why is my cake batter curdling when I add the eggs? expand_more
Curdling happens when the temperature difference between the fat (butter) and the cold eggs is too great, causing the emulsion to break. The fat solidifies slightly, creating visible clumps instead of a smooth, uniform mixture. To prevent this for your next Rainbow Layer Cake, ensure your eggs have sat on the counter for at least 30 minutes to reach room temperature (around 70°F). If it curdles slightly, add one tablespoon of your pre-measured flour mixture to help stabilize the emulsion before proceeding.
How can I ensure the food coloring doesn't make my layers taste metallic or bitter? expand_more
This metallic off-taste is usually a result of using too much liquid coloring, which concentrates the dyes and throws off the pH balance of the batter, or using very cheap, low-quality coloring. Always use concentrated gel pastes, as they are designed to deliver color without adding significant liquid weight. If you are aiming for deep, dark colors like navy or deep purple, it is better to use a higher concentration of a darker base color (like deep blue) rather than overdoing a lighter shade, which requires far more product.
My layers baked fine, but they are shrinking significantly after cooling. What causes this? expand_more
Shrinking, or a sudden collapse after initial rising, is almost always related to insufficient structural development or an oven temperature issue. If the oven temperature is too low, the cake sets too slowly, and the air bubbles collapse before the structure is firm enough to hold its shape. Confirm your oven temperature with a thermometer. Also, ensure your baking powder is fresh; if it’s old, it loses its leavening power, leading to a weak structure that can't support the weight once removed from the heat.
I want to make a chocolate version of this cake—how do I adapt the Rainbow Layer Cake? expand_more
Adapting this to chocolate requires careful substitution. For every cup of flour you remove, replace it with 3/4 cup of high-quality unsweetened cocoa powder (like Ghirardelli or Valrhona). Because cocoa powder is drying, you must increase the liquid slightly—add 2 tablespoons of extra milk or buttermilk per cup of cocoa added. This will give you rich, dark layers that contrast beautifully with the white frosting, though you will likely need to use fewer colors for the rainbow effect.
What is the best way to transport this tall, layered cake safely? expand_more
Transporting a tall cake like the Rainbow Layer Cake requires stability. First, ensure the cake is fully chilled (30 minutes in the fridge after the final crumb coat) so the frosting is firm. Place the cake on a non-slip mat inside a sturdy cake carrier. If you don't have a carrier, place the cake on a sturdy board and secure it in a box that is slightly larger than the cake. Drive carefully, using the flattest part of the floorboard behind the passenger seat or the trunk floor, never on a sloped seat. Avoid sudden stops or turns at all costs!
More Recipes You'll Love
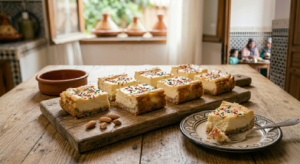
Easy 5-Ingredient Sugar Cookie Cheesecake Bars
Golden Mini Donut Bites: Restaurant Texture at Home
The Ultimate Halal Cuppa Cuppa Cake Recipe
Apple Cake Recipe (Classic British Delight)
Community Kitchen