Strawberry Angel Cake Recipe
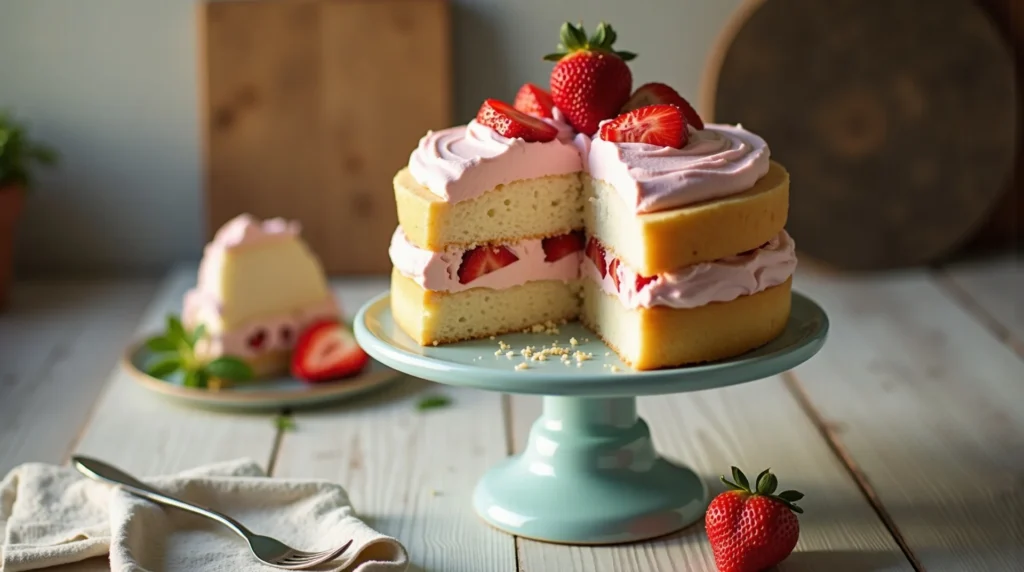
This layered Strawberry Angel Cake transforms a simple store-bought base into a stunning, cloud-light dessert using fresh berries and a stabilized creamy filling. It's the perfect make-ahead centerpiece.
restaurant_menu Ingredients
For the Assembly
Optional Garnish
hardware Essential Tools
Large mixing bowl
Potato masher or sturdy wooden spoon
Sharp, long serrated knife
Offset spatula
Serving platter or cake stand
Plastic wrap
format_list_numbered Preparation
Preparing the Filling
If using a homemade cake, ensure it is completely cooled, preferably chilled slightly, before beginning assembly
Place the 2 1/2 cups of diced strawberries into a medium mixing bowl
Gently mash about half of the strawberries using the back of a spoon to release their natural juices
Fold in the thawed whipped topping until just barely combined, leaving streaks of strawberry juice visible
Gently fold in the 2 1/2 cups of mini marshmallows until evenly distributed throughout the mixture
Cover the bowl tightly and refrigerate for a minimum of 20 minutes to allow the filling to firm slightly
Assembling the Layers
Place the fully cooled angel food cake directly onto your final serving platter or cake stand
Using a long, sharp serrated knife, carefully saw through the cake horizontally to create three even layers; use gentle sawing motions and do not press down
Spread one-third of the chilled strawberry filling evenly over the bottom cake layer, leaving a small border around the edge
Carefully place the middle cake layer on top of the filling, then repeat the spreading process with the next third of the mixture
Top with the final cake layer and use the remaining filling to frost the top and sides of the entire Strawberry Angel Cake
Chilling and Serving
Cover the assembled cake loosely with plastic wrap, ensuring the wrap does not touch the frosting, or use toothpicks to prop it up
Refrigerate the entire Strawberry Angel Cake for a minimum of 90 minutes, though 2-3 hours is ideal for flavor melding and structure setting
Before serving, allow the cake to sit at room temperature for 15-20 minutes to slightly soften the topping and enhance the strawberry flavor
Garnish with additional sliced strawberries or a light dusting of confectioners' sugar just before slicing and serving
favorite You Might Also Love
Browse All arrow_forward
Greek Orange Cake Recipe (Moist & Aromatic)

Strawberry Slab Pie Recipe (Homestyle & Easy)
Decadent Peppermint Truffles: The Ultimate Holiday Candy
Mastering Heavenly Divinity Candy: The Ultimate Southern Recipe
Tropical Coconut Dream Cake: Southern Summer Indulgence

Hasty Pudding Dessert Recipe (Classic American Comfort)
Try These Variations
Raspberry Citrus Twist
Substitute half the strawberries with fresh raspberries and add the zest of one large lemon to the filling mixture
Chocolate Drizzle
Drizzle melted dark chocolate over the top of the finished Strawberry Angel Cake just before serving
Pineapple Upside-Down Style
Replace strawberries with well-drained crushed pineapple and omit the marshmallows for a tropical flavor profile
Chef's Pro Tips
Always use a cake that is completely chilled when slicing; this prevents the delicate foam structure from tearing aggressively
When frosting the exterior, use light, sweeping strokes with your spatula; pressing too hard will compress the airy cake underneath
If you must use fresh heavy cream, add 1 teaspoon of gelatin dissolved in 2 tablespoons of cold water to the cream after it reaches soft peaks to ensure stability for the Strawberry Angel Cake
Keep your knife blade clean and slightly damp between each slice for the cleanest presentation possible
Storage Guide
Room Temperature
Not recommended for more than 2 hours due to fresh fruit and whipped topping
Refrigerator
Store tightly covered in an airtight container or plastic wrap for up to 3 days
Freezer: Not recommended due to texture breakdown upon thawing
Avoid These Mistakes
✕ Attempting to slice the cake before it is fully chilled, resulting in a messy, collapsed presentation
✕ Overmixing the filling once the whipped topping is incorporated, which deflates the volume and texture of the Strawberry Angel Cake filling
✕ Using overly wet fruit, which introduces too much liquid and causes the cake layers to become soggy too quickly
✕ Opening the refrigerator door frequently during the 90-minute chilling period, disrupting the temperature balance needed for the flavors to meld
nutrition Nutrition Facts
Per serving: 1 slice
Nutritional values are estimates based on using standard store-bought angel food cake and Cool Whip.
flag Conclusion
In conclusion, my friends, this layered Strawberry Angel Cake is a testament to simple, beautiful American baking. It’s light, it’s fruity, it’s incredibly satisfying, and it requires no oven time on the day you serve it, which is a massive victory in my book. Take pride in the layers you create and the fresh flavors you showcase. Don’t be afraid to make this Strawberry Angel Cake your own by experimenting with other seasonal fruits. Head over to HomeRecipes.com and share your beautiful creations with the community—I can’t wait to see your stunning results!
sell Related Topics
Frequently Asked Questions
Can I make this strawberry angel cake entirely from scratch? expand_more
Absolutely! While using a store-bought cake saves time, baking your own angel food cake is incredibly rewarding. If you choose to bake, ensure you whip your egg whites to stiff, glossy peaks—this is crucial for volume. Use a 10-inch tube pan, and remember to cool the cake completely upside down on its little feet (or on a bottle neck) for at least two hours before attempting to remove it and slice it. A warm homemade cake will disintegrate when assembling your Strawberry Angel Cake.
What can I use instead of Cool Whip for the filling? expand_more
If you prefer a less processed topping, you can substitute the whipped topping with freshly whipped heavy cream. For every 16 ounces of topping called for, whip 2 cups of very cold heavy whipping cream with 1/4 cup of powdered sugar and 1 teaspoon of pure vanilla extract until you achieve stiff peaks. Fold in the strawberries and marshmallows gently. Be aware that homemade whipped cream may not hold its structure quite as long as the stabilized topping, so plan to serve this version sooner.
How do I prevent the cake from becoming soggy during the 90-minute chill? expand_more
Sogginess is usually a result of excess liquid from the fruit or using a cake that wasn't fully cooled. To combat this, ensure you gently mash the berries—don't pulverize them into liquid soup. Secondly, when spreading the filling between layers, try to leave a small, half-inch border around the very edge uncoated. This buffer zone, which will be covered by the final exterior frosting, helps keep the inner crumb from becoming saturated too quickly. This structure is vital for a beautiful Strawberry Angel Cake.
Can I substitute the strawberries with other fruits? expand_more
Yes, this recipe is highly adaptable! Peaches, raspberries, or even a mix of berries work wonderfully in place of strawberries. If you use raspberries, handle them extremely gently, as they break down much faster. If using slightly tart fruit like kiwi or pineapple, you may wish to increase the sugar slightly in your whipped topping mixture to balance the acidity. The core technique for the Strawberry Angel Cake—the light mashing and the marshmallow stabilizer—remains the same regardless of the fruit you choose.
Is this dessert suitable for making ahead of time? expand_more
This Strawberry Angel Cake is actually best made ahead! You can assemble the entire cake up to 4 hours before serving. In fact, the 90-minute minimum chill time is intended to allow the flavors to marry. If you are preparing for a large event, you can even prepare the strawberry-cream filling mixture the day before and store it, tightly covered, in the refrigerator. Then, on the day of serving, simply slice the cake and assemble everything. This makes it an ideal make-ahead dessert for holidays or parties.
More Recipes You'll Love
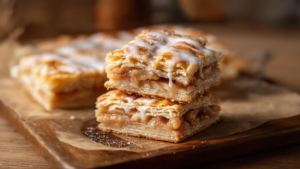
Mastering Flaky Apple Pie Bars: A Pastry Revelation

Coastal Lemon Dream: My Atlantic Beach Pie Masterpiece

Homemade Lemon Cream Cheese Bread

Cowboy Cookie Recipe (Chewy & Loaded)

New Mexican Sopapilla Pie Recipe (Honey Drizzled)
Community Kitchen