Velvet Chocolate Hazelnut Fudge Pops Recipe
These are not your average frozen dessert! These Nutella Fudge Pops deliver an intensely rich, velvety mouthfeel that defies the typical icy texture of homemade pops. Harnessing the blend of heavy cream and hazelnut spread, this recipe creates a slow-melting, satisfyingly dense treat reminiscent of premium fudge. Perfect for a sophisticated, yet incredibly easy, summer indulgence or a guaranteed hit at any children's party, these Nutella Fudge Pops redefine freezer desserts.
restaurant_menu Ingredients
For the Creamy Fudge Base
For Serving and Garnish
hardware Essential Tools
Medium saucepan
Whisk
Heat-safe spatula
Popsicle molds (8 cavity recommended)
Tall glass for dipping
format_list_numbered Preparation
Heating the Dairy Base
Combine the heavy cream and whole milk in a medium saucepan over medium-low heat. Warm gently, stirring occasionally, until small bubbles form around the edges and steam rises steadily (do not allow it to boil).
Creating the Emulsion
Remove the pan from the heat and immediately add the hazelnut spread, sugar, cocoa powder, vanilla, and optional corn syrup. Let stand for one minute to soften the solids, then whisk slowly and consistently until the mixture is completely homogenous, glossy, and smooth—this is the secret to creamy Nutella Fudge Pops.
Molding and Freezing
Allow the mixture to cool on the counter until it is near room temperature, about 20 minutes. Carefully pour the cooled base into your popsicle molds, leaving a small margin at the top for expansion. Insert the sticks securely and freeze for a minimum of 6 hours, or preferably overnight.
favorite You Might Also Love
Browse All arrow_forward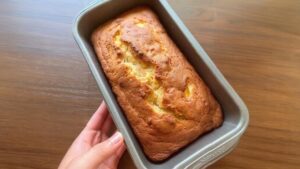
Divine Peaches Cream Cheese Loaf: Your New Favorite Dessert
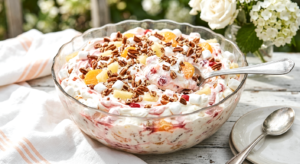
The Ultimate Heavenly Hash: A Creamy Retro Dessert Dream

The Ultimate Halal Muddy Buddy Recipe: Sweet & Simple
White Texas Almond Sheet Cake Recipe (Classic & Moist)
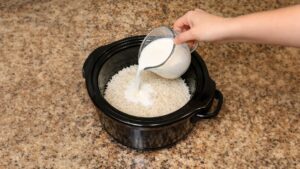
Velvety Slow Cooker Rice Pudding Masterpiece

Southern Peach Bread Recipe (Moist & Flavorful)
Try These Variations
Mocha Espresso Boost
For a sophisticated twist that highlights the chocolate, dissolve 1 tablespoon of high-quality instant espresso powder into the warm milk mixture before adding the hazelnut spread. This deepens the chocolate notes significantly, transforming the Nutella Fudge Pops into a frozen mocha experience, perfect for adult palates. Ensure it dissolves completely before moving to the next step to avoid gritty texture.
Salted Caramel Swirl
After pouring the base into the molds, drizzle a teaspoon of thick, homemade salted caramel sauce into each cavity. Use a thin skewer to gently swirl the caramel just once or twice through the mixture. Do not over-mix, or the swirl will disappear. This adds a delightful salty-sweet complexity to the rich hazelnut flavor.
Nut Butter Swap
If you prefer a different nutty profile or have an allergy concern, substitute an equal amount of creamy, high-quality almond butter or cashew butter for the hazelnut spread. You may need to slightly increase the sugar by 1 teaspoon, as some nut butters are less sweet than commercial hazelnut spreads. This creates a wonderful alternative frozen treat that still relies on that essential creamy base.
Chef's Pro Tips
Always use a visual check for emulsion, not just time. Tilt the whisk under warm water after mixing; if the mixture slides off cleanly as one cohesive film, you are good. If it separates or looks oily, gently reheat the mixture over very low heat (off the burner) and whisk vigorously again until completely unified. This attention to the emulsion is what prevents the dreaded icy texture in your Nutella Fudge Pops.
To ensure the sticks remain perfectly centered and straight, use a piece of parchment paper or foil laid across the top of the filled molds. Poke small, even holes through the barrier where you want the sticks to sit. This creates a rigid support structure that keeps the sticks perpendicular to the base while they freeze solid, a technique I learned managing high-volume pastry production.
When serving, temperature shock is your enemy. If you pull them directly from a deep freeze, they can shatter. Allow the molds to sit on the counter for 5 minutes before attempting to dip them in hot water, or use slightly warm (not hot) water for the release dip. This gradual warming prevents the rapid expansion that can crack the frozen structure of your beautiful Nutella Fudge Pops.
Storage Guide
Refrigerator (Short-Term)
These pops should not be stored in the refrigerator, as they will fully melt into a liquid state within an hour or two, ruining the texture. If you have leftovers that have partially melted, you can *attempt* a recovery by pouring the liquid back into the saucepan, reheating gently to re-emulsify, cooling it down, and refreezing. However, this process will inevitably result in a slightly icier texture than the first freeze, so this method is only recommended in emergencies.
Freezer (Optimal Long-Term)
Once fully frozen, the crucial step is wrapping them individually. Use high-quality plastic wrap, ensuring you press out every bit of air around the pop before twisting the ends tightly. For the second layer of defense against freezer burn and odor absorption, place the wrapped pops inside a heavy-duty zip-top freezer bag, squeezing out all air before sealing. Stored this way, your Nutella Fudge Pops will retain their creamy texture perfectly for up to three months.
Thawing for Serving
Never serve directly from the deepest freezer setting, as they will be rock hard and shatter when bitten. To achieve the perfect serving temperature—that ideal balance between solid and creamy—transfer the wrapped pops to the refrigerator for 15 minutes before unwrapping, or allow them to sit on the counter for 5 minutes before dipping them in hot water for easy release.
Avoid These Mistakes
✕ Overheating the dairy mixture is a common pitfall. If the milk or cream boils, the proteins can denature and separate, leading to a grainy or curdled texture once frozen, regardless of how well you whisk afterward. You only need to reach the steaming point—just shy of simmering—to properly soften the fats in the spread. Keep that heat low and patient; we are coaxing the ingredients together, not forcing them.
✕ Not using enough fat is the primary reason for icy pops. If you attempt to substitute heavy cream with skim milk or water to lower calories, you are fundamentally changing the dessert from a ‘fudge pop’ to a ‘flavored ice pop.’ The fat molecules coat the water molecules, inhibiting large ice crystal growth. For the best Nutella Fudge Pops, stick to the specified heavy cream ratio; the richness is essential to the texture.
✕ Failing to cool the mixture before molding can cause two issues
warping of plastic molds and, critically, sticks sinking or shifting. When hot liquid hits the cold mold, the stick placement stabilizes too quickly before the mixture has a chance to fully set around it. Always wait until the mixture is lukewarm or room temperature before inserting the sticks and moving them to the freezer for final setting.
nutrition Nutrition Facts
Per serving: 1 pop
Nutritional information is an estimate based on using standard commercial hazelnut spread and whole dairy products.
flag Conclusion
There you have it—a masterclass in turning humble ingredients into an extraordinary frozen delight. These Nutella Fudge Pops require minimal effort but deliver maximum impact, proving that gourmet desserts don’t require hours of labor. Embrace the richness, enjoy the velvety texture, and take pride in serving something truly special that you crafted right in your own kitchen. Head over to HomeRecipes.com for more secrets to elevate your everyday cooking!
Frequently Asked Questions
Can I use a different brand of hazelnut spread for these pops? expand_more
You certainly can, but pay close attention to the ingredient list. Commercial hazelnut spreads are formulated with a specific balance of sugar and palm oil (fat) to maintain a certain viscosity at room temperature. If you use a lower-fat spread or one that is primarily nut butter, your Nutella Fudge Pops will freeze significantly harder and icier. Look for a substitute that lists sugar and oil high up on the ingredient panel to mimic the texture we are aiming for.
Is the corn syrup necessary for the texture of the Nutella Fudge Pops? expand_more
The corn syrup is highly recommended, though not strictly mandatory if you don't have it. Its purpose is purely textural: it acts as an invert sugar, lowering the overall freezing point of the mixture. This means the pop freezes slightly less solidly than pure sugar and dairy would, resulting in that sought-after, slightly pliable, creamy texture rather than a hard, brittle block of ice cream. If you skip it, ensure you follow the whisking technique perfectly to maximize emulsion.
My popsicles stuck in the mold; how do I prevent this next time? expand_more
Sticking usually happens because the mixture froze too tightly against the plastic, or the plastic itself was too cold when the mixture was poured in. To combat this, always ensure your mixture has cooled to room temperature before filling the molds. When releasing, never try to yank them out. Instead, use the hot water bath method: dip only the bottom half of the mold into hot water for 5-7 seconds. The slight warmth melts the outermost layer, releasing the vacuum seal, allowing the pop to slide out easily.
Can I make these vegan by substituting the dairy? expand_more
Yes, this base is very adaptable to a vegan diet, but you must select the right dairy replacers to maintain the texture. Replace the heavy cream with full-fat canned coconut cream (the thick part scooped from the top of a chilled can) and use a rich, unsweetened oat milk or soy milk for the whole milk component. Coconut cream specifically provides the high saturated fat content necessary to mimic the cream's function in resisting large ice crystal formation in your Nutella Fudge Pops.
How long can I safely store these homemade Nutella Fudge Pops? expand_more
When wrapped properly—individually wrapped in plastic film, then sealed in an airtight freezer bag—these pops can maintain excellent quality for about three months. After four months, while they are still safe to eat (due to the high sugar content acting as a preservative), the texture might begin to degrade slightly, potentially becoming a bit drier or developing minor freezer burn spots on the surface, even with double wrapping. Always store them in the back of the freezer, away from the door, where temperature fluctuations are minimal.
More Recipes You'll Love

Irresistible 4-Ingredient Blueberry Dump Cake: Easiest Dessert Recipe
Zesty Mediterranean Delight: Authentic Greek Orange Cake
Thick, Chewy Cowboy Cookies Recipe Secrets
Wondrous Chocolate Depression Cake Mastered at Home

Community Kitchen