Flaky Sopapilla Cheesecake: Layered Dessert Dream
This legendary Sopapilla Cheesecake delivers incredible texture contrast: shatteringly crisp, buttery crescent dough encasing a cool, velvety, slightly tangy cheesecake filling. The signature topping of melted butter, cinnamon, and sugar caramelizes beautifully in the oven, creating a dessert that is both rustic and refined. It’s the ultimate American fusion dessert, perfect for potlucks or satisfying a serious sweet tooth after a hearty meal. Every bite of this Sopapilla Cheesecake is a celebration of texture and balanced sweetness.
restaurant_menu Ingredients
Cheesecake Filling Components
Pastry and Topping
Optional Dusting
hardware Essential Tools
9x13 inch baking dish
Electric mixer (hand or stand)
Large mixing bowl
Small microwave-safe bowl for butter
Whisk
Offset spatula
Wire cooling rack
Plastic wrap
format_list_numbered Preparation
Preparing the Filling and Base
Preheat your oven to 350°F (175°C) and lightly grease your 9x13 inch baking dish, ensuring the sides are coated for easy release later. Position your oven rack in the center to guarantee even heat exposure on the bottom crust. Place one entire package of crescent roll dough into the prepared dish, gently pressing and overlapping the seams to form a continuous base layer across the bottom. Do not stretch or tear the dough excessively; let it relax into place.
Assembling the Layers
In a large mixing bowl, combine the softened cream cheese, 1 cup of the granulated sugar, and the vanilla extract. Beat this mixture on medium speed for precisely 2 minutes, scraping down the sides halfway through. We are looking for a light, fluffy, streak-free texture, but stop immediately once uniform to avoid incorporating too much air into your Sopapilla Cheesecake filling. Spread this rich mixture evenly over the bottom dough layer using your offset spatula, ensuring it reaches the corners but stays about a half-inch away from the edges to prevent seepage.
Topping and Baking
Carefully unroll the second package of crescent dough and lay these triangles over the filling, overlapping seams similarly to the bottom layer. In a small bowl, mix the remaining 1/2 cup of sugar with the 1 teaspoon of cinnamon and the toasted sliced almonds. Drizzle the slightly cooled melted butter evenly across the top layer of dough, then generously scatter the remaining cinnamon-sugar-almond mixture over the entire surface. This topping is what creates that signature crisp crust on the Sopapilla Cheesecake. Refrigerate the assembled dish for a mandatory 60 minutes before baking.
favorite You Might Also Love
Browse All arrow_forwardMastering Induction Cooking: Techniques for the Modern Kitchen

Cozy Grandma's Martini Sticks: The Ultimate Cream Cheese Stuffed Celery Recipe

Humpty Dumpty Dip Recipe
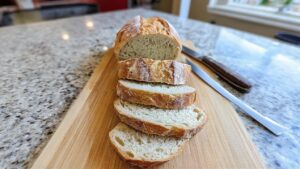
Farmhouse Style Sourdough Bread Recipe (Rustic & Hearty)

Hot Chicken Salad Recipe (Creamy Baked Casserole)
The Ultimate Halal Piña Colada Dip: Tropical Bliss at Home
Try These Variations
For a brighter, zingier flavor profile reminiscent of a Lemon Cheesecake Delight, incorporate 2 tablespoons of fresh lemon zest and 2 tablespoons of fresh lemon juice directly into the cream cheese filling. The acid in the lemon helps balance the richness of the dairy beautifully, providing a sophisticated counterpoint to the sweet crust. Make sure the zest is finely grated to avoid large, bitter pieces in your Sopapilla Cheesecake.
To create a decadent chocolate swirl, reserve 1/4 cup of the cream cheese filling and mix it vigorously with 2 tablespoons of high-quality unsweetened cocoa powder and 1 tablespoon of extra sugar. Once the base dough is laid, dollop the chocolate mixture randomly over it, then follow with the plain white filling. Use a skewer to gently swirl the two colors together once before topping with the second dough layer. This variation offers a richer, more complex flavor profile than a standard Sopapilla Cheesecake.
If you prefer a nutty depth akin to Pecan Pie Cheesecake, omit the almonds and instead press 1/2 cup of finely chopped, toasted pecans into the melted butter layer just before the final cinnamon-sugar topping goes on. For an even greater depth, substitute 1/4 cup of the granulated sugar in the topping with packed light brown sugar; the molasses content will deepen the caramelization and add a slight toffee note to your Sopapilla Cheesecake.
For a festive holiday twist, incorporate 1/2 teaspoon of ground nutmeg and a tiny pinch of ground cloves into the cinnamon-sugar topping. This warming spice blend works exceptionally well with the cool cream cheese, transforming the dessert into something perfectly suited for a winter gathering or pairing well with the flavors found in a traditional Hawaiian Bread Roll Cheesecake base.
Chef's Pro Tips
When dealing with refrigerated doughs like crescent rolls, the secret to maximum lift is temperature management. Always allow the dough to sit at room temperature for about 10 minutes after taking it out of the fridge before you attempt to unroll it. This slight warming relaxes the gluten strands, allowing the dough to stretch and separate into its flaky layers without tearing, ensuring a light, airy foundation for your Sopapilla Cheesecake.
The choice of baking dish matters significantly for heat transfer. If you are using a glass or ceramic dish, which retain heat longer and can sometimes lead to over-browning on the bottom, reduce your initial oven temperature to 325°F for the first 30 minutes before bumping it up to 350°F to finish the top crust. Metal pans conduct heat faster, so the standard 350°F is usually perfect for that Sopapilla Cheesecake base.
To achieve that perfect, glossy, caramelized top, ensure your melted butter is not hot when drizzled; warm butter melts the sugar slightly, allowing it to adhere better, but hot butter will actually start cooking the dough prematurely. After drizzling the butter, let it sit for two minutes before sprinkling the sugar mixture; this slight resting period maximizes the sugar adhesion before baking this beautiful Sopapilla Cheesecake.
When slicing, always use a hot, clean knife. Dip a long, thin slicing knife into a pitcher of very hot water, wipe it completely dry with a clean towel, and then slice. The heat melts the sugar crust cleanly and gently slices through the chilled filling without dragging the layers together, resulting in perfect squares of Sopapilla Cheesecake every time.
Storage Guide
Refrigerator Storage
For the best texture, allow the baked Sopapilla Cheesecake to cool completely to room temperature (this takes about 2 hours) before covering. Use plastic wrap, ensuring it creates a tent over the topping so it doesn’t stick to the sugar crystals. It maintains excellent quality for up to 4 days in the fridge, remaining firm and delicious. Always serve chilled or allow it to sit on the counter for 20 minutes before cutting for easier slicing.
Freezer Method for Long-Term Preservation
This dessert freezes exceptionally well. Once completely cooled, wrap the entire dish first in a layer of plastic wrap, followed by a heavy-duty layer of aluminum foil to prevent freezer burn and odor absorption. Label clearly with the date; it keeps perfectly for up to 8 weeks. Thaw overnight in the refrigerator before serving. Do not attempt to thaw at room temperature or the crust can become soggy.
Reheating Individual Slices
While Sopapilla Cheesecake is traditionally served cold, if you prefer a slightly warmer center, place a single slice on a microwave-safe plate and heat on 50% power for 15-20 second intervals. This gently warms the filling without compromising the structural integrity of the pastry layers. For a slightly crisper crust, you can briefly warm slices on a baking sheet in a 300°F oven for about 8 minutes, watching closely.
Avoid These Mistakes
✕ The most frequent error I observe is skipping the mandatory chilling time after assembly. If you bake the assembled Sopapilla Cheesecake immediately, the cold, fatty dough hits the hot oven air, causing the layers to separate violently and unevenly, resulting in a greasy, collapsed layer between the crust and filling, rather than the neat, distinct strata we aim for. The chilling period allows the dough to equilibrate slightly, ensuring a more controlled expansion during the bake.
✕ Another common pitfall is using softened cream cheese that is too warm or even slightly melted. If the cream cheese is too soft, it incorporates too much air when beaten, leading to the aforementioned ‘volcano effect’ where the center rises dramatically only to fall flat upon cooling, leaving a massive dip in the middle of your Sopapilla Cheesecake. Ensure it is merely ‘room temperature’—pliable but still holding its shape.
✕ Many cooks fail to properly seal the edges between the two crescent layers. If there are gaps, the cheesecake filling, which is mostly fat and moisture, will boil out during baking, creating a sticky, burnt mess on the bottom of your pan and leaving the center filling thin and watery. Press the seams firmly together, especially around the perimeter, to create a sealed ‘pouch’ for the filling within the Sopapilla Cheesecake structure.
✕ Using cold butter for the topping is a recipe for a dry, sandy crust. The butter must be melted to properly coat the sugar and dough, allowing the sugar to caramelize evenly and adhere during baking. Cold, hard bits of butter will simply melt away, leaving dry patches of dough that won’t brown correctly on your finished Sopapilla Cheesecake.
nutrition Nutrition Facts
Per serving: 1/12th of the dish
Nutritional information is an estimate based on the ingredients listed and standard product sizes. This is a rich dessert best enjoyed in moderation.
flag Conclusion
This Sopapilla Cheesecake is more than just a dessert; it’s a statement piece that proves you don’t need complicated techniques to achieve magnificent results. It’s the perfect intersection of flaky pastry, tangy cream, and sweet spice that every American kitchen deserves to have in its repertoire. Embrace the simplicity, trust the chilling time, and prepare for accolades. This recipe is a guaranteed winner, and I know you will make this Sopapilla Cheesecake a regular feature in your home baking rotation. Find more culinary inspiration just like this at HomeRecipes.com!
sell Related Topics
Frequently Asked Questions
What is the difference between Sopapilla Cheesecake and regular cheesecake? expand_more
The fundamental difference lies in the crust and structure. A traditional New York Cheesecake Recipe 3 relies on a graham cracker or cookie crumb crust, which is dense and uniform, and the filling is typically baked in a water bath to ensure a silky, crack-free texture. Our Sopapilla Cheesecake utilizes pre-made, flaky crescent roll dough for both the bottom and top layers. This results in a much lighter, more pastry-like experience where the rich filling is sandwiched between buttery dough, offering a textural contrast that standard cheesecake lacks. It’s less dense, puffier, and far easier to execute successfully.
Why is my Sopapilla Cheesecake sunken in the middle after cooling? expand_more
A sunken center, often called a 'crater,' is almost always due to over-aeration during the mixing of the filling or insufficient baking time. When you beat the cream cheese mixture too vigorously, you whip in excessive air bubbles which expand rapidly in the oven’s heat, causing a dramatic rise. When removed from the heat, the unsupported air structure collapses, pulling the center down. To avoid this with your Sopapilla Cheesecake, mix only until just combined, and ensure the edges of the dough are a deep golden brown before removing it from the heat.
Can I make this ahead of time for a party? expand_more
Absolutely, and I highly recommend it! As mentioned in the storage section, chilling helps the flavors meld beautifully. You can assemble the entire Sopapilla Cheesecake, cover it tightly with plastic wrap, and keep it refrigerated for up to 24 hours before baking. When it’s time to serve, pull it out of the fridge about 30 minutes before sliding it into the preheated 350°F oven. You may need to add an extra 5 to 8 minutes to the bake time since it is starting cold, so watch those edges closely for that perfect golden hue.
I don't have crescent rolls; what dough can I use instead? expand_more
If you cannot find standard refrigerated crescent roll dough, you have excellent alternatives that will still honor the spirit of the Sopapilla Cheesecake. Your best bet is refrigerated pie crust dough, though you will need two standard 9-inch crusts which you must carefully roll out thinner to fit the 9x13 pan and ensure the layers don't become too thick or heavy. Alternatively, for a much more rustic and airy texture, you could use puff pastry sheets, but you must prick the top layer extensively with a fork (docking) to prevent it from puffing up into a massive dome that would cause the filling to escape during baking.
How can I make this taste more like traditional fried sopapillas? expand_more
To truly capture that authentic flavor profile often found in roadside stands, you need to enhance the browning and add a hint of fried aroma. While we are not deep-frying the pastry here, you can achieve a parallel effect. Before baking, brush the top layer of dough with an egg wash—one large egg beaten with 1 tablespoon of water—in addition to the melted butter. This promotes a deeper, richer mahogany browning that mimics the look of fried dough, giving your Sopapilla Cheesecake an even more enticing exterior and a slight crispness that complements the creamy interior.
More Recipes You'll Love
Decadent Southern Peach Dumplings: Effortless Comfort
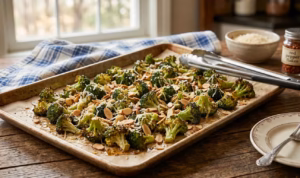
Mastering Crack Broccoli: The Ultimate Roasted Vegetable

Mastering Authentic Hibachi Sauce at Home: Flavor Secrets
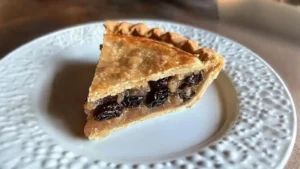
Classic Old-Fashioned Raisin Pie Recipe: A Nostalgic Delight
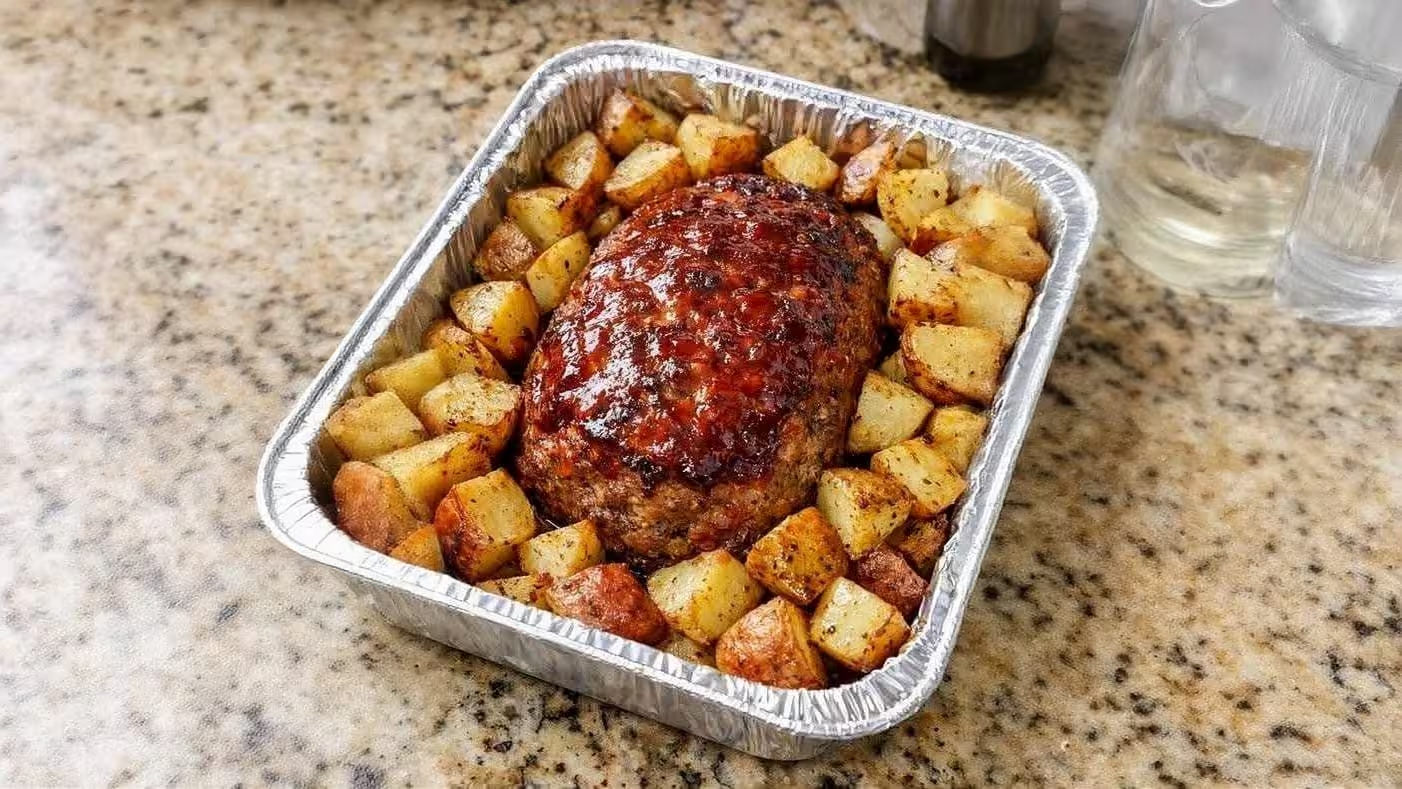
Simple Oven-Baked Meatloaf and Potatoes: A Classic Comfort Food Recipe
Community Kitchen