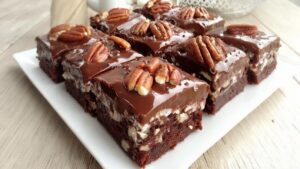
Decadent Caramel Chocolate Crunch Bars
These Better Than Anything Bars 2 are the pinnacle of American no-fuss decadence, combining a dense chocolate base with a molten heart of sweetened condensed milk, rich caramel, and crunchy toffee. They are engineered for maximum textural satisfaction—chewy, crisp, and creamy all in one bite. Perfect for any gathering where serious indulgence is required, these bars redefine simple comfort baking.
restaurant_menu Ingredients
The Foundation and Filling
The Topping
hardware Essential Tools
9x13 inch metal baking dish
Parchment paper
Large mixing bowl
Measuring cups and spoons
Rubber spatula
Wire cooling rack
format_list_numbered Preparation
Building the Layers
Preheat your oven to 350°F (175°C) and prepare your 9x13 pan by lining it with parchment paper, ensuring the paper overhangs two sides for easy lifting later.
In a bowl, combine the dry cake mix and melted butter until the mixture forms a uniform, coarse crumble, avoiding overmixing to maintain a tender crust texture.
Press exactly half of the crumb mixture firmly into the bottom of the prepared pan and bake this base layer alone for 10 minutes to set its structure.
Adding Richness and Crunch
Carefully remove the partially baked crust and pour the entire can of sweetened condensed milk evenly over the hot base, followed by a generous drizzle of the caramel sauce.
Sprinkle the 1 cup of crushed toffee bits evenly across the caramel layer, distributing them as uniformly as possible to ensure even crunch in every slice.
Gently scatter the remaining half of the dry cake crumb mixture loosely over the top; do not press this layer down, as it needs to bake into a delicate streusel.
Return the pan to the oven and bake for an additional 25 to 30 minutes, watching until the edges are deeply golden and the caramel filling is visibly bubbling thickly.
Chilling and Finishing
Remove the pan from the oven and allow the bars to cool completely to room temperature—this takes about 3 hours—or accelerate by chilling in the refrigerator for 90 minutes until firm.
Once fully chilled and set, evenly spread the 1½ cups of whipped topping across the entire surface of the cooled bars, smoothing it gently with an offset spatula.
Garnish immediately with the mini chocolate chips, slice into neat squares using a large, sharp knife dipped in hot water between cuts, and return to the refrigerator until serving time.
favorite You Might Also Love
Browse All arrow_forward
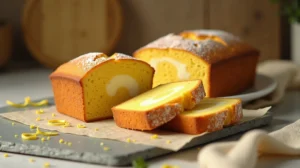
Greek Orange Cake Recipe (Moist & Aromatic)
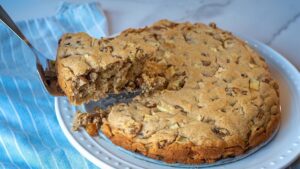
Nana's Warm Mississippi Mud Cake Brownies Recipe (Classic Comfort)
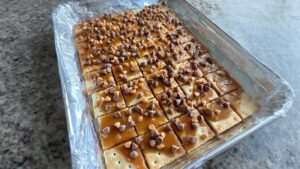
Irresistible Peanut Butter Cracker Candy Crunch
The Ultimate Peach Pretzel Salad: A Retro Dessert Masterpiece
Apple Cake Recipe (Classic British Delight)
Effortless Wonder: The Are You Kidding Me Cake
Try These Variations
Peanut Butter Swirl Edition
Warm 1/2 cup of creamy peanut butter until drizzle-able. After pouring the condensed milk and caramel, stream the peanut butter over the top, then use a thin knife to create wide, gentle swirls before adding the toffee bits. This adds a fantastic salty-nutty depth, elevating the experience beyond simple Caramel Chocolate Crunch Bars.
Coconut Macaroon Topping
Replace the final layer of dry cake mix with 1 cup of sweetened flaked coconut. Sprinkle it over the caramel layer before the final bake. The coconut will toast beautifully, adding a chewy texture that complements the dense base, making it taste more like a gourmet Snickerdoodle Cookie Bars hybrid.
White Chocolate & Macadamia Nut Bar
Substitute the chocolate cake mix for a white cake mix, and swap the toffee bits for 1 cup of chopped macadamia nuts and 1/2 cup of chopped white chocolate chunks. This shifts the profile to a lighter, buttery base, closer in concept to a sophisticated Congo Bar, offering a luxurious, buttery finish.
Chef's Pro Tips
When melting the butter for the crust, ensure it is only slightly warm—about 100°F. If the butter is too hot, it can prematurely activate the leavening agents in the dry cake mix, resulting in a crust that rises too much and becomes cakey rather than dense and shortbread-like, which is essential for supporting the heavy topping of these Better Than Anything Bars 2.
For the cleanest possible cuts when slicing the finished bars, use a long, sharp chef’s knife that has been dipped in hot water and wiped dry between every two cuts. The heat briefly melts the caramel and chocolate layers right at the cutting edge, allowing the knife to pass through without dragging or tearing the structure, preserving the beautiful layers you worked hard to create.
To achieve the fluffiest, most stable whipped topping, especially if using fresh heavy cream, ensure your mixing bowl and whisk attachments are pre-chilled in the freezer for 15 minutes beforehand. Cold fat whips faster and incorporates air more efficiently, yielding a topping that holds its structure against the dense layers below far longer than room-temperature cream would.
Storage Guide
Refrigerator Storage (Best Method)
Store the fully assembled bars, topped with whipped cream, in an airtight container. Place a sheet of parchment paper directly over the topping before sealing to prevent condensation from making the cream weep onto the surface. Kept this way, these Better Than Anything Bars 2 remain perfectly textured for 4 to 5 days, with the caramel layer staying delightfully chewy.
Freezing for Future Enjoyment
If you need to store them longer, slice the bars completely after chilling, but before adding the whipped topping. Place wax paper squares between each slice to prevent sticking, then transfer them to a heavy-duty freezer bag, pushing out as much air as possible. They maintain excellent quality for up to two months; thaw overnight in the refrigerator before topping and serving.
Reheating for Warm Dessert Experience
If you wish to serve a warm version (without the whipped topping), place individual squares on a microwave-safe plate. Heat on 50% power for 15-20 seconds. This gently warms the caramel layer just enough to make it flow slightly, creating a fantastic warm sauce effect that mimics a freshly baked dessert straight from the oven.
Avoid These Mistakes
✕ Failing to pre-bake the bottom crust for the initial 10 minutes is a critical error. This dry-baking step is necessary to set the flour and fat matrix so it can resist saturation from the liquid condensed milk and caramel poured over it. Without this set time, the bottom layer will absorb too much moisture, resulting in a gummy, raw-tasting foundation instead of a firm, slightly crisp shortbread base required for these complex bars.
✕ Over-pressing the top layer of dry cake mix is another common pitfall. While the bottom crust must be packed down, the top layer must remain loose and crumbly. Pressing it down traps steam during the bake, leading to a dense, tough middle layer that merges poorly with the caramel. Leaving it airy allows it to bake into a light, crisp streusel that provides the necessary textural contrast against the chewy center.
✕ Serving or slicing the bars before they are fully chilled is the primary reason for messy presentation. The caramel and condensed milk layers need significant time—ideally 3 hours at room temperature or 90 minutes refrigerated—to firm up and stabilize their sugar matrix. Cutting warm or room-temperature bars results in the gooey layers oozing out, destroying the clean lines that distinguish these beautiful Caramel Chocolate Crunch Bars.
nutrition Nutrition Facts
Per serving: 1 bar (approx. 3x3 inches)
Nutritional information is an estimate based on using standard store-bought cake mix and full-sugar caramel sauce, excluding optional chocolate chips.
flag Conclusion
These Better Than Anything Bars 2 are a testament to the power of simple, layered construction in dessert making. They offer unparalleled richness, achieving that perfect intersection of chew, crunch, and creamy lightness. Whether you call them Caramel Chocolate Crunch Bars or your own special name, they are guaranteed to disappear quickly from any gathering. Embrace the simplicity, trust the chilling process, and enjoy the applause when you serve this masterpiece!
Frequently Asked Questions
Why are my Better Than Anything Bars 2 crumbly and falling apart when I try to cut them? expand_more
This usually happens for one of two reasons, both related to temperature management during the final assembly. First, if you spread the whipped topping before the bars were completely chilled and set, the warmth causes the topping to liquefy slightly, essentially gluing the layers together unevenly. Second, if you skipped the initial 10-minute pre-bake of the crust, the base remains too delicate. That initial bake sets the flour and fat structure, creating the necessary foundation. Always ensure a minimum of 3 hours of cooling or 90 minutes of chilling before attempting to slice these rich Caramel Chocolate Crunch Bars.
Can I substitute the chocolate cake mix for a different flavor, like vanilla or yellow cake mix? expand_more
Absolutely, and this is where you can start experimenting with variations similar to Apple Cheesecake Danish Bars or Congo Bars! If you use vanilla or yellow cake mix, you will lose the deep cocoa notes, transforming the dessert into a butterscotch and toffee powerhouse. When making this switch, I highly recommend adding 1/2 cup of semi-sweet chocolate chips directly into the dry topping mixture along with the toffee bits. This substitution maintains that essential chocolate element while shifting the profile toward a lighter, buttery base, making them closer in spirit to a classic butter bar.
My caramel is too hard or too runny after baking. What went wrong? expand_more
The consistency of your caramel layer is dictated by the quality and thickness of the sauce you started with, compounded by the baking time. If the caramel is too runny, you likely used a very thin sauce, or you under-baked the bars—they need to be visibly bubbling hot to allow some of the moisture to evaporate. If it is rock hard, you likely over-baked past the point of bubbling, causing too much sugar crystallization. For the perfect chew, bake until the edges are bubbly and the center looks set, usually around 28 minutes at 350°F. This balance is key to achieving the chewy texture expected in premium layered bars.
Can I make these bars ahead of time for a party? expand_more
Yes, these are fantastic make-ahead treats! For the best flavor and texture, I suggest completing the entire recipe up through spreading the whipped topping and garnishing with chocolate chips. Store them tightly covered in the refrigerator for up to 3 days. They actually seem to improve slightly overnight as the caramel and condensed milk layers fully meld with the crust. If you are planning further ahead, see the storage section regarding freezing—but remember, only freeze the base layers before the topping is applied.
What is the purpose of sprinkling the remaining cake mix loosely on top? expand_more
This is a nuanced technique designed to create a textural gradient. If you pressed the top layer down like the bottom crust, you would create a solid, dense cake layer sandwiching the caramel, resulting in a tough, almost bread-like texture once cooled. By leaving the top layer loose, it bakes into a delicate, slightly crisp streusel that contrasts beautifully with the molten interior. It allows steam to escape, preventing the top from becoming gummy, which is crucial for achieving that satisfying 'crunch' factor in these Better Than Anything Bars 2.
More Recipes You'll Love
Golden Southern Banana Cobbler: Ultimate Comfort Bake
Effortless Wonder: The Are You Kidding Me Cake
Velvet Chocolate Hazelnut Fudge Pops Recipe
Astonishingly Easy Pumpkin Spice Muffins Recipe
Wondrous Chocolate Depression Cake Mastered at Home
Community Kitchen