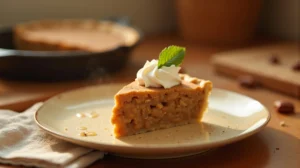
Artisan No-Churn Strawberry Ice Cream: Make Your Own At Home
This recipe demystifies the process to Make Your Own Strawberry Ice Cream At Home, delivering a dessert that defies its simplicity. Forget the ice crystals; we rely on the chemical balance of heavy cream and sweetened condensed milk to trap air perfectly, resulting in a velvety, dense texture bursting with the pure, bright flavor of fresh summer strawberries. It’s the ultimate no-fuss, high-impact dessert that transitions seamlessly from a casual weeknight treat to a centerpiece for a holiday gathering. The process is intuitive, relying on precise whipping and gentle folding techniques that any home cook can master immediately.
restaurant_menu Ingredients
Core Components for Creamy Perfection
Optional Flavor Boosters
hardware Essential Tools
High-speed blender or food processor
Large mixing bowl (preferably metal)
Stand mixer with whisk attachment or powerful hand mixer
Rubber spatula
9x5 inch metal loaf pan
Plastic wrap or parchment paper
format_list_numbered Preparation
Strawberry Preparation and Base Creation
Macerate the strawberries
Toss the hulled and halved strawberries with 1 tablespoon of sugar in a bowl and let sit for 30 minutes to draw out moisture and concentrate flavor. Purée the fruit: Transfer the macerated strawberries and any released juices into a blender and process until completely smooth. Chill this purée for at least one hour until it is thoroughly cold to prevent warming the cream later. Create the base: In a separate bowl, whisk together the chilled condensed milk and the cold strawberry purée until perfectly homogenous. Stir in the vanilla extract and salt, if using.
Whipping and Folding
Whip the cream
Pour the very cold heavy cream into your mixer bowl. Begin whipping on medium speed, gradually increasing to high, until stiff, firm peaks form that hold their shape when the whisk is lifted. Fold gently: Take one-third of the whipped cream and fold it into the strawberry-condensed milk base to lighten the mixture. Then, add the remaining cream in two additions, folding with a spatula using deliberate, slow motions until just combined. Stop immediately when no white streaks remain.
Freezing
Transfer the airy mixture into a parchment-lined 9x5 inch metal loaf pan, smoothing the top gently with the spatula. Cover the surface directly with a sheet of plastic wrap, pressing it down lightly to eliminate air exposure, then cover the entire pan with a lid or foil. Freeze overnight (at least 8 hours) to fully set the structure needed to successfully Make Your Own Strawberry Ice Cream At Home.
favorite You Might Also Love
Browse All arrow_forward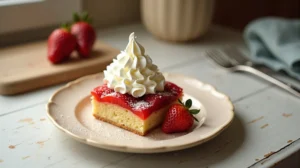


Try These Variations
Rich Chocolate Swirl Variation
Skip the strawberries. Whisk 2 tablespoons of high-quality unsweetened Dutch-process cocoa powder into the condensed milk base. Separately, melt 4 ounces of semi-sweet chocolate chips with 1 teaspoon of coconut oil until smooth. After folding the whipped cream into the chocolate base, layer the ice cream mixture into the pan, alternating with thin drizzles of the melted chocolate. Use a knife to swirl gently before freezing. This creates a beautiful ribbon effect reminiscent of a premium ice cream parlor offering.
Lemon-Lime Zest Infusion
For a brighter, more complex flavor profile that cuts through the richness, add the zest of one whole lemon and one whole lime directly into the heavy cream before whipping. The oils in the zest infuse beautifully during the whipping process. This variation pairs incredibly well with the strawberry, offering a subtle citrus lift that makes the berry flavor pop, transforming the simple dessert into something worthy of a fine dining experience. If you enjoy bright flavors, this is a must-try when you Make Your Own Strawberry Ice Cream At Home.
Spiced Pecan Crunch Variation
Substitute the strawberries with 1 cup of finely chopped pecans toasted lightly with 1/2 teaspoon of cinnamon and a pinch of smoked paprika (this substitutes for the savory element often found in dishes like Creamy Chicken Crescent Bake, surprisingly enhancing the sweetness here). Fold these toasted pecans into the base right before the final fold of the whipped cream. The nutty, warm spice complements the sweet cream beautifully, adding a necessary textural crunch that elevates this simple frozen dessert substantially. This variation requires slightly more aggressive folding to ensure the nuts are evenly distributed.
Chef's Pro Tips
When whipping the cream, I always add the vanilla extract right after the cream starts to thicken but before it reaches soft peaks. Adding extracts too early can sometimes inhibit the whipping process, but adding it just as the fat globules begin to stabilize ensures it emulsifies perfectly into the air structure without deflating your volume. Watch for the moment the cream transitions from looking like liquid to looking like shaving cream—that’s your cue.
The quality of your spatula work during the final incorporation is the single most important technique to master when you Make Your Own Strawberry Ice Cream At Home. Think of it as lifting a very light cloud over a heavy pudding. Use broad, sweeping strokes, turning the bowl a quarter turn after each fold. If you see a streak of unmixed white cream, gently guide it towards the center of the spatula and lift. If you stir or use a whisk here, you are violently knocking the air out, and the result will be noticeably harder and icier in the freezer.
To ensure the best possible texture when you plan to Make Your Own Strawberry Ice Cream At Home, chill absolutely everything that touches the cream: the mixing bowl, the whisk attachment, the cream itself, and even the condensed milk. Cold ingredients whip faster and achieve greater volume before the fat starts to warm up and turn buttery. If your kitchen is warm, place your mixing bowl in an ice bath while you whip the cream for maximum stability and aeration. This professional trick guarantees the stiffest peaks possible.
Storage Guide
Refrigerator Tempering for Serving
Never attempt to scoop the ice cream straight from a deep freeze after 8 hours. To achieve the ideal scoopable consistency, remove the sealed container from the freezer and place it on your kitchen counter for 10 to 15 minutes. This controlled, ambient temperature warming allows the high-sugar SCM base to soften slightly without causing the ice crystals to melt and refreeze unevenly. If your kitchen is very warm (above 75°F), reduce this time to 7 minutes or place it in the refrigerator for 30 minutes instead. This tempering step is vital for every batch you Make Your Own Strawberry Ice Cream At Home.
Airtight Re-Sealing
For long-term storage (beyond two weeks), the best practice is to transfer the frozen mixture from the loaf pan into a heavy-duty, airtight, freezer-safe container, preferably one designed specifically for ice cream storage which often has better insulation. Before sealing, place a sheet of plastic wrap or wax paper directly onto the surface of the ice cream to prevent direct contact with trapped air, then secure the lid tightly. Store this container in the back of your freezer where temperatures are most stable and coldest, away from the door.
Freezing for Future Use
This recipe freezes exceptionally well due to the high sugar content. You can safely freeze this homemade batch for up to two months. After the initial 8-hour freeze, you can wrap the entire loaf pan tightly in aluminum foil in addition to the plastic wrap for an extra layer of protection against freezer burn. When you decide to enjoy it again, follow the standard counter-tempering process described above to restore its creamy texture.
Avoid These Mistakes
✕ The biggest mistake people make when attempting to Make Your Own Strawberry Ice Cream At Home is using fruit straight from the refrigerator without pre-treating or chilling the purée. Fresh fruit contains a significant amount of water. If you fold cold, watery purée directly into the whipped cream, the water content immediately begins to destabilize the protein and fat structure of the aeration, causing the cream to collapse rapidly. Always macerate the fruit to draw out excess liquid, and ensure the resulting purée is ice-cold before it meets the whipped cream to maintain maximum volume.
✕ Another frequent error is rushing the freezing process or using an inappropriate container. If you use a deep, narrow container, the center freezes much slower than the edges, leading to an uneven texture where the edges are rock-hard and the center is slushy. For optimal results, use a wide, shallow metal pan (like a standard 9×5 inch loaf pan). Metal conducts cold rapidly, ensuring the entire mass freezes uniformly, which is crucial for eliminating large, unpleasant ice crystals that ruin the creamy mouthfeel you are aiming for.
✕ Failing to cover the surface directly with plastic wrap before sealing the lid is a common oversight. When ice cream sits in the freezer, moisture from the air sublimates directly onto the surface, forming hard, white, flavorless ice shards—this is freezer burn. By pressing plastic wrap directly onto the surface of the ice cream, you create a physical barrier against ambient freezer air, preserving the smooth, perfect texture you achieved during the folding stage, ensuring your effort to Make Your Own Strawberry Ice Cream At Home pays off for weeks to come.
nutrition Nutrition Facts
Per serving: 1/2 cup
Nutritional information is an estimate based on the core ingredients and recipe yield of 6 servings.
flag Conclusion
There you have it—the blueprint for mastering the art of frozen desserts right in your own freezer. Learning to Make Your Own Strawberry Ice Cream At Home using this simple, yet scientifically sound, no-churn method unlocks a world of possibilities beyond what you find on freezer shelves. The vibrant flavor, the rich, creamy mouthfeel, and the pride of serving something crafted by your own hands are unparalleled. Don’t just follow the steps; feel the ingredients, watch the cream peak, and fold with intention. I encourage you to try this tonight and taste the difference true quality makes. Visit us at HomeRecipes.com for more culinary mastery made simple for your home kitchen!
Frequently Asked Questions
Why is my homemade ice cream hard as a rock? expand_more
This is the most common pitfall when you try to Make Your Own Strawberry Ice Cream At Home without a machine. Hardness results from large ice crystal formation, which happens when water freezes too slowly or when there isn't enough 'antifreeze' (sugar/fat) present. In this recipe, the likely culprits are either over-mixing during the folding stage, which knocked out too much essential air, or using low-fat cream. Ensure your cream is heavy whipping cream (minimum 36% fat), and fold gently until just combined. Also, ensure your freezer temperature is set to 0°F or below for optimal structure setting.
Can I substitute the sweetened condensed milk with regular milk or sugar? expand_more
Absolutely not, if you want the no-churn texture. Regular milk and granulated sugar will freeze solid because they lack the high concentration of dissolved solids found in SCM. Sweetened condensed milk is non-negotiable in this formula because its unique composition—high sugar, low water—is what physically prevents the water molecules from linking up into large, palate-grating ice crystals. If you were making a custard base that cooks on the stove, you could use sugar and heavy cream, but for no-churn, SCM is the essential stabilizing agent that lets you Make Your Own Strawberry Ice Cream At Home successfully.
How long does it take for the ice cream to freeze solid? expand_more
While the minimum safe time is 6 hours, for the best results when you Make Your Own Strawberry Ice Cream At Home, I insist on an overnight freeze, or at least 8 hours. The first few hours are crucial for the mixture to transition from liquid to a semi-solid state. If you try to scoop it too early (say, 4 hours in), the texture will be slushy and uneven. A full overnight freeze allows the fat globules to fully stabilize around the air pockets, yielding that perfect, dense, scoopable consistency that defines premium ice cream.
My strawberries weren't very sweet. How can I boost the flavor? expand_more
Flavor concentration is key, as I mentioned in the secrets section. If your berries are bland, you need to concentrate their essence. After blending, place the purée in a small saucepan over medium-low heat. Simmer gently, stirring frequently, until the volume reduces by about 25%—this concentrates the sugars and deepens the flavor profile through gentle caramelization of the natural fruit sugars. Let this reduced purée cool completely before mixing it with the condensed milk. This trick is invaluable when dealing with off-season fruit and significantly improves the final taste when you Make Your Own Strawberry Ice Cream At Home.
Can I use this base recipe to make other flavors? expand_more
Yes, this foundational technique is incredibly versatile! You can adapt this method for almost any fruit or mix-in. For example, if you wanted to try a chocolate chip variation, you could skip the strawberries entirely, add 1 teaspoon of high-quality cocoa powder to the condensed milk mixture, and fold in 1 cup of mini chocolate chips at the end. Or, for a taste reminiscent of Homemade Turtle Candy With Pecans And Caramel, fold in chopped pecans and ribbons of homemade caramel sauce instead of fruit. The ratio of whipped cream to SCM remains the constant that ensures success, allowing you to pivot flavors easily.
More Recipes You'll Love
The Ultimate Halal Pinto Bean Pie Recipe
Cuppa Cuppa Cake Recipe (Old-Fashioned Fruit Dessert)
Community Kitchen