Simple. Tasty. From Our Home to Yours. Browse all recipes

Simple. Tasty. From Our Home to Yours. Browse all recipes
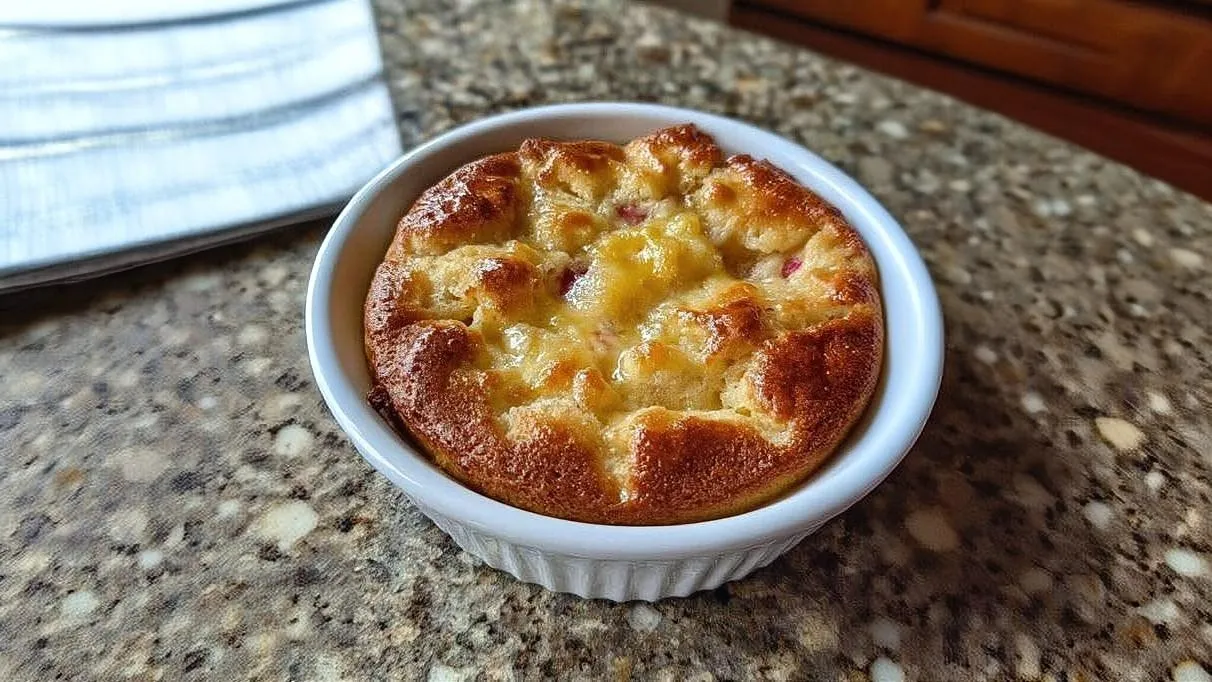
Experience the charming simplicity of Cuppa Cuppa Cake, a beloved old-fashioned dessert that lives up to its name with easy cup-based measurements. This 'magic' cake bakes into a warm, inviting treat featuring a tender, golden-brown cake topping and a luscious, bubbling fruit filling underneath. It’s the ultimate comfort food, requiring minimal effort but delivering maximum flavor and nostalgic appeal, perfect for any American home kitchen.
8x8-inch or 9x9-inch baking dish
Medium mixing bowl
Whisk
Measuring cups and spoons
Small saucepan or microwave-safe bowl (for melting butter)
Spatula or spoon
Wire cooling rack
Preheat your oven to a precise 350°F (175°C) and lightly grease an 8x8-inch or 9x9-inch baking dish to prevent sticking and ensure easy serving.
Spread the entire can of fruit pie filling evenly across the bottom of the prepared baking dish, creating a consistent layer from edge to edge.
In a medium mixing bowl, whisk together the 1 cup of self-rising flour, 1 cup of granulated sugar, and 1 cup of whole milk until a smooth, pourable batter forms, being careful not to overmix.
Slowly and carefully pour the prepared batter directly over the fruit filling in the baking dish, allowing it to settle naturally without spreading or stirring.
Melt the 1/2 cup of unsalted butter until liquid, then slowly and evenly drizzle it over the surface of the batter, ensuring not to stir the layers.
Carefully transfer the baking dish to the preheated oven and bake for 40-45 minutes, or until the top is a deep golden brown and the fruit filling is visibly bubbling around the edges.
Remove the Cuppa Cuppa Cake from the oven and place it on a wire cooling rack, allowing it to cool for 10-15 minutes before serving warm.
Instead of canned pie filling, use 4-5 cups of fresh, seasonal fruit like sliced peaches, berries, or apples. Toss the fresh fruit with 1/2 cup granulated sugar, 1 tablespoon of cornstarch (to thicken juices), and 1 teaspoon of lemon juice before spreading it in the dish. This variation offers a brighter, fresher flavor profile, perfect for summer gatherings, and allows you to enjoy the Cuppa Cuppa Cake with what’s in season.
For a warming, aromatic twist, add 1/2 teaspoon of ground cinnamon and 1/4 teaspoon of ground nutmeg to the dry ingredients when whisking the batter. You can also sprinkle an additional 1/4 teaspoon of cinnamon over the top of the melted butter just before baking. This variation is particularly delightful with apple or pumpkin pie filling, evoking classic fall flavors in your Cuppa Cuppa Cake.
Introduce a delightful textural contrast by sprinkling 1/2 cup of finely chopped pecans or walnuts over the melted butter layer just before baking. The nuts will toast beautifully in the oven, adding a rich, earthy flavor and a satisfying crunch to the tender Cuppa Cuppa Cake topping. This works exceptionally well with peach or apple pie fillings.
For a bright, zesty note, add 1 tablespoon of finely grated lemon or orange zest to the batter when mixing. The citrus oils will infuse the cake with a fragrant aroma and a subtle tang that beautifully complements sweet fruit fillings, especially blueberry or cherry. This simple addition elevates the Cuppa Cuppa Cake with a refreshing complexity.
For a truly decadent Southern twist, sprinkle 1/2 cup of shredded sweetened coconut and 1/2 cup of chopped pecans over the melted butter before baking. This creates a rich, chewy, and nutty topping that pairs wonderfully with pineapple or peach pie filling, transforming your Cuppa Cuppa Cake into an even more indulgent treat.
The melted butter is crucial for that signature golden-brown, slightly crispy crust on your Cuppa Cuppa Cake. After melting, drizzle it slowly and as evenly as possible over the entire surface of the batter. If it pools too much in one spot, use the back of a spoon to gently guide it without disturbing the batter layer underneath. This ensures uniform browning and texture across the entire top of the cake.
While not strictly necessary, using room temperature milk for your Cuppa Cuppa Cake batter can lead to a more tender and evenly textured cake. Cold ingredients can stiffen the butter (if any were in the flour) and make the batter slightly harder to mix smoothly, potentially leading to a denser crumb. Letting your milk sit out for 15-20 minutes before mixing will yield a superior result.
Baking times are always approximate. While 40-45 minutes is a good guideline for this Cuppa Cuppa Cake, keep an eye on it. Look for a deep golden-brown crust and visible, active bubbling of the fruit around the edges. If it’s browning too quickly, loosely tent it with aluminum foil for the last 10-15 minutes to prevent burning while ensuring the fruit is fully heated through.
Don’t rush serving! Allowing your Cuppa Cuppa Cake to rest for 10-15 minutes after baking is vital. This short resting period allows the fruit filling to cool slightly and thicken, preventing it from being too runny. It also gives the cake topping a chance to set, making for cleaner scoops and a more enjoyable texture. Patience here will be rewarded with a perfect slice.
Although not in the original recipe, adding 1 teaspoon of pure vanilla extract to your batter when you mix the flour, sugar, and milk can significantly enhance the overall flavor profile of your Cuppa Cuppa Cake. Vanilla is a universal flavor enhancer that will deepen the sweetness and complement the fruit, adding another layer of deliciousness without changing the core character of the dessert.
After baking, allow the Cuppa Cuppa Cake to cool completely on a wire rack. While tempting, I do not recommend storing this dessert at room temperature for more than 2 hours due to the perishable nature of the fruit and dairy components, which can encourage bacterial growth and spoilage, especially in warmer environments. Always transfer to the refrigerator for longer storage to maintain food safety.
Once the Cuppa Cuppa Cake has cooled entirely, cover the baking dish tightly with plastic wrap or transfer individual slices to an airtight container. Stored this way, it will keep beautifully in the refrigerator for up to 3-4 days. Ensure the container is truly airtight to prevent the cake from drying out or absorbing refrigerator odors. Reheating individual portions is best for maintaining quality.
For extended storage, the Cuppa Cuppa Cake freezes surprisingly well. Allow the cake to cool completely. You can freeze the entire cake in its baking dish, tightly wrapped in multiple layers of plastic wrap and then aluminum foil, or freeze individual slices. For slices, place them on a baking sheet and freeze until solid, then transfer to a freezer-safe bag or container, separating layers with parchment paper. It will maintain its quality for up to 1 month. Thaw overnight in the refrigerator before reheating. Freezing helps lock in the moisture and flavor.
To reheat, individual portions can be warmed in the microwave for 30-60 seconds on high, until heated through. For a crisper topping that mimics freshly baked, place slices in a preheated oven at 300°F (150°C) for 10-15 minutes, or until warmed through and the top is slightly refreshed. Covering with foil for the first few minutes can prevent over-browning.
If reheating from frozen, thaw the Cuppa Cuppa Cake overnight in the refrigerator. Once thawed, follow the reheating instructions for refrigerated cake. For a whole frozen cake, you may need to bake it covered with foil in a 300°F (150°C) oven for 30-40 minutes, then uncover for the last 10 minutes, until heated through and bubbling.
This is the most common and critical mistake. The ‘magic’ of Cuppa Cuppa Cake relies on the distinct layers of fruit, batter, and butter remaining separate until baking. Stirring them together will result in a dense, uniformly mixed cake rather than the desired tender cake topping and saucy fruit bottom. Always pour and drizzle, never mix, after the initial batter is made; the layers will naturally interact in the oven.
Failing to adequately grease your baking dish can lead to the fruit filling sticking to the bottom and sides, making it incredibly difficult to serve neat portions. This can also damage the integrity of the fruit layer and make cleanup a chore. Ensure a thorough coating of non-stick spray or butter for easy release of your Cuppa Cuppa Cake.
While the batter is simple, overmixing the flour, sugar, and milk can develop the gluten too much, leading to a tough or rubbery cake topping instead of a tender one. Mix just until the ingredients are combined and no dry streaks of flour remain. A few small lumps are perfectly acceptable and will disappear during baking, yielding a more delicate Cuppa Cuppa Cake.
If your oven is too hot, the cake topping might brown too quickly before the fruit filling is adequately heated and bubbly, potentially leading to a burnt exterior and an undercooked interior. If it’s too cool, the cake might not rise properly or achieve that beautiful golden crust. Always preheat your oven properly and monitor the Cuppa Cuppa Cake for visual cues of doneness, such as a deep golden top and bubbling edges, tenting if necessary.
Serving the Cuppa Cuppa Cake immediately out of the oven can result in a very runny fruit filling and a cake topping that is too fragile. The 10-15 minute resting period allows the fruit juices to thicken slightly and the cake’s structure to set, making it much easier to scoop and providing a more pleasant eating experience. Patience ensures a perfectly structured Cuppa Cuppa Cake.
Per serving: 1 slice
Nutritional values are approximate and can vary based on specific brands of ingredients and fruit pie filling used.
That's an excellent question, and the distinction lies in the layering and the magic that happens during baking. A traditional cobbler usually has a biscuit-like topping dropped over fruit. A dump cake often involves 'dumping' ingredients without much mixing and may use cake mix. The Cuppa Cuppa Cake, however, features a specific batter (flour, sugar, milk) poured over fruit, followed by melted butter, and crucially, it's not stirred. This unique layering allows the butter to seep through, creating a distinct, tender cake crust on top while the fruit and some of the batter meld below into a rich, saucy, cobbler-like base. It truly forms its own category!
While canned fruit pie filling is traditional and provides consistent results for this Cuppa Cuppa Cake, you absolutely can use fresh fruit, with a few adjustments. You'll need to sweeten and thicken the fresh fruit first. For about 4-5 cups of sliced fresh peaches, apples, or berries, you'd combine them with 1/2 to 3/4 cup of sugar (to taste), 1-2 tablespoons of cornstarch (to thicken the juices), and a splash of lemon juice to brighten the flavors. Let this mixture sit for 15-20 minutes to draw out juices before spreading it in the baking dish. This extra step will ensure your fruit layer is as luscious as the canned version.
The instruction to 'do not stir' is the secret handshake of the Cuppa Cuppa Cake! It's critical because the distinct layering of batter, fruit, and butter is what creates the unique texture and 'magic' of this dessert. As the cake bakes, the batter absorbs the fruit juices and rises through the melted butter, forming a tender, almost self-saucing cake on top, while the fruit below becomes a sweet, bubbling base. If you stir, you'll simply create a uniform cake batter mixed with fruit, losing the signature cobbler-like texture and the delightful contrast between the golden crust and the saucy fruit layer. Trust the process, and resist the urge!
Absolutely! This Cuppa Cuppa Cake is a fantastic make-ahead dessert, which is one of its many charms for entertaining. You can bake it earlier in the day, allow it to cool completely, and then cover it tightly. When you're ready to serve, simply reheat the entire dish in a 300°F (150°C) oven for 15-20 minutes, or until warmed through. This method helps maintain the integrity of the cake topping and ensures the fruit filling is delightfully warm and bubbly. It’s perfect for potlucks or when you want to minimize last-minute kitchen stress.
Beyond the cardinal rule of not stirring, there are a couple of other pitfalls to sidestep for a perfect Cuppa Cuppa Cake. One common mistake is baking at too high a temperature or for too long, which can result in a dry, tough cake topping and a burnt fruit bottom. Always stick to 350°F and keep an eye on it; ovens vary! Another error is not greasing the baking dish adequately; this can cause the delicious fruit filling to stick, making serving difficult and messy. Lastly, using cold milk straight from the fridge can slightly impede the leavening action of the self-rising flour. While not a deal-breaker, letting your milk come to room temperature for 15-20 minutes can contribute to a more tender crumb.
No items yet. Click "Add All" or use + buttons!
Community Kitchen