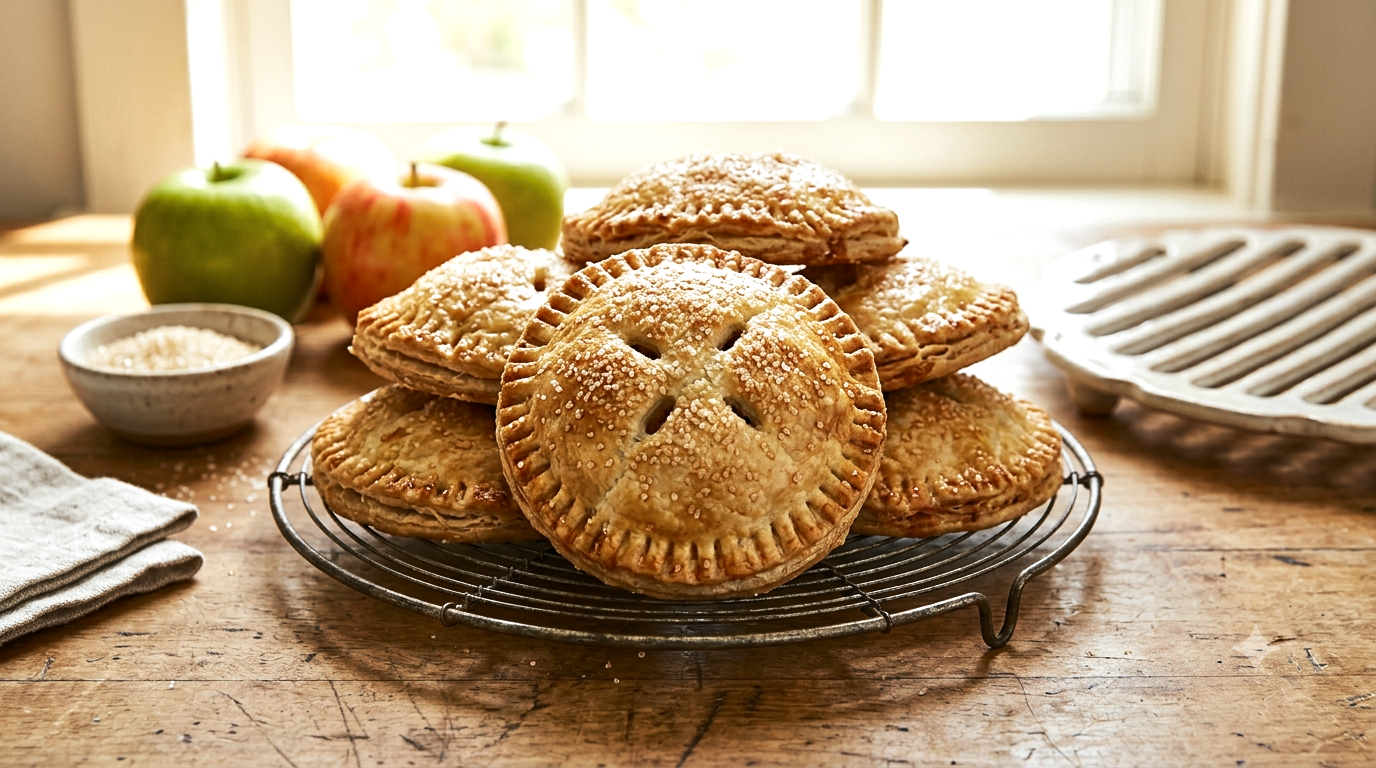
Apple Hand Pie Recipe (Flaky Golden Crust)
Discover the ultimate apple hand pie recipe, a portable delight featuring a perfectly flaky, golden crust and a warm, aromatic apple filling. This easy-to-follow guide from Chef HomeRecipes provides all the insider tips for achieving a dessert that tastes straight out of a Michelin-starred kitchen, yet is simple enough for any home cook. Perfect for a comforting snack, elegant breakfast, or a charming addition to any gathering, these hand pies are designed for convenience and incredible flavor.
restaurant_menu Ingredients
For the Apple Filling
For the Hand Pies
hardware Essential Tools
Large skillet
Large mixing bowl
Small bowl
Whisk
Measuring cups and spoons
Sharp knife
Cutting board
Rolling pin
3 1/2-inch round cookie cutter or drinking glass rim
2 baking sheets
Parchment paper
Fork
Pastry brush
Wire cooling rack
format_list_numbered Preparation
Preparing the Filling
Preheat your oven to 400°F (200°C) and line two baking sheets with parchment paper; set aside.
In a large skillet over medium heat, melt the unsalted butter.
In a small bowl, combine the light brown sugar, cornstarch, ground cinnamon, and ground nutmeg.
Add the finely chopped apples and the spice mixture to the melted butter in the skillet, stirring to coat the apples evenly.
Cover the skillet, reduce the heat to medium-low, and simmer for about 5 minutes, or until the apples just begin to soften.
Transfer the cooked apple filling to a bowl and allow it to cool for at least 10 minutes.
Assembling the Hand Pies
On a lightly floured surface, unroll the pre-made pie crusts and roll them out to about 1/8-inch thickness.
Using a 3 1/2-inch round cookie cutter or the rim of a glass, cut out circles from the pie crusts; gather and re-roll scraps to cut more circles.
Arrange half of the pie crust circles on the prepared baking sheets.
Spoon about 1 1/2 to 2 tablespoons of the cooled apple filling onto the center of each pie crust circle, leaving a small border around the edge.
Dampen the edges of the filled pie crusts with a little water using your finger.
Place an empty pie crust circle on top of each filled one, gently pressing down.
Use the tines of a fork to firmly crimp the edges of each hand pie to seal them completely.
Baking and Finishing
In a small bowl, whisk together the large egg and whole milk to create an egg wash.
Brush the tops of the assembled hand pies generously with the egg wash.
Sprinkle the tops of the pies with coarse sugar.
Using a sharp knife, cut three small slits into the top of each hand pie to allow steam to vent during baking.
Bake in the preheated 400°F (200°C) oven for approximately 20 minutes, or until the crusts are golden brown.
Allow the hand pies to cool slightly on the baking sheets before transferring them to a wire rack to cool completely before serving.
favorite You Might Also Love
Browse All arrow_forwardThe Easiest 4 Ingredient Lemon Cream Cheese Dump Cake Recipe

Mastering What Is Chantilly Cream: The Ultimate Guide
Muddy Buddies Recipe (Classic Chocolate Peanut Butter)
Golden Fried Peach Cobbler Egg Rolls
Strawberry Cheesecake Poke Cake Recipe (Easy & Creamy)
Thick, Chewy Cowboy Cookies Recipe Secrets
Try These Variations
Peach Hand Pies
Substitute the apples with 2 cups of finely diced fresh or frozen (and thawed) peaches. Reduce the brown sugar slightly if your peaches are very sweet, and consider adding a pinch of ground ginger or cardamom for a different spice profile. Ensure the peaches are blotted dry if using thawed frozen ones to avoid excess moisture. This variation is particularly delightful in the summer months when peaches are at their peak.
Mixed Berry Hand Pies
Use 2 cups of a mixed berry blend (strawberries, blueberries, raspberries) instead of apples. Berries release more liquid, so increase the cornstarch to 3 teaspoons to ensure a thicker filling. A touch of lemon zest pairs beautifully with berries. This makes for a vibrant, tangy, and sweet hand pie that’s bursting with summery flavor.
Nutty Apple Hand Pies
For added texture and flavor, fold in 1/4 cup of finely chopped toasted pecans or walnuts into the apple filling after it has cooled. This provides a lovely crunch and a nutty depth that complements the spiced apples. Ensure the nuts are toasted beforehand to enhance their flavor and aroma, adding another layer of complexity to your apple hand pie recipe.
Savory Hand Pies
While this is an apple hand pie recipe, the concept can be adapted for savory fillings! Imagine a spinach and feta hand pie, or a cheesy potato and onion version. For savory, omit the sugar and sweet spices, and season with herbs like thyme, rosemary, or a pinch of garlic powder. This demonstrates the versatility of the hand pie format beyond just desserts.
Cranberry Orange Hand Pies
For a festive twist, replace half of the apples with fresh or frozen cranberries and add 1 tablespoon of fresh orange zest to the filling. The tartness of the cranberries and the bright citrus notes of the orange pair wonderfully with the sweet apples and warm spices, creating a delightful treat perfect for autumn or winter holidays.
Chef's Pro Tips
Don’t Be Afraid of the Chill
Keeping your pie dough and even your filling cold is the secret to a truly flaky crust. Warm dough means melted butter, and melted butter won’t create those wonderful steam pockets that lift the layers. If your kitchen is warm, pop your dough back in the fridge for 10-15 minutes between steps. This small act of patience yields massive results in texture and flakiness, making your apple hand pie recipe a success.
Spice is Nice, but Don’t Overdo It
While cinnamon and nutmeg are classic, a light hand is best. Too much spice can overpower the delicate apple flavor. For an extra touch, consider freshly grating your nutmeg; its aroma and flavor are far superior to pre-ground. A pinch of allspice or a tiny amount of ground cloves can also add complexity, but always taste a small amount of your filling to ensure balance.
The Art of the Crimp
A well-crimped edge isn’t just for looks; it’s crucial for sealing in that delicious filling and preventing leaks during baking. Use a fork and press firmly, ensuring the top and bottom crusts are securely joined. If the edges aren’t sealed properly, your hand pies might burst open, and the filling could seep out, making a mess and affecting the final presentation of your apple hand pie recipe.
The Power of the Egg Wash
Don’t skip the egg wash! It’s more than just a shiny finish. The protein in the egg and the fat in the milk contribute to a beautiful, deep golden-brown color and a slightly crispier exterior. It also helps the coarse sugar adhere, adding that extra sparkle and textural contrast that elevates the humble hand pie to a professional level.
Listen to Your Oven
Every oven is a little different, and baking times can vary. While 20 minutes is a good guideline, keep a close eye on your hand pies, especially towards the end of the baking time. You’re looking for a rich, golden-brown color across the entire crust and gentle bubbling of the filling through the vents. If they’re browning too quickly, you can loosely tent them with aluminum foil.
Storage Guide
Room Temperature
Once completely cooled, store your apple hand pies in an airtight container at room temperature for up to 2 days. To maintain their crispness, you can place a paper towel at the bottom of the container to absorb any excess moisture. Avoid direct sunlight or humid environments, as these can soften the crust and encourage spoilage. For best quality, consume within 24 hours.
Refrigerator
For extended freshness, place cooled hand pies in an airtight container or wrap individually in plastic wrap and store in the refrigerator for up to 5 days. Before storing, ensure they are completely cool to prevent condensation buildup, which can lead to a soggy crust. Reheat them in a 300°F (150°C) oven for 10-15 minutes to restore their flakiness.
Freezer
To freeze, arrange the completely cooled hand pies in a single layer on a baking sheet and freeze until solid (about 1-2 hours). Once frozen, transfer them to a freezer-safe zip-top bag or an airtight container, ensuring as much air is removed as possible to prevent freezer burn. They can be stored for up to 3 months. Thaw overnight in the refrigerator or reheat directly from frozen in a 350°F (175°C) oven for 20-30 minutes.
Avoid These Mistakes
✕ Overworking the Dough
This is perhaps the most common mistake in any pastry recipe, including this apple hand pie recipe. When you overwork pie dough, you develop the gluten, which leads to a tough, chewy, and bready crust instead of the desired flaky, tender texture. Handle the dough minimally, just enough to bring it together and roll it out. If you find yourself kneading or stretching it excessively, you’ve likely gone too far.
✕ Not Cooling the Filling Sufficiently
Patience is a virtue in baking! Placing hot or even warm apple filling directly onto cold pie crust will melt the butter in the crust, turning it greasy and making it incredibly difficult to handle. This also leads to a soggy bottom crust that lacks flakiness. Always ensure your filling is completely cooled, ideally to room temperature or even slightly chilled, before assembly.
✕ Skipping the Steam Vents
Those three little slits on top of your hand pies serve a vital purpose. Without them, steam produced by the cooking apples will build up inside the pie, causing it to burst open during baking. This results in an unsightly mess and a compromised structure. Always remember to cut these vents to allow the steam to escape gracefully.
✕ Inconsistent Apple Chop
If your apples are chopped into varying sizes, they will cook unevenly. Some pieces will be mushy, while others might still be too firm. Ensure your apples are finely and uniformly chopped, ideally into 1/4 to 1/2-inch pieces, so they cook consistently and fit neatly within the hand pies, creating a harmonious texture in every bite.
✕ Not Sealing the Edges Properly
If the edges of your hand pies aren’t firmly crimped and sealed, the delicious apple filling can leak out during baking. This not only creates a sticky mess on your baking sheet but also results in less filling inside the pie. Use a little water as a ‘glue’ and press firmly with a fork to create a secure seal all the way around the perimeter of each hand pie.
nutrition Nutrition Facts
Per serving: 1 hand pie
Nutritional values are approximate and may vary based on specific ingredients and brands used.
sell Related Topics
Frequently Asked Questions
How can I prevent my apple hand pies from getting soggy? expand_more
Soggy hand pies are often a result of too much moisture. The most critical step to avoid this is to ensure your apple filling is completely cooled before placing it into the pie crust. Hot filling will melt the butter in the crust, leading to a greasy, soggy bottom. Additionally, properly crimping the edges and cutting steam vents allows moisture to escape during baking, preventing it from getting trapped inside and making the crust damp. Using cornstarch in the filling also helps absorb excess liquid, creating a thick, luscious filling that won't make your crust wet.
Can I use different fruits for this hand pie recipe? expand_more
Absolutely! This hand pie recipe is incredibly versatile. You can easily substitute the apples with other firm fruits like peaches, berries (strawberries, blueberries, raspberries), cherries, or even pears. If using juicier fruits like berries, you might need to slightly increase the amount of cornstarch to ensure the filling thickens properly. For stone fruits like peaches or cherries, you may want to peel and pit them first. Adjust the sugar and spices according to the sweetness and flavor profile of your chosen fruit. A mix of fruits can also be delightful!
What's the best way to get a perfectly golden-brown crust? expand_more
Achieving that beautiful, golden-brown crust comes down to a few key techniques. First, don't skip the egg wash – the mixture of egg and milk brushed over the top provides protein and fat that caramelize and brown in the oven. Second, the coarse sugar sprinkled on top not only adds texture but also helps with the browning. Finally, ensure your oven is properly preheated to the specified temperature (400°F or 200°C). This initial high heat helps activate the browning process. Keep an eye on your pies during the last few minutes of baking; if they're browning too quickly, you can loosely tent them with aluminum foil.
My hand pies are bursting open during baking, what am I doing wrong? expand_more
If your hand pies are bursting, it's typically due to steam buildup inside the pie with no escape route. The solution is simple: make sure you're cutting those three small slits on the top of each hand pie before baking. These vents allow the steam generated by the cooking fruit filling to release, preventing pressure from building up and causing the crust to rupture. Also, ensure your edges are tightly crimped with a fork, creating a strong seal so the steam can only escape through the intentional vents you've created.
Can I prepare the apple filling ahead of time? expand_more
Yes, you can absolutely prepare the apple filling in advance! This is a fantastic time-saving tip, especially if you're planning to make a large batch or preparing for a gathering. After cooking the apples and spices, let the filling cool completely, then transfer it to an airtight container. It can be stored in the refrigerator for up to 3 days. When you're ready to assemble your hand pies, simply take the filling out of the fridge and proceed with the recipe. This makes the assembly process much quicker and more efficient.
More Recipes You'll Love

Greek Orange Cake Recipe (Moist & Aromatic)

The Ultimate Pig Pickin Cake: A Southern Dessert Legend
Golden Mini Donut Bites: Restaurant Texture at Home
Rainbow Layer Cake: Ultimate Chaos Centerpiece
Community Kitchen