Simple. Tasty. From Our Home to Yours. Browse all recipes

Simple. Tasty. From Our Home to Yours. Browse all recipes
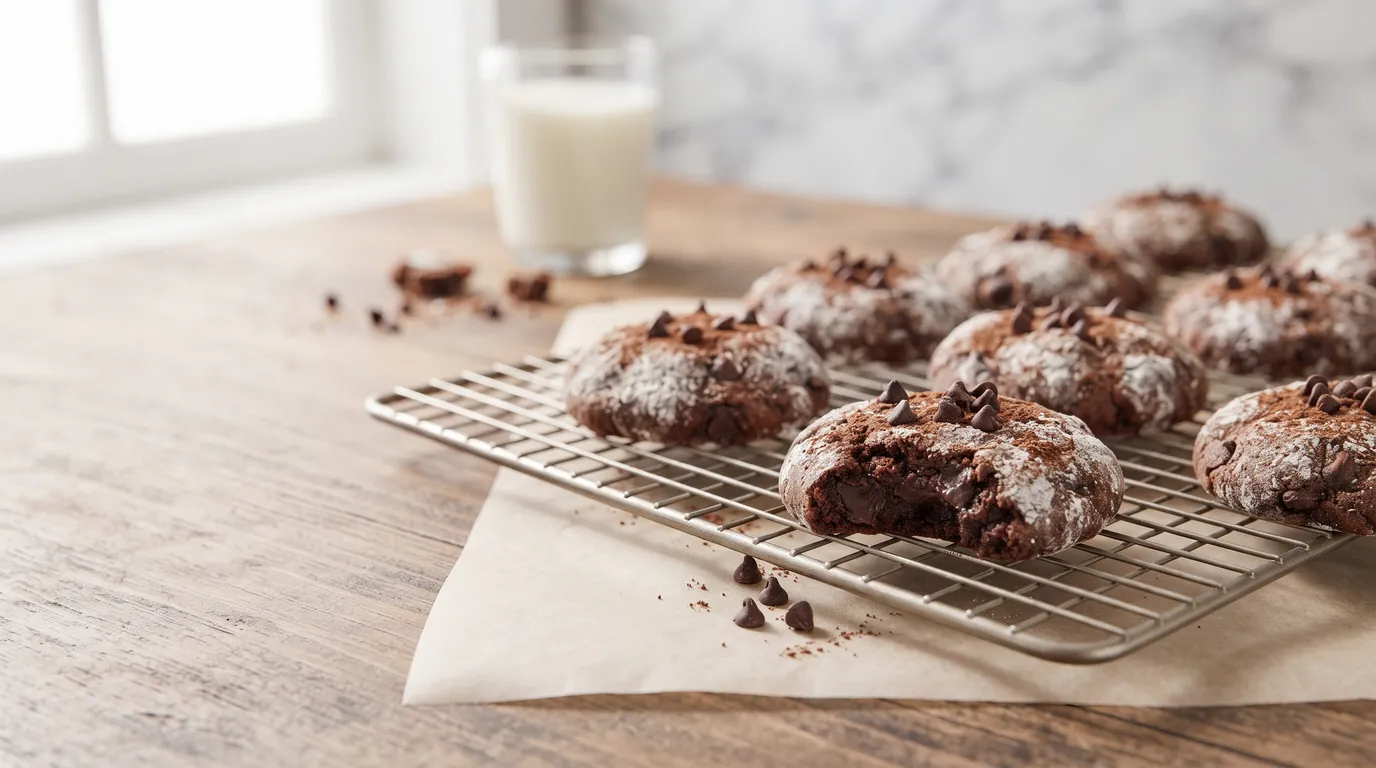
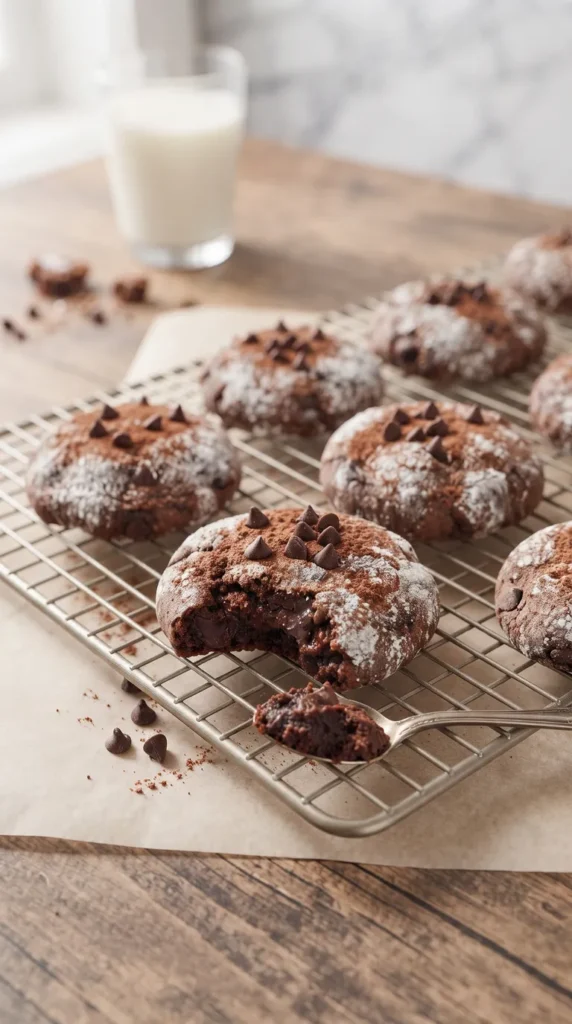
Indulge in the comforting nostalgia of Aunt Millie's Retro Bakery Dirt Ball Cookies, a classic chocolate chip cookie recipe perfected for the home baker. These delightful treats boast a wonderfully chewy texture, crisp edges, and a generous scattering of rich, melty chocolate chips, with optional crunchy nuts. They embody the simple, honest pleasure of homemade baking, bringing a taste of yesteryear's bakery straight to your kitchen. Perfect for any occasion, these cookies are destined to become a family favorite, offering a warm hug in every bite.
Large mixing bowl
Medium mixing bowl
Whisk
Stand mixer with paddle attachment (or hand mixer)
Rubber spatula
Measuring cups and spoons
Baking sheet
Parchment paper
Cookie scoop (1.5-inch)
Wire cooling rack
Preheat your oven to 350°F (175°C) and line a baking sheet with parchment paper, ensuring it lies flat.
In a medium bowl, whisk together the all-purpose flour, baking soda, and kosher salt thoroughly; set this dry mixture aside.
In a large bowl, using a stand mixer or hand mixer, cream together the softened unsalted butter, granulated sugar, and light brown sugar on medium speed until the mixture is light, fluffy, and pale, about 2-3 minutes.
Beat in the vanilla extract until fully incorporated, then add the large eggs one at a time, mixing well after each addition and scraping down the sides of the bowl to ensure a smooth, emulsified mixture.
Gradually add the reserved dry ingredients to the wet mixture on low speed, mixing only until the flour streaks have just disappeared, being careful not to overmix.
Fold in the semi-sweet chocolate chips and chopped nuts (if using) with a rubber spatula until they are evenly distributed throughout the cookie dough.
Using a 1.5-inch cookie scoop, drop rounded balls of dough onto the prepared baking sheet, spacing them about 2 inches apart.
Bake in the preheated oven for 10-12 minutes, or until the edges are golden brown and the centers still appear slightly soft.
Remove the baking sheet from the oven and allow the cookies to cool on the sheet for 5 minutes to let them set up and finish baking gently.
Carefully transfer the cookies to a wire rack to cool completely before serving or storing to prevent them from becoming soggy.



For those with nut allergies or preferences, simply omit the chopped pecans or walnuts from the recipe. The cookies will still be wonderfully chewy and rich with chocolate, making them a safe and delicious option for everyone to enjoy. You can increase the chocolate chips slightly, up to 1 ¾ cups, to compensate for the missing texture and flavor from the nuts, ensuring a satisfying bite every time.
Amp up the chocolate factor by replacing ¼ cup of the all-purpose flour with ¼ cup of unsweetened cocoa powder. This will give your cookies a deeper, richer chocolate base. Additionally, you could use a mix of dark chocolate chips and milk chocolate chips for a more complex chocolate experience, creating a truly decadent treat that chocolate lovers will adore.
Add a warm, comforting twist to your Aunt Millie’s Retro Bakery Dirt Ball Cookies by incorporating ½ teaspoon of ground cinnamon and ¼ teaspoon of ground nutmeg into your dry ingredients. These spices perfectly complement the brown sugar and chocolate, adding an extra layer of cozy flavor that makes these cookies even more inviting, especially during cooler months or holidays.
For a chewier texture and a touch of wholesome goodness, replace ½ cup of the all-purpose flour with ½ cup of old-fashioned rolled oats. This variation adds a delightful chewiness and a subtle nutty flavor, making the cookies heartier and even more satisfying. Ensure you use old-fashioned oats, not instant, for the best texture.
Butter should be soft enough to leave an indentation when pressed gently, but not melted or greasy. If it’s too cold, your creamed mixture will be lumpy; too warm, and the cookies can spread excessively. I often cut my butter into smaller pieces and let it sit on the counter for 30-60 minutes, which accelerates the process, especially when I’m in a hurry.
During the creaming process and after adding eggs, always pause to scrape down the sides and bottom of your mixing bowl. This ensures that all ingredients are thoroughly incorporated and prevents pockets of unmixed butter or sugar, leading to a homogenous dough and evenly baked Aunt Millie’s Retro Bakery Dirt Ball Cookies.
If your kitchen is warm or your dough feels too soft, a quick 20-30 minute chill in the refrigerator can work wonders. This firms up the butter, which helps prevent excessive spreading during baking and can result in a thicker, chewier cookie. It’s a simple step that can significantly improve texture.
A cookie scoop is a baker’s best friend. It ensures that all your cookies are the same size, which means they will bake evenly and finish at the same time. This consistency is crucial for professional-looking results and prevents some cookies from being underbaked while others are overbaked.
After baking, while the cookies are still warm, sprinkle a tiny pinch of flaky sea salt (like Maldon) over the tops of your Aunt Millie’s Retro Bakery Dirt Ball Cookies. This enhances the chocolate flavor and provides a delightful contrast to the sweetness, elevating them from great to extraordinary.
Once completely cooled, store your Aunt Millie’s Retro Bakery Dirt Ball Cookies in an airtight container at room temperature for up to 3-4 days. To maintain their soft and chewy texture, I always recommend placing a half slice of plain white bread in the container; the bread will gradually release its moisture, keeping the cookies fresh longer and preventing them from drying out.
Storing baked cookies in the refrigerator can actually dry them out and make them hard due to the low humidity. However, if you’re making the dough ahead of time, cookie dough can be stored tightly covered in the refrigerator for up to 3 days. Simply let it come to room temperature slightly before scooping and baking.
For long-term storage, place completely cooled cookies in a single layer on a baking sheet and freeze until solid, typically about 1-2 hours. Once frozen, transfer them to a heavy-duty freezer bag or an airtight freezer-safe container, separating layers with parchment paper, for up to 3 months. To enjoy, thaw at room temperature or warm gently in a preheated 275°F (135°C) oven for 5-7 minutes until soft and warm.
Scoop the cookie dough into uniform balls and place them on a parchment-lined baking sheet. Freeze until solid, then transfer the frozen dough balls into a freezer-safe bag or container. You can bake these directly from frozen; just add an extra 2-4 minutes to the baking time, typically 13-15 minutes, until the edges are golden.
A common pitfall for home bakers is overmixing once the flour is added. This develops gluten, leading to tough, dense cookies rather than the desired tender and chewy texture. As soon as the dry ingredients are just incorporated and no streaks of flour remain, stop mixing immediately. A light hand is crucial here.
Butter temperature is paramount. Cold butter won’t cream properly, leading to a lumpy dough and inconsistent texture. Melted butter, on the other hand, causes cookies to spread excessively and become greasy. Aim for room temperature butter that is pliable but still holds its shape, allowing for proper aeration during creaming.
Baking cookies for too long is a surefire way to end up with dry, hard results. Always remove your Aunt Millie’s Retro Bakery Dirt Ball Cookies from the oven when the edges are golden brown but the centers still look slightly soft and underbaked. They will continue to set and firm up as they cool on the hot baking sheet, resulting in a perfectly chewy interior.
While not a disaster, failing to use parchment paper can lead to sticking and uneven baking. Parchment paper provides a non-stick surface, ensures even heat distribution, and makes cleanup effortless. It’s a small step that yields significant benefits for the final cookie quality.
Baking cookies of different sizes means they will cook at different rates, leading to some being burnt while others are raw. Always use a cookie scoop or carefully measure out uniform portions of dough. This ensures consistent baking and a batch of perfectly cooked Aunt Millie’s Retro Bakery Dirt Ball Cookies.
Per serving: 1 cookie
Nutritional values are estimates and may vary based on specific ingredients and preparation methods. This calculation includes optional nuts and assumes a standard semi-sweet chocolate chip brand.
And there you have it, my friends – the timeless delight of Aunt Millie’s Retro Bakery Dirt Ball Cookies! This recipe isn’t just about following instructions; it’s about connecting with a culinary heritage, creating something truly special with your own hands, and filling your home with the irresistible aroma of freshly baked goodness. I’ve shared my secrets, my insights, and my passion with you, and now it’s your turn to make these cookies your own. So, gather your ingredients, preheat your oven, and get ready to bake a batch of pure joy. I promise, these will become a cherished part of your baking repertoire. Happy baking from HomeRecipes.com!
Cookie spread can be a common issue, and there are a few chef-approved tricks to keep your Aunt Millie's Retro Bakery Dirt Ball Cookies from becoming too flat. Ensure your butter isn't too soft – it should be pliable but still hold its shape, not greasy or melted. Chilling the dough for at least 30 minutes, or even an hour, before baking can significantly help. The cold butter takes longer to melt in the oven, allowing the cookie to set before spreading too much. Also, make sure your baking soda is fresh, as old leavening agents can affect spread and rise. Finally, consider the temperature of your baking sheet; using a cool baking sheet for each batch prevents excess spreading.
Absolutely! While semi-sweet chocolate chips are classic for Aunt Millie's Retro Bakery Dirt Ball Cookies, feel free to experiment. You could use milk chocolate chips for a sweeter, creamier cookie, or dark chocolate chips for a more intense chocolate flavor. For a truly gourmet touch, chop up a good quality chocolate bar into irregular chunks; these will melt beautifully and create pockets of molten chocolate throughout the cookie. White chocolate chips or even a mix of different chocolates would also be delightful variations to explore.
Brown sugar is crucial for the chewiness and moisture in these Aunt Millie's Retro Bakery Dirt Ball Cookies, but if you're in a pinch, you can make a quick substitute. For 1 cup of light brown sugar, combine 1 cup of granulated sugar with 1 tablespoon of molasses. Mix them together thoroughly with a fork or in a food processor until evenly combined. This will replicate the flavor and texture contributions of brown sugar, ensuring your cookies still have that wonderful richness and chew.
Dry and crumbly cookies often stem from one of two common issues: either too much flour or overbaking. When measuring flour, always spoon it into your measuring cup and level it off with a straight edge; scooping directly from the bag can compact the flour, leading to an excess amount. Overbaking, even by a minute or two, can also dry out cookies. Remember the visual cues: golden brown edges with slightly soft centers. If your oven runs hot, consider checking your cookies a minute or two earlier than the recipe suggests, or invest in an oven thermometer to ensure accuracy.
Of course! The beauty of a classic cookie like Aunt Millie's Retro Bakery Dirt Ball Cookies is its adaptability. You could add dried cranberries or cherries for a fruity twist, or a pinch of cinnamon or nutmeg for a warm spice note. Toffee bits or caramel pieces would also be a decadent addition. Just be mindful of the total quantity of mix-ins; generally, you want to keep it around 1.5 to 2 cups total to ensure the cookies hold together well and bake evenly. Feel free to unleash your creativity!
No items yet. Click "Add All" or use + buttons!


Community Kitchen