Simple. Tasty. From Our Home to Yours. Browse all recipes

Simple. Tasty. From Our Home to Yours. Browse all recipes
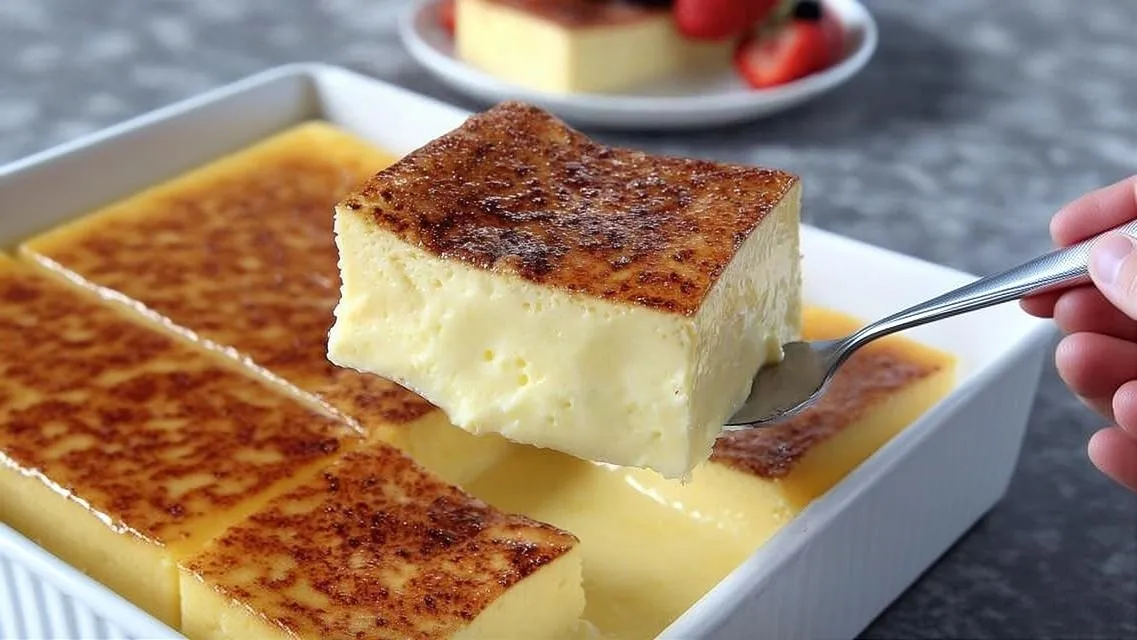
A silky, gently sweet baked custard made with just six pantry ingredients and set to a perfect jiggle using a protective water bath. The technique of straining the mixture before baking guarantees a smooth, glassy texture free of lumps or bubbles. It's a comforting, old-fashioned dessert that works equally well for a holiday table or a simple weeknight treat, and it's naturally gluten-free with easy substitutions for dairy-free diets.
Large mixing bowl
Whisk
Fine-mesh strainer
Ramekins or baking dish
Large roasting pan (for water bath)
Kettle or pot for hot water
Cooling rack
Preheat the oven to 325°F.
In a mixing bowl, whisk the eggs and sugar together until just combined and slightly pale.
Add the milk, vanilla extract, nutmeg, and salt, whisking gently until smooth.
Strain the custard mixture through a fine-mesh strainer to remove any lumps or foam.
Divide the strained custard evenly among ramekins or pour into a single baking dish.
Place the ramekins in a larger pan and pour hot water in until it reaches halfway up the sides.
Bake for about 45 minutes, until the edges are set but the center still jiggles slightly.
Remove from the water bath and let cool before chilling or serving.
Honey or maple syrup can replace the granulated sugar in equal measure for a more natural sweetness and a slightly deeper flavor note. Because these liquid sweeteners add a bit more moisture, whisk them in gradually and taste as you go to keep the custard’s texture and sweetness balanced.
Full-fat coconut milk or almond milk both work as substitutes for whole milk, producing a custard that’s slightly less rich but still sets beautifully in the water bath. Coconut milk will add a subtle tropical note, so pair it with a touch of extra vanilla if you want the egg flavor to stay front and center.
A teaspoon of lemon or orange zest whisked in with the milk brightens the custard’s flavor and pairs particularly well with the warm notes of nutmeg. This variation works wonderfully in spring and summer when a lighter, fresher dessert feels more appropriate.
Swap the nutmeg for cinnamon, or use both together with a pinch of ground cloves, for a custard that leans into cozy, fall-inspired flavors. This variation pairs especially well served slightly warm during the cooler months.
This single step removes any small bits of cooked egg white, chalazae, or foam that form during whisking, resulting in that signature glassy, ultra-smooth texture custard is known for. Skipping this step is one of the most common reasons homemade custard turns out slightly grainy.
A gentle 325°F oven combined with a water bath insulates the delicate egg proteins from direct heat, allowing them to set slowly and evenly instead of curdling at the edges. This is the single biggest factor in making this recipe truly fail-proof.
Overbeating the eggs and sugar incorporates excess air into the mixture, which can create unwanted bubbles and a slightly foamy texture on the surface once baked. Whisk just until the ingredients are combined and no more.
Every oven runs slightly differently, so rely on the visual cue of a gently wobbling center rather than baking for the exact time listed. The custard will continue to firm up as it cools, so pulling it slightly early prevents overcooking.
Because this custard contains eggs and dairy, it should not sit out at room temperature for more than 2 hours after baking. Let it cool briefly on the counter before transferring it to the refrigerator to chill fully.
Store leftover custard covered tightly in the refrigerator for up to 3 days. The texture is best within the first day or two, though it will still taste good through day three as long as it stays well covered.
Freezing is not recommended for this custard, as the delicate egg-and-milk structure tends to separate and turn watery and grainy once thawed. This dessert is best made fresh and enjoyed within a few days of baking.
A hot oven causes the egg proteins to coagulate too quickly, resulting in a curdled, watery texture instead of a smooth custard. Always stick to a low 325°F oven temperature and never rush this dessert by turning up the heat.
Without the insulating layer of hot water, the exterior of the custard cooks much faster than the interior, leading to an overcooked edge and an undercooked, runny center. The water bath is essential for even, gentle cooking throughout.
Leaving the custard in the oven until it’s completely firm with no wobble at all leads to a rubbery, overcooked texture once it cools completely. Pull it from the oven while the center still has a slight tremble.
Pouring the custard mixture directly into ramekins without straining leaves small bits of egg white and foam in the finished dessert, resulting in a slightly grainy or lumpy bite instead of the smooth texture this dessert is known for.
Per serving: 1 ramekin
Nutrition values are estimated per serving and will vary based on the exact type of milk and sweetener used.
Fail-Proof Egg Custard proves that a handful of simple pantry ingredients can create something genuinely special with the right technique behind them. Between the gentle water bath, the careful straining, and that perfect jiggly set, this recipe takes the guesswork out of a classic dessert — leaving you with a silky, comforting treat worth making again and again.
Curdling almost always happens when the oven temperature is too high or the custard bakes without a water bath, causing the egg proteins to seize rapidly instead of setting gently. Stick to 325°F and always use a water bath to keep the heat gentle and even throughout the full 45 minutes of baking.
Look for edges that appear set while the center still has a slight, gentle jiggle when you nudge the pan — it will continue to firm up as it cools on the counter. Pulling it from the oven at this stage is exactly what keeps the final texture silky rather than rubbery.
Yes, full-fat coconut milk or almond milk both work well as substitutes for whole milk in this recipe. The texture will be slightly less rich than the dairy version, but the custard will still set beautifully as long as you keep the water bath and low oven temperature the same.
Straining removes small bits of cooked egg white or foam that form naturally during whisking, which is what gives baked custard its signature glassy, ultra-smooth texture. Skipping this step can leave small lumps or a slightly grainy bite in the otherwise silky finished dessert.
Absolutely — cinnamon, almond extract, or a touch of citrus zest all work well in place of or alongside the vanilla and nutmeg called for in the base recipe. Add these flavorings when you whisk in the milk so they distribute evenly throughout the custard before it's strained and baked.
No items yet. Click "Add All" or use + buttons!
Community Kitchen