Vanilla Cookie Wafers Recipe (Crisp & Creamy)
Unleash your inner pastry chef with this exquisite vanilla cookie wafers recipe. Achieve the perfect crispness and delicate flavor that makes these homemade treats utterly irresistible. Ideal for pairing with ice cream, fruit, or enjoying on their own, these wafers are a testament to simple, high-quality baking that will impress family and friends alike. Experience the joy of baking a classic American dessert from scratch with Chef HomeRecipes.
restaurant_menu Ingredients
Vanilla Cookie Wafers
hardware Essential Tools
Large mixing bowl
Electric mixer (stand or hand)
Rubber spatula
Two large baking sheets
Parchment paper or silicone baking mats
Small offset spatula or back of a spoon
Wire cooling rack
format_list_numbered Preparation
Baking the Wafers
Preheat your oven to 325°F (160°C) and line two large baking sheets with parchment paper or silicone baking mats.
In a large mixing bowl, cream together the softened unsalted butter and granulated sugar with an electric mixer until light, fluffy, and pale, about 3-4 minutes, scraping down the sides as needed.
Beat in the large eggs one at a time, incorporating fully after each addition, then stir in the pure vanilla extract.
In a separate medium bowl, whisk together the all-purpose flour and kosher salt, then gradually add the dry ingredients to the wet mixture, mixing on low speed just until no streaks of flour remain, being careful not to overmix.
Drop small spoonfuls (about 1 teaspoon) of batter onto the prepared baking sheets, spacing them about 2 inches apart, and use a small offset spatula or the back of a spoon to spread each spoonful into a very thin, even circle, about 2-2.5 inches in diameter.
Bake for 12-15 minutes, rotating the baking sheets halfway through, until the wafers are uniformly golden brown around the edges.
Remove from the oven and let the wafers cool on the baking sheets for 1-2 minutes to firm up slightly, then carefully transfer them to a wire cooling rack to cool completely and crisp up.
favorite You Might Also Love
Browse All arrow_forwardVelvety Soft Maple Cookies With Maple Icing

Cookie Dough Stuffed Chocolate Chip Cookies Recipe (Ultimate Indulgence)

Soft Brown Sugar Cookies Recipe (Chewy & Easy)
Peanut Butter Haystacks Recipe (No-Bake Treats)
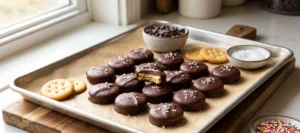
Chocolate-Covered Ritz Biscuit Bites Recipe (Sweet & Salty Snack)
Effortless 'Are You Kidding Me Cake' Marvel
Try These Variations
Lemon Zest Wafers
For a bright, citrusy twist, add 1 tablespoon of finely grated lemon zest to the butter and sugar mixture. The zest’s oils will infuse the wafers with a vibrant, refreshing flavor that pairs beautifully with berries or as an accompaniment to a light dessert. This variation is particularly lovely in spring and summer.
Cinnamon Sugar Wafers
After spreading the batter, lightly sprinkle each wafer with a mixture of 1 teaspoon ground cinnamon and 2 tablespoons granulated sugar before baking. This adds a warm, aromatic spice note and a delightful textural crunch, reminiscent of snickerdoodle cookies, making them perfect for cozy autumn evenings.
Chocolate Dipped Wafers
Once the vanilla cookie wafers are completely cooled, melt 4 ounces of high-quality dark or milk chocolate. Dip half of each wafer into the melted chocolate, letting any excess drip off, then place them on parchment paper to set. This adds a luxurious touch and a wonderful contrast in flavor and texture, transforming a simple wafer into an elegant confection.
Nutty Wafers
Fold in 1/4 cup of finely ground blanched almonds or pecans into the batter with the flour. The nuts add a subtle depth of flavor and a slightly more robust texture to the delicate wafers. Be sure to grind them very finely so they don’t impede the thin spreading of the batter, ensuring your wafers remain crisp.
Chef's Pro Tips
Achieving the Perfect Thinness
The secret to truly crisp vanilla cookie wafers lies in how thinly you spread the batter. Aim for a layer that’s almost translucent before baking. If your batter is too thick, your wafers will be softer and chewier rather than crisp. Using an offset spatula and working quickly will help you achieve this delicate balance, as the batter can firm up as it sits.
Don’t Overbake, But Don’t Underbake
It’s a fine line! Underbaked wafers will be soft and bendy, lacking that satisfying snap. Overbaked wafers can taste burnt and become overly brittle. Look for uniform golden-brown edges and a slightly lighter center. The color is your best indicator. When I baked these last week, I pulled them out right when the edges began to deepen in hue, yielding perfect results.
Cooling is Crucial for Crispness
While the wafers are still warm and pliable, they will seem soft. It’s during the cooling process on a wire rack that they release their remaining moisture and firm up, developing their characteristic crisp texture. Resist the urge to stack them too soon, as trapped heat can lead to condensation and a soggy result. Give them ample space to cool completely.
The Power of Quality Vanilla
Since these are vanilla cookie wafers, the vanilla is the undisputed star. Investing in a good quality pure vanilla extract or vanilla bean paste makes an enormous difference. The complex, aromatic notes of pure vanilla elevate these simple cookies from good to extraordinary, providing a depth of flavor that artificial extracts simply cannot replicate. It’s a small expense for a huge flavor payoff.
Storage Guide
Room Temperature Storage
Once your vanilla cookie wafers are completely cooled to room temperature, store them in an airtight container. A cookie jar with a tight-fitting lid or a plastic food storage container works perfectly. Place a piece of parchment paper between layers if stacking to prevent sticking. Stored this way, they will maintain their crispness and fresh flavor for up to 5-7 days, making them a great make-ahead treat.
Reviving Soft Wafers
If your wafers lose some of their crispness due to humidity or improper storage, don’t despair! You can easily revive them. Simply spread them in a single layer on a baking sheet and bake in a preheated oven at 250°F (120°C) for 5-7 minutes. Allow them to cool completely on a wire rack afterward, and they should regain their delightful crunch, tasting almost as fresh as the day you baked them.
Avoid These Mistakes
✕ Overmixing the Flour
A common pitfall in baking delicate cookies is overmixing the flour. Once flour is added, mixing develops gluten, which is desirable for chewy breads but detrimental to crisp, delicate wafers. Overmixed batter will result in tough, dense cookies instead of light, airy ones. Mix just until the flour streaks disappear, then stop.
✕ Not Spreading Thin Enough
If your cookie wafers come out soft or chewy instead of crisp, it’s likely because the batter wasn’t spread thinly enough. Thicker wafers retain more moisture and won’t achieve the desired snap. Take your time with this step, using an offset spatula to create a uniform, almost transparent layer of batter for optimal crispness.
✕ Baking at Too High a Temperature
A common mistake is baking these delicate wafers at too high a temperature. This can cause them to brown too quickly on the outside while remaining undercooked and soft in the center. A lower temperature, like 325°F (160°C), allows for more even baking and proper moisture evaporation, leading to that perfect, uniform golden crispness we’re aiming for.
✕ Improper Cooling or Storage
Many home bakers ruin perfectly good wafers by not cooling them properly or storing them incorrectly. Stacking warm wafers traps steam, making them soggy. Storing them in a container that isn’t airtight exposes them to humidity, which will quickly turn them soft. Always cool completely on a wire rack and store in an airtight container at room temperature.
nutrition Nutrition Facts
Per serving: About 4 wafers
Nutritional values are estimates and may vary based on specific ingredient brands and preparation methods. These calculations are per serving, with each serving being approximately 4 wafers.
sell Related Topics
Frequently Asked Questions
Can I make the batter ahead of time? expand_more
Yes, you can absolutely prepare the vanilla cookie wafers batter in advance! Once mixed, cover the bowl tightly with plastic wrap and refrigerate for up to 24 hours. When you're ready to bake, let the batter sit at room temperature for about 15-20 minutes to soften slightly, making it easier to spread thinly. You might need to give it a quick stir to re-emulsify any separated ingredients. This is a great trick for meal prepping or getting a head start on entertaining.
Why are my cookie wafers not crisp? expand_more
There are a few common culprits if your cookie wafers aren't achieving that signature crispness. The most frequent reason is that they weren't spread thinly enough. A thicker batter retains more moisture, leading to a chewier, softer cookie. Another reason could be underbaking; they need to bake until a uniform golden-brown to ensure enough moisture has evaporated. Lastly, improper storage in a non-airtight container or a humid environment can quickly cause them to soften. Ensure they cool completely on a wire rack before storing.
Can I use a different flavor extract instead of vanilla? expand_more
Absolutely! While pure vanilla extract is classic for these cookie wafers, feel free to experiment with other flavor profiles. Almond extract would give them a lovely marzipan-like note, lemon extract would offer a bright, zesty twist, or even a hint of orange blossom water could be enchanting. Just remember that some extracts are more potent than others, so start with half the amount and adjust to taste. This is where you can truly make the recipe your own, just like how I encourage my culinary students to find their unique voice in the kitchen.
What's the best way to get them uniformly thin? expand_more
Achieving uniformly thin cookie wafers takes a bit of practice, but an offset spatula is truly your best friend here. Start by dropping a small amount of batter onto the parchment paper. Then, place the center of the offset spatula on the batter and gently swirl outwards in a circular motion, applying even pressure. The goal is to spread the batter as thin as possible without tearing it. If you find the batter too stiff, it might be too cold; let it sit at room temperature for a few more minutes. Patience and a light hand are key to these delicate treats.
Can I make these gluten-free? expand_more
Yes, you can adapt this vanilla cookie wafers recipe to be gluten-free. I recommend using a high-quality 1:1 gluten-free all-purpose flour blend that contains xanthan gum. The xanthan gum helps provide the necessary structure that gluten would normally offer. The texture might be slightly different, perhaps a touch more delicate, but you can still achieve a wonderfully crisp wafer. Make sure to follow the same mixing and baking instructions carefully, keeping an eye on the browning, as gluten-free flours can sometimes brown a little differently.
More Recipes You'll Love
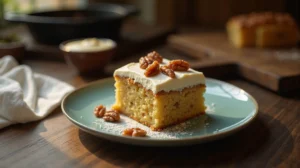
Retro Swedish Nut Cake Recipe
Tropical Coconut Dream Cake: Southern Summer Indulgence
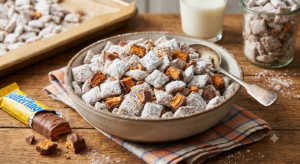
The Ultimate Butterfinger Puppy Chow: A Crunchy Masterpiece
Chef’s Ultimate Yum Yum Cake: Southern Comfort Redefined

Coastal Lemon Dream: My Atlantic Beach Pie Masterpiece

Community Kitchen