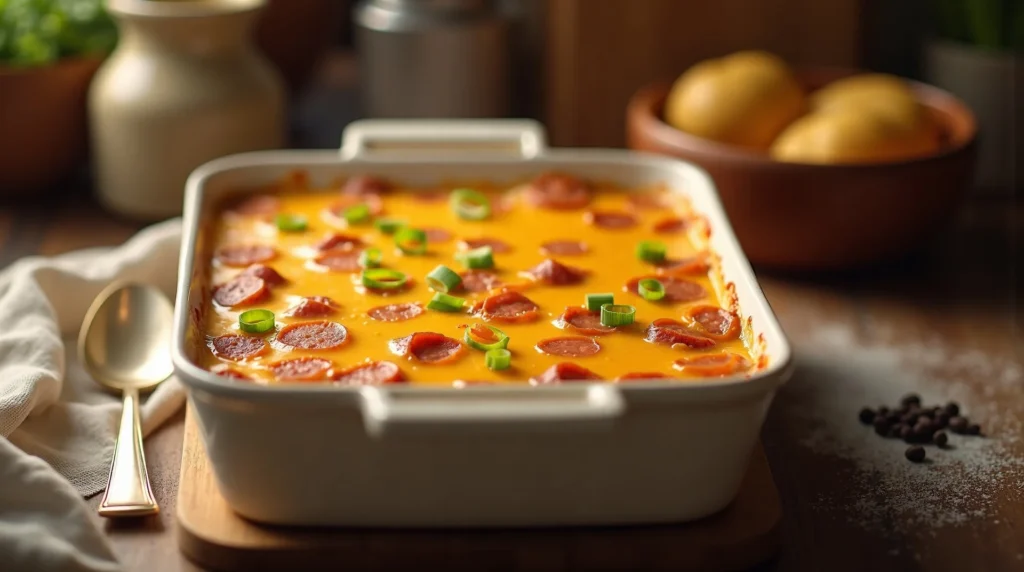
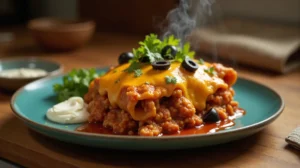
Hearty Kielbasa Pierogies Casserole Recipe
Transform humble frozen pierogies and smoky Halal kielbasa into a show-stopping, creamy, cheesy baked dinner. This Kielbasa Pierogies Casserole is the ultimate weeknight comfort food, delivering rich, savory flavor with minimal hands-on time.
restaurant_menu Ingredients
Main Casserole Components
Creamy Sauce Base
hardware Essential Tools
9x13-inch baking dish
Large skillet (cast iron preferred)
Large mixing bowl
Whisk
Rubber spatula
Aluminum foil
format_list_numbered Preparation
Searing and Assembly
Preheat your oven to 375°F (190°C) and lightly grease a 9x13-inch baking dish with nonstick spray or butterSear the sliced kielbasa in a large skillet over medium-high heat until golden brown edges form, about 5-7 minutes; transfer the sausage to the prepared baking dishAdd the frozen pierogies to the dish with the sausage and toss lightly to distribute them evenly
Making the Velvety Sauce
In a separate bowl, beat the softened cream cheese until smooth, then whisk in the sour cream until fully incorporatedSlowly whisk in the chicken broth until the mixture is smooth, then add the garlic powder, salt, and pepper, tasting for seasoningGently fold in 1 cup of the grated cheddar cheese and half of the sliced green onions into the sauce basePour this creamy mixture evenly over the pierogies and sausage, using a spatula to gently combine without breaking the pierogi dough
Baking to Perfection
Sprinkle the remaining 1 cup of cheddar cheese generously over the top of the casserole mixtureCover the dish tightly with aluminum foil and bake in the preheated 375°F oven for 30 minutes to steam the pierogies throughRemove the foil and continue baking uncovered for an additional 8 to 12 minutes, until the cheese is bubbly, melted, and deeply golden brown on topRemove from the oven and allow the Kielbasa Pierogies Casserole to rest for 5 minutes before garnishing with the remaining fresh green onions and serving hot
favorite You Might Also Love
Browse All arrow_forward


Try These Variations
Add Bacon Substitute
Use Halal beef bacon or turkey bacon, cooked until crisp, mixed with the kielbasa for extra texture and saltiness
Spice it Up
Incorporate 1/2 teaspoon of crushed red pepper flakes into the cream cheese mixture for a subtle kick
Vegetable Boost
Sauté 1 cup of finely chopped onions and 1 cup of diced bell peppers along with the sausage, then mix them into the casserole base
Different Cheese Blend
Swap half the cheddar for Monterey Jack or Gruyère for a nuttier, creamier melt profile
Mustard Finish
Whisk 1 tablespoon of Dijon mustard into the sauce for added sharpness that beautifully complements the smoky sausage in your kielbasa pierogies casserole
Chef's Pro Tips
Always ensure the cream cheese is truly room temperature—it should yield easily to light pressure, preventing a chunky sauce base
For an extra layer of flavor, lightly sauté the sliced green onions in the sausage drippings before folding them into the cheese sauce
If your pierogies are sticking to the bottom after baking, it means the sauce wasn’t distributed evenly; next time, ensure the bottom layer is well-coated before topping with cheese
Always use freshly grated sharp cheddar; the anti-caking agents in pre-shredded cheese inhibit that beautiful, cohesive melt
Storage Guide
Room Temperature
Do not leave at room temperature for more than 2 hours due to dairy content
Refrigerator: Store tightly covered in an airtight container for up to 4 days
Freezer: Wrap individual portions tightly in plastic wrap then foil; freeze for up to 2 months. Thaw overnight in the refrigerator before reheating.
Reheating
Warm covered at 325°F (160°C) for 20 minutes, removing foil for the last 5 minutes to re-crisp the topping.
Avoid These Mistakes
✕ Using cold ingredients, which results in a lumpy, poorly combined sauce base
Overcrowding the baking dish, which causes the ingredients to steam instead of bake to a nice texture
✕ Forgetting to cover the dish initially, leading to dry, hard pierogies and a burnt cheese top before the center is hot enough
✕ Not allowing the Kielbasa Pierogies Casserole to rest for 5 minutes after baking, resulting in a watery serving consistency
nutrition Nutrition Facts
Per serving: 1/6 of casserole
This is an estimate for one serving based on standard ingredient measurements. Sodium content is high due to cured sausage and cheese.
flag Conclusion
There you have it, dear cooks. We’ve taken simple ingredients and, with a little professional technique—managing heat, layering textures, and balancing richness—we’ve created a spectacular, soul-soothing kielbasa pierogies casserole. This dish proves that restaurant-quality flavor doesn’t require a reservation or hours of tedious work. It requires good ingredients and a confident hand. I urge you to make this dish tonight, serve it proudly to your family, and watch how quickly those plates are cleaned. Enjoy the process, make it your own, and keep cooking with passion right here at HomeRecipes.com!
sell Related Topics
Frequently Asked Questions
Can I substitute the kielbasa with another type of sausage while keeping it Halal? expand_more
Absolutely! The key characteristic we are seeking is smokiness and firmness. If you cannot find Halal beef or turkey kielbasa, look for high-quality Halal smoked beef sausage or even a Halal smoked turkey sausage. The texture should be firm enough to sear nicely. Avoid soft, fresh sausages like breakfast links, as they will crumble too much in this baked application. The success of your kielbasa pierogies casserole relies heavily on that smoky component.
My sauce broke slightly when I added the broth. What went wrong? expand_more
This usually happens when the cream cheese is too cold or the broth is added too quickly. Cream cheese emulsifies best when it’s perfectly room temperature—soft enough to spread easily but not melted. When adding liquid to a fat base like cream cheese, the addition must be gradual, whisked constantly, to allow the emulsion to form slowly. If it happens, remove the bowl from the heat source immediately and whisk vigorously; sometimes, adding a tiny splash of cold broth can shock it back into a smoother texture.
Do I need to boil the pierogies before making this casserole? expand_more
No, and this is one of the greatest advantages of this recipe! The instructions call for using them frozen directly from the bag. The covered baking time (30 minutes at 375°F) creates a steamy environment inside the foil, which cooks the dough perfectly. Boiling them first would introduce too much moisture, leading to a soggy final product, which is the absolute antithesis of a great kielbasa pierogies casserole! They will absorb the sauce beautifully as they cook in the oven.
Is it possible to make a vegetarian version of this casserole? expand_more
Yes, though it shifts the flavor profile significantly. You would omit the kielbasa entirely. To replace the smoky depth, I strongly recommend sautéing 1 cup of sliced cremini mushrooms with 1 teaspoon of smoked paprika and a dash of liquid smoke (ensure it is alcohol-free) in place of the sausage. You would then follow the rest of the sauce instructions, perhaps adding a little extra broth since you lose the fat from the sausage. It becomes a wonderful Mushroom and Cheese Pierogi Bake, but it won't technically be a kielbasa pierogies casserole.
How can I ensure the bottom layer of pierogies doesn't stick or burn? expand_more
Sticking is the enemy of any good casserole! Beyond using non-stick spray or butter in the entire dish, ensure you are using the correct amount of sauce. The sauce must coat the bottom layer adequately. Also, make sure your oven rack is positioned in the center. If the bottom element is too close, it can scorch. Finally, the resting period helps the sauce redistribute moisture, preventing a dry, stuck layer.
More Recipes You'll Love

Irresistible Cheesy Baked Potato Rounds: A Simple Comfort Food Recipe

The Ultimate Cheesy Hamburger Potato Casserole Recipe
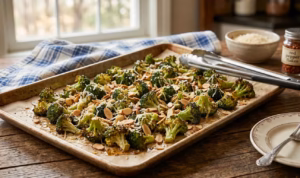
Mastering Crack Broccoli: The Ultimate Roasted Vegetable
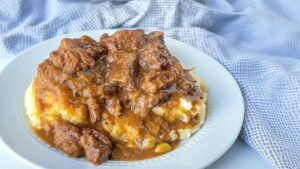
Beef Tips with Mushroom Gravy Recipe (Comfort Classic)
Community Kitchen