Dive into the ultimate Southern comfort with this irresistible Baked Cheesy Grits recipe. Featuring creamy stone-ground grits, rich sharp cheddar, and a secret chef's technique for tempering eggs, this dish bakes into a golden, bubbly casserole with a perfectly set interior. It's a versatile crowd-pleaser, ideal for brunch, a hearty side, or a comforting weeknight meal, bringing restaurant-quality flavor right to your American kitchen.
Ingredients
Main Ingredients
Optional Garnish
Essential Tools
9x13 inch baking dish
Medium saucepan
Whisk
Measuring cups and spoons
Small bowl
Ladle
favorite You Might Also Love
Browse All arrow_forward
No-Bake Biscoff Cheesecake: A Dreamy 5-Ingredient Dessert

Baked Greek Lemon Chicken at Home

Creamy Paprika Steak Shells: A Comforting Pasta Delight

The Ultimate Comfort: Cheeseburger Macaroni Soup Recipe
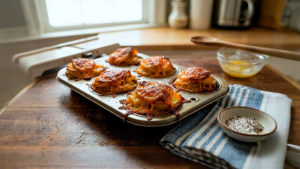
Irresistible 4-Ingredient Sharp Cheddar Potato Stacks: Crispy Edges Guaranteed
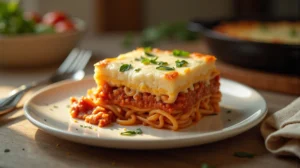
Million Dollar Spaghetti Casserole Recipe
Preparation
Preparation
Preheat your oven to 350°F (175°C) and lightly grease a 9x13 inch baking dish with butter or non-stick cooking spray, ensuring a smooth release for your Baked Cheesy Grits.
In a medium saucepan, bring 4 cups of water to a rolling boil over high heat, then add 1 teaspoon of kosher salt, seasoning the cooking liquid from the start.
Gradually whisk in the 1 cup of stone-ground grits, pouring slowly and continuously stirring to prevent any lumps from forming, ensuring a creamy base.
Reduce the heat to low, cover the saucepan, and simmer the grits for 20-25 minutes, stirring occasionally to prevent sticking and ensure even cooking, until they are tender and have absorbed most of the liquid.
Remove the saucepan from the heat and stir in the 1/4 cup of unsalted butter until fully melted, followed by the 1/2 cup of whole milk and 1/2 teaspoon of black pepper.
Add 1 1/2 cups of the shredded sharp cheddar cheese to the hot grits, stirring until it's completely melted and smoothly incorporated, creating a rich, cheesy foundation for your Baked Cheesy Grits.
In a separate small bowl, whisk the 2 large eggs until well beaten; then, gradually ladle a small amount (about 1/2 cup) of the hot grits mixture into the eggs while continuously whisking to temper them, preventing scrambling.
Pour the warmed egg mixture back into the saucepan with the remaining grits, stirring quickly and thoroughly until everything is fully combined and homogeneous.
Transfer the cheesy grits mixture into your prepared baking dish, spreading it evenly with a spatula, and then sprinkle the remaining 1/2 cup of shredded sharp cheddar cheese over the top for a golden crust.
Bake in the preheated oven for 30-35 minutes, or until the cheese is melted, bubbly, and beautifully golden brown on top, and the edges are set.
For an extra crispy crust, you may broil for an additional 2-3 minutes, watching constantly to prevent burning, as broiler heat is intense.
Allow the Baked Cheesy Grits to cool and set for at least 10-15 minutes before serving to achieve the best texture and clean portions, then garnish with chopped green onions if desired.
Recipe Variations
Spicy Kick
For those who love a bit of heat, incorporate 1/4 teaspoon of cayenne pepper or a dash of your favorite hot sauce into the grits mixture along with the black pepper. This adds a subtle warmth that enhances the cheesy flavor without overpowering it, perfect for a bolder taste profile in your Baked Cheesy Grits.
Herbaceous Delight
Stir in 1 tablespoon of finely chopped fresh chives or parsley with the cheese for a fresh, aromatic twist. Herbs add a bright, earthy note that complements the richness of the cheese and corn, elevating the overall freshness of the dish.
Smoked Flavor
Substitute half of the sharp cheddar with smoked Gouda or smoked cheddar for a deeper, more complex smoky flavor. This variation adds a sophisticated layer to the traditional comfort food, making it feel more gourmet and unique.
Veggie Boost
Lightly sauté 1/4 cup of finely diced bell peppers or a small amount of corn kernels and fold them into the grits mixture before baking. This adds extra texture, nutrients, and a touch of sweetness, making your Baked Cheesy Grits even more wholesome.
Chef's Tips
Achieving the Creamiest Grits
For truly exceptional creaminess in your Baked Cheesy Grits, consider soaking your stone-ground grits overnight in cold water. This pre-hydrates the corn, allowing for more even cooking and a silkier texture. When you cook them, use the soaking liquid as part of your measured water, and reduce the simmering time slightly, as they’ll cook faster. The result is an incredibly smooth, melt-in-your-mouth consistency that elevates the dish.
Temperature Control for Cheese
When incorporating the cheese, ensure your grits are still quite hot but not actively boiling. The residual heat is sufficient to melt the cheese smoothly without causing it to seize or become oily. Stirring slowly and continuously helps the cheese fats emulsify properly, preventing separation and ensuring a homogeneous, creamy mixture that bakes beautifully.
The Art of Seasoning
Don’t be shy with seasoning! Besides the initial salt in the cooking water, taste your grits mixture before transferring it to the baking dish. Cheese adds salt, but often not enough for a well-balanced dish. A pinch more salt, a grind of fresh black pepper, or even a tiny dash of garlic powder can awaken the flavors and make your Baked Cheesy Grits truly sing. Think of it as tuning an instrument – small adjustments make a big difference.
Storage & Conservation
Refrigerator
Once your Baked Cheesy Grits have cooled completely to room temperature, transfer them to an airtight container. They will maintain their deliciousness in the refrigerator for up to 3-4 days. To reheat, place individual servings in the microwave, covered with a damp paper towel, and heat in 1-minute increments, stirring until warm. For larger portions, cover with foil and reheat in a 325°F (160°C) oven until heated through.
Freezer
For longer storage, allow the Baked Cheesy Grits to cool completely. Portion into individual, freezer-safe containers or wrap tightly in plastic wrap and then foil. They can be frozen for up to 2-3 months. Thaw overnight in the refrigerator before reheating. Reheat gently in the oven or microwave, adding a splash of milk or broth if needed to restore creaminess.
Room Temperature
While delicious, Baked Cheesy Grits should not be left at room temperature for more than 2 hours due to the dairy and egg content, to prevent bacterial growth. Always cool quickly and refrigerate promptly to ensure food safety and maintain quality.
Common Mistakes
Not whisking continuously when adding grits: This is a cardinal sin in grit-making! If you dump the grits into boiling water without whisking, they will clump together into a lumpy, unappetizing mess. The starch granules immediately absorb water and stick, creating hard pockets. Always whisk steadily as you slowly pour in the grits, ensuring each granule is separated and hydrates evenly, leading to smooth, creamy Baked Cheesy Grits.
Skipping the egg tempering step
Adding cold, beaten eggs directly into a hot grit mixture will cause the eggs to curdle and scramble instantly. This results in a grainy, unpleasant texture and an unappetizing appearance, ruining the custardy consistency we’re aiming for. Tempering by gradually introducing hot grits to the eggs slowly raises their temperature, preventing this protein shock and ensuring a smooth, binding agent for your Baked Cheesy Grits.
Using pre-shredded cheese
While convenient, pre-shredded cheeses often contain cellulose or other anti-caking agents to prevent clumping in the bag. These additives can interfere with the cheese’s ability to melt smoothly, leading to a slightly gritty or less creamy texture in your Baked Cheesy Grits. For the best results, always shred your own cheese from a block; it melts beautifully and contributes to a superior mouthfeel.
Overcooking or undercooking the grits
Undercooked grits will be gritty and hard, while overcooked grits can become too pasty and lose their individual texture. The ideal consistency for Baked Cheesy Grits is creamy but with a slight chew. Pay close attention during the simmering phase, tasting for doneness and adding liquid as needed to achieve that perfect balance before baking.
Recipe Keywords
Frequently Asked Questions
Can I use quick-cooking grits instead of stone-ground? expand_more
While you technically can use quick-cooking grits for this Baked Cheesy Grits recipe, I strongly advise against it for the best results. Stone-ground grits offer a superior flavor, a more robust corn essence, and a delightful, slightly chewy texture that quick grits simply cannot replicate. Quick grits are processed differently and will result in a less satisfying, often mushier, and less flavorful casserole. If you must use them, reduce the initial cooking time to about 5-7 minutes, stirring until thickened, before proceeding with the rest of the recipe. Adjust liquid as necessary, as they absorb water much faster.
What's the best way to prevent lumpy grits? expand_more
Preventing lumpy grits is all about technique and patience. The absolute best way is to gradually whisk the grits into boiling salted water. Don't dump them all in at once! Pour in a slow, steady stream while continuously whisking vigorously. This ensures that each grit particle is coated with water and separates, preventing them from clumping together. Once incorporated, reduce the heat to a simmer and stir frequently during the cooking process. This constant agitation helps keep them smooth and prevents sticking to the bottom of the pan, yielding perfectly creamy Baked Cheesy Grits.
Can I make these Baked Cheesy Grits ahead of time for a party? expand_more
Absolutely! These Baked Cheesy Grits are an excellent make-ahead dish, which is one of their many charms, especially for entertaining. You can prepare the entire recipe up to the point of baking, cover the dish tightly with plastic wrap, and refrigerate it for up to 24 hours. When you're ready to bake, remove it from the refrigerator about 30 minutes before baking to allow it to come closer to room temperature. You might need to add an extra 5-10 minutes to the baking time since it's starting cold. This method is a lifesaver for holiday brunches or busy gatherings, allowing you to enjoy your guests without being stuck in the kitchen.
How can I add more flavor to my cheesy grits? expand_more
Beyond the basic salt and pepper, there are many ways to amp up the flavor of your Baked Cheesy Grits! Consider adding a pinch of garlic powder or onion powder to the grits along with the cheese. For a subtle smoky depth, a dash of smoked paprika works wonders. If you enjoy a bit of heat, a tiny pinch of cayenne pepper or a few drops of your favorite hot sauce can provide a delightful kick. You could also experiment with different cheeses; a blend of sharp cheddar with a touch of Gruyere or even a spicy pepper jack can create a more complex flavor profile. Don't forget fresh herbs like chives or parsley as a garnish for a bright finish!
Why did my cheesy grits turn out grainy or watery? expand_more
There are a few culprits if your Baked Cheesy Grits are grainy or watery. Graininess often stems from either using undercooked grits (they haven't absorbed enough liquid) or using pre-shredded cheese with anti-caking agents that prevent smooth melting. Ensure you're using stone-ground grits and cooking them until tender, and always shred your own cheese. Watery grits usually mean too much liquid was added or not enough time was given for the grits to thicken during simmering. Make sure to measure your liquids accurately and allow the grits to simmer until they reach a thick, creamy consistency before adding the other ingredients. The tempering of the eggs is also crucial for binding and preventing a watery separation during baking.
Suggested Recipes

Easy 3-Ingredient Sausage Cream Cheese Casserole: A Flaky Delight
timer 10 minutes

Simple Beef with Broccoli at Home
timer 15 minutes

The Ultimate Pickle Pizza: A Savory American Favorite
timer 10 minutes
Crock Pot Chicken Enchiladas Perfection
timer 15 minutes

Homemade German Meat Salad Recipe
timer 5 minutes
Easy 5-Ingredient Beef Pizza Roll-Ups: A Quick & Delicious Recipe
timer 15 minutes