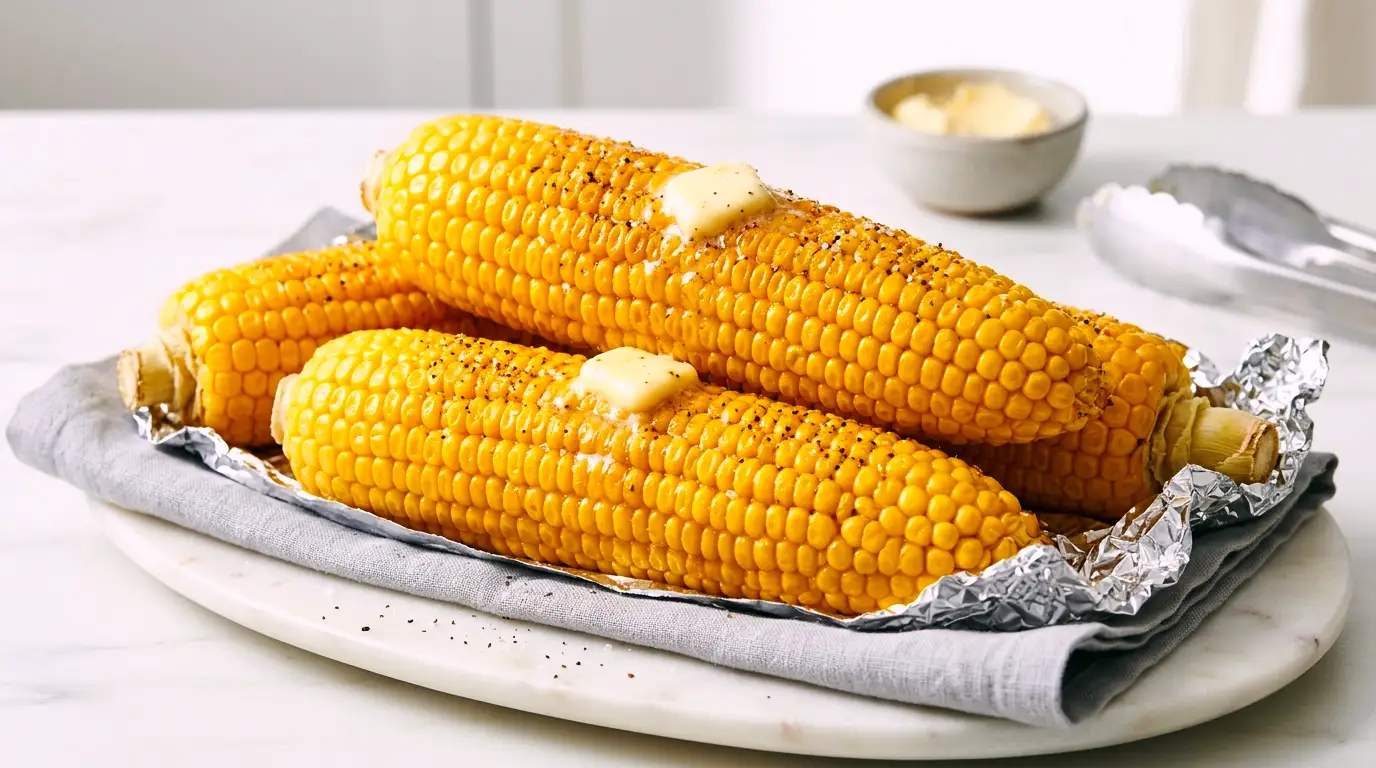
Corn on the Cob Oven Recipe (Perfectly Roasted)
Experience the ultimate comfort food with this foolproof corn on the cob oven recipe. Chef HomeRecipes brings you a method that guarantees incredibly tender, juicy kernels bursting with sweet, buttery flavor, all achieved with the consistent heat of your oven. Perfect for any meal, this side dish is simple to prepare, packed with natural goodness, and offers a delightful texture that will make it a family favorite. Say goodbye to dry, unevenly cooked corn and hello to roasted perfection, every single time.
restaurant_menu Ingredients
Main Ingredients
Optional Seasonings
hardware Essential Tools
Large mixing bowl (optional, for seasoning)
Baking sheet
Aluminum foil
Pastry brush (optional)
Tongs
format_list_numbered Preparation
Preparation
Preheat your oven to 425°F (220°C) and ensure your shucked corn is patted dry.
Generously spread the softened unsalted butter over the entire surface of each ear of corn.
Season each buttered ear of corn liberally with kosher salt and freshly ground black pepper, along with any optional seasonings you choose.
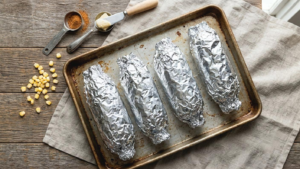
Individually wrap each seasoned ear of corn tightly in aluminum foil, ensuring no gaps for moisture to escape.
Place the wrapped corn on a sturdy baking sheet and transfer it to the preheated oven.
Bake for 25 minutes, making sure to turn each ear of corn halfway through the cooking time for even roasting.
Carefully remove the baking sheet from the oven and allow the wrapped corn to rest for a few minutes before unwrapping and serving.
favorite You Might Also Love
Browse All arrow_forwardSouthern Brussels Sprouts Recipe (Potluck Favorite)
Southern Hoe Cakes: Crispy & Fluffy Recipe
Golden Corn Bake: Rich & Creamy Comfort Casserole
Emerald Crunch: Mastering the Avocado Cucumber Salad

Dill Pickle Pasta Salad Recipe (Creamy & Tangy)

Golden Crusted Creamy Parmesan Oven Baked Potatoes
Try These Variations
Spicy Southwestern Corn
Mix 1 teaspoon chili powder, 1/2 teaspoon smoked paprika, and 1/4 teaspoon ground cumin into your softened butter before spreading on the corn. After roasting, sprinkle with fresh cilantro and a squeeze of lime juice for a zesty, fiery kick that complements the sweetness of the corn beautifully, making this a vibrant corn on the cob oven variation.
Herbed Garlic Parmesan Corn
Combine 1 tablespoon finely minced fresh parsley, 1 teaspoon dried oregano, and 1/2 teaspoon garlic powder with your softened butter. After roasting the corn on the cob oven, immediately sprinkle generously with grated Parmesan cheese, which will melt slightly from the heat, creating a savory, aromatic crust.
Sweet & Smoky Corn
Add 1 tablespoon of maple syrup or honey to your softened butter along with a pinch of smoked paprika and a tiny dash of liquid smoke (just a drop or two!). This creates a wonderful balance of sweet and savory notes, with a hint of outdoor grill flavor, perfect for your corn on the cob oven.
Chef's Pro Tips
Selecting Peak Season Corn
The quality of your raw ingredients is paramount. Always choose corn that is heavy for its size, with plump, unblemished kernels. If you can, buy from local farmers’ markets during peak season (typically summer in most of the US) for the absolute sweetest and most flavorful corn. This will significantly impact the final taste of your corn on the cob oven.
The Art of Softened Butter
“Softened” butter doesn’t mean melted. It should be pliable enough to spread easily, like mayonnaise, but still hold its shape. This texture ensures an even coating on the corn, preventing it from sliding off and creating a consistent flavor barrier. If your butter is too cold, cube it and let it sit at room temperature for 30-60 minutes, or gently warm in the microwave for 5-10 second bursts.
Don’t Overcrowd the Baking Sheet
While you might be tempted to cram all the corn onto one sheet, giving each ear a little space ensures proper heat circulation. Overcrowding can lead to uneven cooking, with some ears steaming rather than roasting effectively, which can detract from the desired texture of your corn on the cob oven.
Storage Guide
Refrigerator (Wrapped)
Allow the roasted corn on the cob to cool completely to room temperature. Re-wrap each ear tightly in a fresh piece of aluminum foil or plastic wrap to prevent air exposure and maintain moisture. Store in an airtight container or a resealable plastic bag in the refrigerator for up to 3-4 days. Reheat in a 300°F (150°C) oven, wrapped, for 10-15 minutes or microwave for 1-2 minutes per ear until warmed through.
Refrigerator (Kernels)
Remove the cooled kernels from the cob using a sharp knife. Transfer the kernels to an airtight container. Store in the refrigerator for up to 4 days. Reheat gently in a skillet over medium-low heat with a small amount of butter, stirring occasionally, until hot, or quickly microwave. This method is excellent for adding to salads or creating a quick side dish.
Freezer
For longer storage, you can freeze roasted corn. Once completely cooled, you can either freeze whole cobs (wrapped tightly in foil and then in a freezer-safe bag to prevent freezer burn) or remove the kernels and freeze them in a single layer on a baking sheet before transferring to a freezer-safe bag. Frozen corn will maintain its quality for up to 3 months. Thaw in the refrigerator overnight before reheating.
Avoid These Mistakes
✕ Not Shucking Properly
Leaving too much silk on the corn can create an unpleasant texture and can be difficult to remove after cooking. Ensure all silk strands are removed before buttering and seasoning. A quick trick is to use a stiff brush or a damp paper towel to wipe away stubborn silks. This initial step is critical for an enjoyable corn on the cob oven experience.
✕ Under-Seasoning
Corn, especially when roasted, benefits greatly from proper seasoning. A common mistake is using too little salt and pepper, which leaves the corn tasting bland. Don’t be afraid to season generously! Remember, salt enhances sweetness, and pepper adds depth. Taste a small piece of roasted corn before serving to adjust if necessary, ensuring your corn on the cob oven is perfectly balanced.
✕ Wrapping Too Loosely
If the foil isn’t wrapped tightly, steam can escape, leading to dry, tough corn. The foil packet is designed to create a moist, steamy environment that tenderizes the kernels. Ensure each ear is snugly encased in foil, forming a tight seal to lock in all that precious moisture and flavor for your corn on the cob oven.
✕ Overcooking
While tough corn is undesirable, so is mushy corn. Overcooking can make the kernels lose their appealing pop and become watery. The suggested 25 minutes at 425°F is a good starting point, but ovens vary. Keep an eye on it, and test for doneness around the 20-minute mark. You want tender-crisp, not soft and mealy, for the best corn on the cob oven.
nutrition Nutrition Facts
Per serving: 1 ear
Nutritional values are approximate and can vary based on specific ingredient brands and portion sizes.
flag Conclusion
You’ve now mastered the art of corn on the cob oven style, transforming a simple vegetable into a culinary delight. This method guarantees tender, juicy, and flavorful corn every single time, proving that sometimes the easiest path leads to the most delicious destination. So go ahead, bring this recipe into your kitchen, and watch it become a cherished favorite. Here at HomeRecipes, we believe in empowering you to create incredible meals, and this roasted corn is a perfect testament to that. Happy cooking, my friends!
sell Related Topics
Frequently Asked Questions
How do I choose the freshest corn for oven roasting? expand_more
When selecting corn for oven roasting, always prioritize freshness. Look for ears with bright green, tightly wrapped husks. The silk at the top should be slightly sticky and light brown or golden, not dry or black. Gently peel back a small section of the husk to check the kernels – they should be plump, firm, and milky when pierced with a fingernail. Avoid corn with dry husks, shriveled kernels, or any signs of mold or insect damage. The fresher the corn, the sweeter and juicier your corn on the cob oven will be, as the sugars haven't yet converted to starch.
Can I make this corn on the cob oven recipe without foil? expand_more
While you certainly can roast corn without foil, I highly recommend using it for this particular corn on the cob oven method. The foil acts as a mini-steamer, trapping moisture and allowing the corn to cook in its own juices, resulting in incredibly tender and juicy kernels. Without foil, the corn can dry out more easily and might develop a tougher texture. If you must go foil-free, you could try placing the buttered and seasoned corn directly on a baking sheet, but be prepared for a slightly different, potentially drier, result. You might also want to mist it with a little water or oil halfway through cooking.
What are some other flavor variations for oven-roasted corn? expand_more
The beauty of corn on the cob oven is its versatility! Beyond the suggested Cajun or garlic powder, you can get really creative. Try a Mexican street corn (Elote) inspired version by mixing chili powder, smoked paprika, and a touch of cumin into your butter, then after roasting, sprinkle with cotija cheese and a squeeze of lime. For an herbal twist, finely chop fresh rosemary or thyme and mix it into the butter before spreading. A sweet and savory option could involve a drizzle of maple syrup or honey along with a pinch of red pepper flakes. Don't be afraid to experiment with your favorite spice blends!
Can I prepare the corn ahead of time for a party? expand_more
You absolutely can do some prep work ahead of time to make serving corn on the cob oven at a party a breeze. You can shuck the corn, butter, and season it, and then wrap each ear tightly in foil. Once wrapped, store the prepared corn in the refrigerator for up to 24 hours. When you're ready to cook, simply take them out of the fridge and proceed with the baking instructions. You might need to add an extra 5-10 minutes to the baking time since the corn will be starting from a colder temperature. This pre-prep is perfect for entertaining, allowing you to enjoy your guests without being stuck in the kitchen.
How do I know when the corn is perfectly cooked? expand_more
The best way to tell if your corn on the cob oven is perfectly cooked is by its tenderness and vibrant color. After 25 minutes, carefully unwrap one ear (watch out for steam!) and test a kernel with a fork or your finger. It should be tender, juicy, and easy to bite into, but still have a slight crispness. The kernels should look plump and bright yellow. If they still feel a bit firm or starchy, simply rewrap and return them to the oven for another 5-10 minutes, checking every few minutes until they reach your desired doneness. Experience has taught me that a slightly undercooked kernel lacks that sweet burst, so err on the side of a little extra time if unsure.
More Recipes You'll Love

Air-Fried Crispy Parmesan Cauliflower: An Irresistible Recipe

Wisconsin North Woods Inn Salad: Creamy Gorgonzola Dream
Creamy Herb Potato Bake Recipe (Slow Cooker)

Stick Of Butter Baked Rice Recipe (Golden & Fluffy)
Pineapple Casserole Recipe (Sweet & Savory Side)
Community Kitchen