Ultimate Sheet Pan Quesadillas: Restaurant Flavor at Home
These Sheet Pan Quesadillas redefine weeknight cooking by offering a massive, uniformly crisp, and deeply flavorful main course perfect for feeding large families or game-day crowds. We achieve a perfect textural contrast by pre-browning the savory, spice-infused ground beef filling and strategically overlapping large tortillas to form a sturdy base. The oven ensures even baking, delivering that satisfying crunch and generous cheese pull every single time, making these far superior to standard skillet preparations. This is comfort food upgraded with professional technique.
restaurant_menu Ingredients
The Savory Filling Components
The Quesadilla Structure & Cheese
Garnishes
hardware Essential Tools
Large, heavy-bottomed skillet (cast iron preferred)
Large mixing/prep bowl
Sturdy, large sheet pan (half sheet size)
Parchment paper
Second smaller baking sheet (for pressing)
Sharp chef's knife
Wire cooling rack
format_list_numbered Preparation
Cooking the Flavor Base
Preheat your oven precisely to 425°F (220°C) and line your large sheet pan with parchment paper to ensure even bottom crisping.
Heat the olive oil in your large skillet over medium heat until shimmering, then add the chopped bell peppers and onion, cooking them gently for about 5 minutes until they soften and sweat out excess moisture. Transfer this aromatic mixture to a separate bowl and reserve it.
Browning and Seasoning the Beef
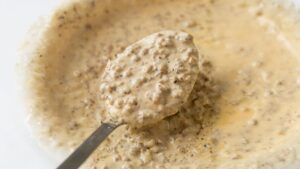
Return the skillet to medium heat and add the ground beef, breaking it up thoroughly as it cooks. Allow the meat to brown deeply on the bottom surface for several minutes to develop rich fond before stirring; this builds complex flavor. Once fully browned, drain off all rendered fat completely. Return the pan to the heat, sprinkle in the chili powder, cumin, and paprika, stirring constantly for 30 seconds until intensely fragrant—this is the spice bloom. Season with salt and pepper, then stir in the reserved, softened vegetables.
Assembly and Pressing
Create the base by overlapping 6 of the large tortillas on the prepared sheet pan to form a continuous, sturdy layer. Spread the seasoned beef mixture evenly over this base, followed by the shredded Cheddar and Monterey Jack cheeses, and finally the sliced green onion whites. Fold the outer edges of the bottom tortillas inward over the filling to create a contained shape. Top this structure with the final, 7th tortilla to seal everything in. Place the second, smaller baking sheet directly on top of the assembly to weigh it down.
favorite You Might Also Love
Browse All arrow_forwardUltimate New Orleans Baked Mac and Cheese
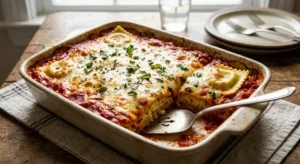
Layered Ravioli Bake: Genius Weeknight Casserole
Mastering Homemade Spaghetti with Rich Meat Sauce

Hearty German Cabbage and Dumplings
4-Ingredient Slow Cooker Imitation Crab Bake Mastery
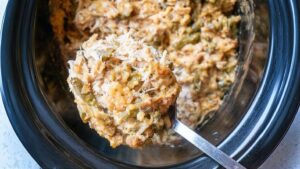
Slow Cooker Chicken and Stuffing Recipe (Easy Weeknight Meal)
Try These Variations
Spicy Chipotle Chicken Variation
Instead of ground beef, use 1 ½ pounds of shredded, slow-cooked chicken breast. Mix the shredded chicken with 1/2 cup of your favorite mild salsa and 2 tablespoons of pureed chipotle peppers in adobo sauce (available in cans at most major grocery stores). Increase the Monterey Jack cheese to 1 ½ cups and substitute the green onions with finely chopped fresh cilantro. The smoky heat from the chipotle provides a wonderful, complex depth that pairs beautifully with the crispy edges of the Sheet Pan Quesadillas, offering a completely different flavor profile than the original savory beef version.
Southwestern Breakfast Sheet Pan Quesadillas
This makes a fantastic brunch centerpiece. Omit the beef entirely. Instead, use 10 scrambled eggs mixed with 1 cup of crumbled, cooked turkey sausage (ensuring it is Halal-compliant). Layer the base tortilla with the cooked eggs/sausage, 1 cup of pepper jack cheese, and 1/2 cup of drained, canned corn kernels. Fold and bake as directed. For serving, skip the Pico de Gallo and instead offer a side of warm maple syrup infused with a pinch of cayenne pepper for a sweet-and-spicy kick. This variation proves the sheet pan method works for any meal structure.
Gourmet Mushroom and Spinach Fiesta
For a vegetarian powerhouse that rivals the beef version in richness, sauté 1 pound of mixed wild mushrooms (cremini, shiitake) until deeply browned. Add 5 ounces of fresh spinach and cook until wilted. Season heavily with dried oregano, garlic powder, and a pinch of smoked paprika. Use a blend of Gruyère and Monterey Jack cheese for a nuttier flavor profile. The deep, earthy flavor of the mushrooms, combined with the saltiness of the Gruyère, creates a sophisticated, intensely savory Sheet Pan Quesadillas experience that feels incredibly indulgent.
Chef's Pro Tips
Bloom Your Spices to Unlock Full Potential
When you add your ground spices—the chili powder, cumin, and paprika—to the hot pan right after draining the beef fat, you are performing a critical step called blooming. Fat acts as a solvent for many flavor compounds found in dried herbs and spices. By briefly heating them in the residual fat for about 30 seconds, you dissolve these compounds, releasing their full aromatic potential. If you simply stir them in cold, they will taste dusty and underdeveloped, resulting in flat-tasting Sheet Pan Quesadillas. Always smell that intense fragrance before moving on!
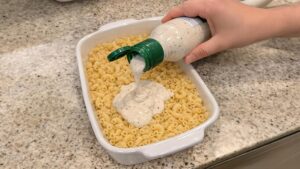
The Importance of Cheese Distribution and Temperature
When layering the cheese, ensure you distribute it evenly right up to the edges where the tortillas will meet. The cheese acts as the adhesive, gluing the top and bottom layers together once melted. Furthermore, use room-temperature cheese if possible. Cold cheese takes longer to melt, which means the surrounding tortilla has more time to dry out and potentially burn before the interior cheese matrix has fully formed and bound the layers. A slight warm-up in the bowl before sprinkling helps immensely.
Parchment Paper is Non-Negotiable for Crispness
While aluminum foil is convenient, I strongly advise against using it directly under the quesadilla for the primary bake. Foil conducts heat too rapidly and aggressively, often leading to scorched bottoms before the top is perfectly golden. Parchment paper provides a buffer, conducting heat more gently and evenly, allowing the bottom of the Sheet Pan Quesadillas to achieve a beautiful, even golden-brown crispness—closer to pan-frying than simply baking—which is essential for the texture contrast we crave.
Controlling the ‘Fold’
When folding the edges of the bottom layer inward, don’t aim for perfect geometry; aim for coverage. The goal is to create a slight lip or border around the filling. This lip catches the cheese that tries to bubble out during baking, creating those wonderfully caramelized, crispy cheese edges we all love. If the cheese escapes onto the parchment paper, it crisps up beautifully, and you can easily scrape those cheesy bits up and sprinkle them back on top before serving.
Storage Guide
Room Temperature Storage (Short Term Only)
If you anticipate finishing the Sheet Pan Quesadillas within 4 hours, you can safely leave them covered loosely at room temperature on the counter. Crucially, they must be completely cooled first. Place them uncovered on a wire rack until they reach ambient temperature. Once cool, cover them loosely with aluminum foil or place them in a large, breathable paper bag. Do not seal them tightly, as any trapped moisture will condense and soften the crust. This method is best used for immediate consumption the same day.
Refrigerator Storage for Optimal Texture Retention
For storage up to 3 days, the refrigerator is best. After the quesadillas have cooled entirely, cut them into serving portions. Line a large, rigid, airtight plastic container (like a Rubbermaid Brilliance container) with a layer of paper towels, arrange the pieces in a single layer if possible, or stack with parchment paper separating layers. The paper towel absorbs any moisture released overnight, protecting the crisp exterior. When reheating, always use the oven method described below to restore the texture.
Freezer for Future Feasts
These freeze exceptionally well, making them perfect for meal prepping. Cool completely, then slice into individual portions. Wrap each piece tightly first in plastic wrap, then in a layer of aluminum foil—this double barrier prevents freezer burn and freezer odor absorption. Label and date them. They can be stored frozen for up to 2 months. To reheat from frozen, remove all wrapping, place directly on a foil-lined baking sheet, and bake at 375°F for 25-30 minutes, checking frequently, until heated through and the exterior is crisp again. This method preserves the integrity of the Sheet Pan Quesadillas beautifully.
Avoid These Mistakes
✕ Overloading the Filling Volume
The single most common error when making large-format dishes like these Sheet Pan Quesadillas is piling on too much filling. If the center layer is too thick, the heat from the 425°F oven cannot penetrate quickly enough to melt the cheese fully before the outer tortilla layer starts to scorch or dry out completely. This leads to a frustrating scenario where the edges are burnt, but the center remains cold and unmelted. Always aim for a filling layer that is no more than 1/2 inch thick across the entire surface; remember, the cheese melts and spreads, adding volume.
✕ Failing to Drain Fat Adequately
When cooking ground beef, especially if you use an 80/20 blend, a significant amount of liquid fat accumulates in the bottom of the skillet. If you skip the crucial step of thoroughly draining this fat—either by pouring it off or using a sieve—that liquid will be absorbed by the tortillas during assembly and baking. This moisture prevents the desirable Maillard reaction on the tortilla surface, resulting in a steamed, soft, and disappointingly limp crust instead of the shatteringly crisp texture that defines excellent Sheet Pan Quesadillas.
✕ Using Cold Ingredients Directly from the Fridge
Placing cold cheese, cold cooked meat, and cold sautéed vegetables onto room-temperature tortillas immediately before baking throws off your thermal dynamics. The cold mass in the center significantly lowers the overall temperature of the dish, forcing the oven to spend valuable time bringing the core up to temperature, which, again, dries out the delicate tortilla exterior. Always allow your cooked filling components to rest on the counter for 15 minutes to come closer to room temperature before assembly.
✕ Cutting Before Resting
Just like a large roast or a fresh-baked loaf of bread, these Sheet Pan Quesadillas need a mandatory 5-minute rest period after they emerge from the oven. Cutting immediately releases steam trapped within the cheese matrix and meat filling. This trapped steam rushes out, collapsing the structure and often pulling the cheese with it, leading to a messy, less appealing presentation and a slightly chewier texture rather than a clean slice. Patience guarantees that perfect, defined rectangular piece.
nutrition Nutrition Facts
Per serving: 1/6th of the sheet pan
Nutritional estimates are based on 85/15 ground beef and standard commercial tortilla sizes.
flag Conclusion
There you have it—a powerful, efficient, and incredibly satisfying way to create massive flavor without the fuss. These Sheet Pan Quesadillas are my go-to when I need to feed a hungry crowd quickly while still delivering that restaurant-quality textural contrast: rich, savory filling against a golden, shattering crust. Do not let the simplicity fool you; the technique of blooming the spices and pressing the layers is what separates this from the average attempt. I urge you to try this method next time you are hosting or simply craving the ultimate comfort food. Make it your own, experiment with the cheeses, and share your success stories with us here at HomeRecipes.com. Happy cooking!
sell Related Topics
Frequently Asked Questions
Can I use pre-cooked chicken or shredded steak instead of ground beef in these Sheet Pan Quesadillas? expand_more
Absolutely, and I encourage experimentation! If you opt for shredded steak or chicken, ensure it is fully cooked and then simmered briefly in a small amount of low-sodium chicken broth mixed with your spices (chili powder, cumin, etc.). The critical step remains: you must reduce that liquid until the meat is nearly dry before layering it onto the tortillas. Wet meat fillings will steam the dough, sabotaging the crispness we are striving for in these Sheet Pan Quesadillas. A drier filling ensures the oven can focus on crisping the tortilla structure rather than evaporating excess liquid.
Why do my tortillas tear when I try to fold them over the filling? expand_more
This almost always points to stale tortillas or an oven that wasn't hot enough during the initial assembly phase. Fresh tortillas have a high moisture content which keeps the gluten pliable. If your tortillas feel stiff or brittle straight out of the bag, you must gently warm them first. Microwave a stack of 4 tortillas wrapped in a damp paper towel for 20 seconds. This brief burst of steam reactivates the structure, making them incredibly flexible for folding over the rich beef and cheese mixture. Remember, the structural integrity of the final Sheet Pan Quesadillas depends on this initial pliability.
What is the purpose of placing a second baking sheet on top during the first phase of baking? expand_more
This technique serves two vital functions, both related to texture. Firstly, it applies necessary weight to press the layers together, ensuring the top tortilla makes full contact with the filling and cheese below. This contact is crucial for a uniform melt and prevents the top layer from buckling or drying out prematurely. Secondly, it essentially steams the center slightly under pressure, guaranteeing that the large volume of filling heats through evenly before we expose the top to direct high heat for crisping. Removing the weight halfway through allows the trapped steam to escape, leading to that perfect, audible crunch on the exterior of the Sheet Pan Quesadillas.
Can I make these vegetarian? What is a good substitute for the beef? expand_more
For a vegetarian version of our spectacular Sheet Pan Quesadillas, you need a substitute that mimics the savory depth and texture of the ground beef. My top recommendation is using a mixture of finely chopped mushrooms (cremini or button) combined with black beans. Sauté the mushrooms until they release their liquid and it completely evaporates, concentrating their umami flavor. Then, stir in rinsed black beans, your spice blend, and perhaps a splash of vegetable broth to moisten slightly. This mixture offers great texture and absorbs the seasoning beautifully, providing a hearty, satisfying filling that complements the melted cheese perfectly.
Is it better to use high heat for a shorter time or lower heat for a longer time for crisping? expand_more
For these specific Sheet Pan Quesadillas, high heat is absolutely mandatory. We are using 425°F because we want rapid heat transfer to the surface of the tortilla to cause immediate dehydration and crisping—this is the mechanism of frying, only achieved via radiant oven heat. If you drop the temperature too low, say below 375°F, the heat will penetrate the tortilla slowly, allowing the moisture from the filling to migrate outward and steam the dough from the inside before the outside has a chance to crisp. We need aggressive heat to achieve that signature crunch, making the high temperature key to success.
More Recipes You'll Love
Hearty Amish Yumasetti Casserole: Comfort Redefined
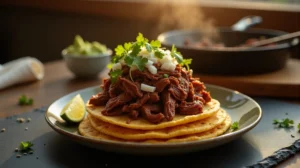
Mastering Authentic Chipotle Barbacoa Beef in Your Instant Pot
Artisan Goat Cheese: Old Fashioned Billy Goats
Effortless 4-Ingredient Amish Ranch Macaroni Bake
Mastering Comfort: Rich Sausage Gravy Recipe

Community Kitchen