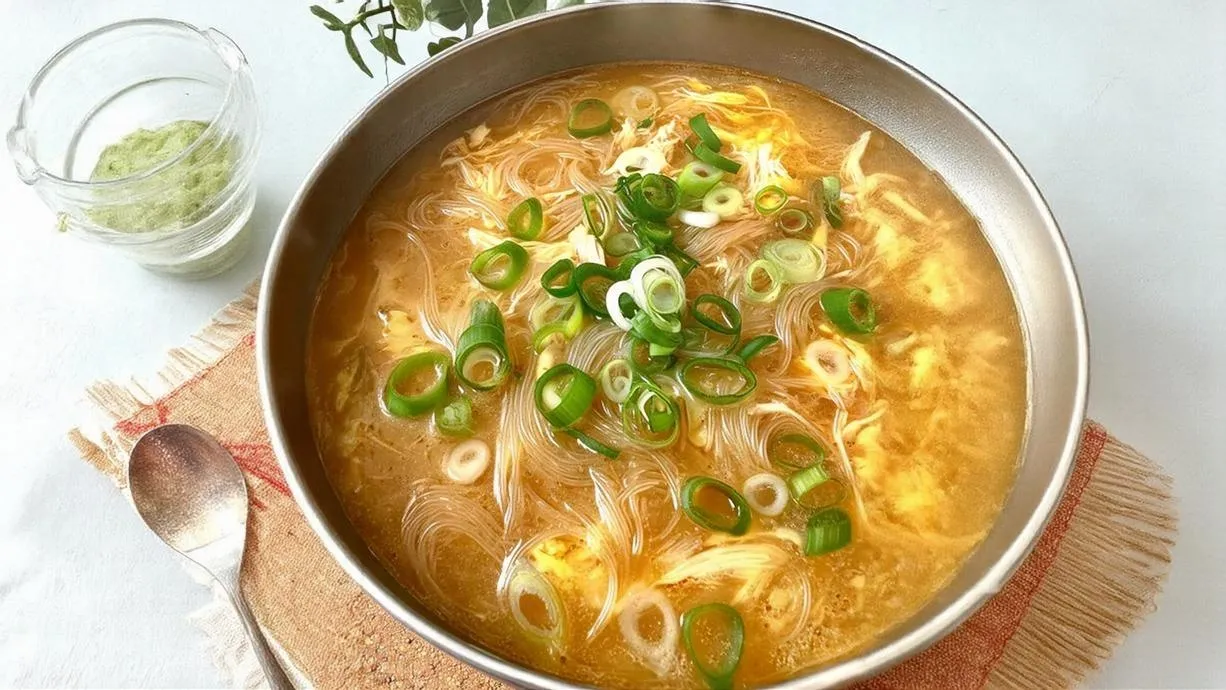
Homemade Chicken Broth Recipe (Essential Kitchen Stock)
Elevate your culinary creations with this foolproof homemade chicken broth recipe. Learn the foundational techniques to create a rich, deeply flavored, and crystal-clear stock from scratch. This essential kitchen staple will transform your soups, sauces, and braises, offering a depth of flavor and nutrition far superior to anything store-bought. It’s an economical and rewarding endeavor that every home cook should master, bringing restaurant-quality taste directly to your table.
restaurant_menu Ingredients
For the Broth
hardware Essential Tools
Large stockpot (8-12 quart capacity)
Fine-mesh sieve
Cheesecloth (optional, for extra clarity)
Large heatproof bowl or clean stockpot
Ladle or skimmer
Airtight containers or freezer bags
format_list_numbered Preparation
Making the Broth
Place chicken bones and scraps in a large stockpot, covering them with 12-16 cups of cold water, ensuring the chicken is submerged by 1-2 inches. Start with cold water to allow impurities to rise slowly.
Bring the water to a very gentle simmer over medium-low heat, being careful not to let it boil vigorously. As foam and scum rise to the surface during the first 30-60 minutes, use a ladle or fine-mesh skimmer to carefully remove and discard it, ensuring a clear broth.
Add the roughly chopped onions, carrots, celery, halved garlic head, whole black peppercorns, bay leaves, and parsley stems to the pot after skimming. Reduce the heat to the lowest possible setting, allowing the broth to barely bubble, and partially cover.
Simmer the broth gently for a minimum of 4 hours, and up to 8 hours, to extract maximum flavor and gelatin. Avoid stirring frequently to keep the broth clear.
Remove the pot from the heat and use a slotted spoon or tongs to carefully remove all large solids from the broth. Discard the solids.
Strain the broth through a fine-mesh sieve set over a large heatproof bowl or clean stockpot. For an even clearer broth, line the sieve with cheesecloth. Do not press on the solids, as this can make the broth cloudy.
Allow the strained chicken broth to cool at room temperature for about an hour. Once sufficiently cooled, transfer it to airtight containers, leaving some headspace for expansion if freezing.
Refrigerate the cooled broth for immediate use (up to 4-5 days) or freeze it for long-term storage (up to 3-4 months). Season with kosher salt to taste just before using or serving.
favorite You Might Also Love
Browse All arrow_forwardEffortless Comfort: Slow Cooker 3-Ingredient Beef Stew Noodles
Cozy Grandma's Country Club Salad Recipe (Creamy & Classic)
Cheesy Italian Spinach Bake Recipe (Comfort Food)
5 Ingredient Slow Cooker Tater Tot Casserole Recipe (Hearty & Easy)
Mongolian Ground Beef Noodles Recipe (Quick Weeknight Meal)
Slow Cooker Creamy Tortellini Soup Recipe (Comforting & Easy)
Try These Variations
Roasted Chicken Broth
For a deeper, richer, and darker homemade chicken broth, roast your chicken bones and vegetables (onions, carrots, celery) on a baking sheet at 400°F (200°C) for 30-45 minutes until deeply golden brown before adding them to the pot. This caramelization creates a more complex flavor profile through the Maillard reaction, perfect for heartier stews or gravies.
Spicy Chicken Broth
Introduce a subtle heat by adding 1-2 dried red chilies, a few slices of fresh ginger, or even a pinch of red pepper flakes along with the other aromatics. This variation is wonderful for Asian-inspired soups or anytime you want a little kick, enhancing the overall warmth and depth of the homemade chicken broth.
Herb-Infused Chicken Broth
Experiment with different herbs to customize your chicken broth. Besides parsley and thyme, consider adding a sprig of rosemary, a few sage leaves, or even dried oregano. Be mindful not to overdo it, as strong herbs can quickly overpower the delicate chicken flavor. Add these herbs during the last hour of simmering for a fresh, vibrant aroma.
Vegetable-Heavy Broth
While this is a chicken broth, you can certainly amp up the vegetable content. Add parsnips, leek greens, mushrooms, or even a quartered tomato for extra layers of earthy flavor and a slightly different hue. Just ensure the chicken flavor remains dominant, as the goal is still a chicken broth, not purely vegetable stock.
Ginger-Turmeric Broth
For a health-boosting twist, add a 2-inch piece of fresh ginger, sliced, and 1 teaspoon of ground turmeric (or a 1-inch piece of fresh turmeric root, sliced) to your chicken broth during the simmering process. This imbues the broth with anti-inflammatory properties and a wonderfully aromatic, slightly warming flavor, perfect for sipping when you need a pick-me-up.
Chef's Pro Tips
The Power of Cold Water
Always start your chicken broth with cold water. This is a fundamental rule in classical French cooking. As the water slowly heats, it gently coaxes out impurities from the bones and meat, which rise to the surface as foam. If you start with hot water, it can ‘shock’ the proteins, causing them to seize and trap impurities within the liquid, resulting in a cloudy and less flavorful broth. Patience here yields clarity and purity, essential for a truly outstanding homemade chicken broth.
The Gentle Simmer is Key
A rolling boil is the enemy of clear, flavorful chicken broth. High heat agitates the ingredients, breaking them down too quickly and emulsifying fats and impurities into the liquid, leading to a greasy, cloudy, and often bitter taste. A gentle simmer, where you see only tiny bubbles occasionally breaking the surface, allows for a slow, steady extraction of collagen and flavor compounds, resulting in a clean, rich, and beautifully translucent broth. This is where true depth of flavor is developed.
To Roast or Not to Roast
While a classic homemade chicken broth is often made with raw bones, roasting your chicken bones and vegetables beforehand at 400°F (200°C) until deeply caramelized will create a profoundly different flavor profile. The Maillard reaction that occurs during roasting develops complex, savory notes and a darker color, yielding a richer, more robust chicken broth perfect for gravies, braises, or robust soups. For a lighter, cleaner broth, skip the roasting. Both methods are valid, depending on your desired end use.
Seasoning Strategy
Resist the urge to heavily salt your chicken broth during the long cooking process. As the liquid reduces, the salt will concentrate, and you could end up with an overly salty broth that’s difficult to salvage. Instead, add a small amount of salt at the beginning to help draw out flavors, and then season your finished homemade chicken broth to taste just before using or serving. This gives you precise control over the final flavor balance, a true mark of a seasoned chef.
Cooling Safely
After straining, it’s crucial to cool your chicken broth rapidly to prevent bacterial growth. Never transfer hot broth directly to the refrigerator, as it can raise the internal temperature of your fridge and put other foods at risk. Instead, let it cool at room temperature for about an hour, then you can place the pot into an ice bath in your sink, stirring occasionally, to expedite cooling. Once it’s below 70°F (21°C), it’s safe to portion and refrigerate or freeze. This step is non-negotiable for food safety.
Storage Guide
Refrigerator Storage
Once your homemade chicken broth has completely cooled to room temperature, transfer it to clean, airtight containers, such as glass jars or food-grade plastic containers. Store it in the refrigerator for up to 4-5 days. You’ll notice a layer of solidified fat will form on top; this acts as a natural protective seal, preserving the broth. You can easily scrape this fat off before reheating, or leave it for added richness and flavor, depending on your recipe. Ensure the containers are sealed tightly to prevent absorption of other refrigerator odors.
Freezer Storage (Containers)
For longer storage, homemade chicken broth freezes beautifully. Pour the cooled broth into freezer-safe airtight containers or heavy-duty freezer bags, leaving about an inch of headspace to account for expansion as it freezes. Label with the date. Frozen broth will maintain its quality for 3-4 months. To use, thaw overnight in the refrigerator or gently reheat directly in a saucepan over low heat. Avoid thawing at room temperature for extended periods to ensure food safety.
Freezer Storage (Ice Cube Trays)
For convenient, single-portion use, consider freezing your chicken broth in ice cube trays. Once solidified, transfer the frozen broth cubes to a large freezer-safe bag. This method allows you to easily grab just the amount you need for sauces, deglazing a pan, or adding a burst of flavor to grains, without having to thaw a large batch. The cubes will keep for 3-4 months. Simply drop the desired number of cubes directly into your cooking or microwave to thaw.
Avoid These Mistakes
✕ Boiling too vigorously
One of the most common pitfalls when making homemade chicken broth is boiling it too hard. A rapid boil causes ingredients to break down too quickly, emulsifying fats and tiny particles into the liquid. This results in a cloudy, often greasy, and sometimes bitter broth. The solution is to maintain a very gentle simmer, where only small bubbles occasionally break the surface, allowing for a slow, steady extraction of flavors and a clear, clean-tasting chicken broth.
✕ Not skimming impurities
Failing to skim the foam and scum that rises to the surface during the initial stages of simmering will lead to a murky, less appealing chicken broth. These impurities are mostly denatured proteins that, if left in the broth, will contribute to cloudiness and can impart an off-flavor. Diligent skimming during the first hour or so ensures a pure, golden liquid that is the hallmark of a high-quality homemade chicken broth.
✕ Adding salt too early or too much
Seasoning your chicken broth heavily at the beginning of the long simmer is a common mistake. As the liquid reduces over several hours, the salt will become highly concentrated, potentially making your broth unusable. It’s best to add very little, if any, salt during the cooking process and then adjust the seasoning of the finished homemade chicken broth to taste just before you use it in a recipe or serve it. This allows for maximum flexibility and control over the final flavor profile.
✕ Overcooking the vegetables
While the chicken bones need a long, slow simmer, adding delicate vegetables like parsley stems too early can lead to them breaking down completely and imparting a slightly bitter or ‘cooked out’ flavor. For the best balance, add aromatics like onions, carrots, and celery after the initial skimming, and any more delicate herbs like parsley or thyme during the last hour of simmering. This ensures their fresh, vibrant notes contribute to the complexity of the homemade chicken broth without becoming mushy or losing their essence.
✕ Pressing on solids when straining
After simmering, it can be tempting to press down on the solids in the sieve to extract every last drop of liquid. However, this action will force small, undesirable particles and fat through the sieve, resulting in a cloudy chicken broth. For a perfectly clear broth, allow it to strain naturally through a fine-mesh sieve, ideally lined with cheesecloth. Patience here is key; let gravity do the work, and resist the urge to squeeze the solids.
nutrition Nutrition Facts
Per serving: 1 cup
Nutritional values are approximate and can vary based on specific ingredients and preparation methods, especially the amount of fat skimmed off.
flag Conclusion
There you have it, my friends – the definitive guide to crafting a truly magnificent homemade chicken broth. This isn’t just a recipe; it’s a fundamental skill that will empower you to cook with more confidence and create dishes that sing with flavor. From humble beginnings, you’ll produce a liquid gold that forms the foundation of countless culinary masterpieces. Here at HomeRecipes, we believe that the best meals start with the best ingredients, and this chicken broth is proof of that philosophy. So, roll up your sleeves, gather your ingredients, and prepare to fill your home with the comforting aroma of a chef’s kitchen. Happy cooking!
sell Related Topics
Frequently Asked Questions
What's the difference between chicken broth and chicken stock? expand_more
This is a question I get all the time, and it’s a subtle but important distinction in the culinary world! Generally, chicken stock is made primarily from bones and connective tissues, often roasted, and simmered for a longer period (4-8+ hours), resulting in a richer, more gelatinous liquid. It's typically unseasoned or lightly seasoned, intended as a base ingredient. Chicken broth, on the other hand, often includes more meat, vegetables, and is seasoned during cooking, making it flavorful enough to drink on its own. It's usually simmered for a shorter time (1-2 hours). My recipe here bridges the gap, offering the richness of a stock with the delicious flavor profile of a broth, making it incredibly versatile.
Can I use a whole chicken instead of just bones for homemade chicken broth? expand_more
Absolutely, and it's a fantastic idea! Using a whole chicken, especially a less expensive stewing hen, will yield an even richer, more flavorful chicken broth because you're extracting flavor from both the bones and the meat. You can simply place the whole chicken in the pot, follow the same steps for simmering and skimming, and then remove the cooked chicken. The meat can be shredded and used for sandwiches, tacos, or added back into a soup made with your fresh chicken broth. It’s a wonderful way to get two meals from one effort, ensuring no part of the chicken goes to waste.
Why is my chicken broth cloudy, and how can I fix it? expand_more
A cloudy chicken broth is usually the result of boiling too vigorously, which emulsifies impurities and fat into the liquid, or stirring too much during the simmering process. To get a clear broth, remember to start with cold water, bring it to a very gentle simmer, and skim meticulously during the first hour. If your broth is already cloudy, you can try to clarify it. One chef's trick is to whisk an egg white (or two) into a cold portion of the broth, then slowly bring it to a simmer. The egg white will coagulate and trap the impurities. Once it forms a raft, gently strain the broth through a fine-mesh sieve lined with cheesecloth. It takes a little extra effort, but it works wonders.
Can I make chicken broth in a slow cooker or Instant Pot? expand_more
Yes, both slow cookers and Instant Pots are excellent tools for making chicken broth, especially if you're short on time or prefer a hands-off approach. For a slow cooker, combine all ingredients and cook on low for 8-12 hours, or on high for 4-6 hours. The low, steady heat is ideal for extraction. For an Instant Pot, place all ingredients in the pot, add water to the maximum fill line, and cook on high pressure for 60-90 minutes, then allow for a natural pressure release. This significantly speeds up the process, giving you a deeply flavorful chicken broth in a fraction of the traditional time. Just remember to still skim any impurities if you're aiming for a super clear broth.
What can I do with the leftover cooked vegetables from the broth? expand_more
While the vegetables have given up most of their flavor to the chicken broth, they still have some nutritional value and can be repurposed. They are quite soft and bland on their own, so I don't usually recommend eating them directly. However, they can be blended into a vegetable puree for a thick soup or sauce, or added to a compost pile. Some home cooks prefer to discard them, seeing their primary purpose as flavor contribution to the broth. If you’re looking to maximize their utility, blending them into a base for a secondary vegetable stock is an option, but don't expect a burst of fresh flavor.
More Recipes You'll Love
Church Supper Chicken Spaghetti Recipe (Creamy Baked)

Community Kitchen