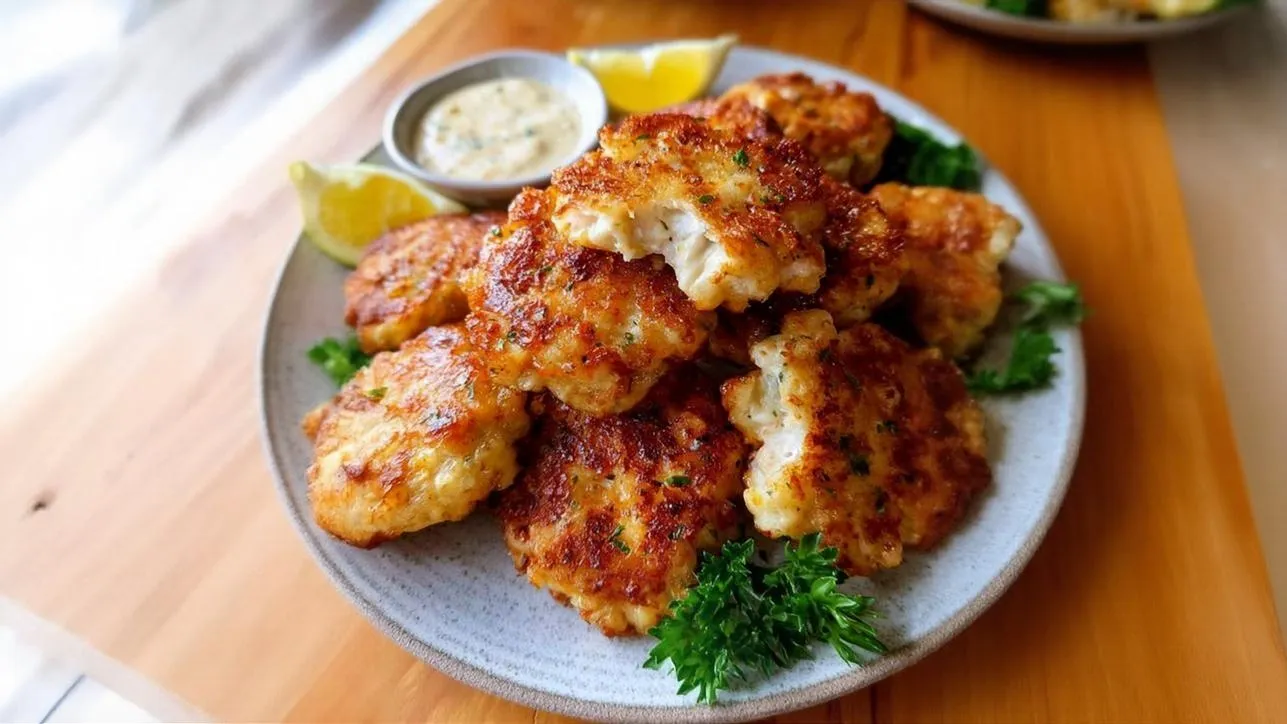
Crispy Chicken Fingers Recipe (Southern-Style)
Unlock the secret to truly irresistible crispy chicken fingers with this chef-crafted recipe. Featuring tender chicken tenderloins soaked in buttermilk for ultimate juiciness, then coated in a perfectly seasoned, crunchy flour mixture and fried to golden perfection. Each bite offers a delightful contrast of crispy exterior and succulent interior, finished with a savory sprinkle of Parmesan. This Southern-style delight is a guaranteed crowd-pleaser, delivering restaurant-quality flavor right to your American kitchen.
restaurant_menu Ingredients
For the Chicken
Wet Breading
Dry Breading & Frying
hardware Essential Tools
Two shallow bowls (pie plates work well)
Whisk
Baking sheet
Wire rack
Heavy-bottomed pot or Dutch oven
Deep-fry thermometer
Tongs
Paper towels
Instant-read thermometer
format_list_numbered Preparation
Prepare Breading Stations
Pat the chicken tenderloins thoroughly dry with paper towels to ensure the coating adheres well.
In the first shallow bowl, whisk together the large egg and 1/2 cup of buttermilk until well combined.
In the second shallow bowl, combine the 1 cup of all-purpose flour, 1 1/2 teaspoons of garlic powder, 1 1/2 teaspoons of black pepper, 1/2 teaspoon of kosher salt, and 1/2 teaspoon of paprika, then whisk until thoroughly blended.
Coat the Chicken Fingers
Working with one chicken tenderloin at a time, first dip it into the egg-buttermilk mixture, ensuring it's fully coated, allowing any excess to drip off briefly.
Transfer the tenderloin to the seasoned flour mixture and press firmly, turning and patting until it is completely covered, making sure those flour clumps form for extra crispiness.
Place the coated chicken on a clean baking sheet or wire rack and repeat with the remaining tenderloins, allowing the coating to set slightly.
Fry to Golden Perfection
In a heavy-bottomed pot or deep skillet, pour enough oil for deep-fat frying to reach a depth of 2 to 3 inches and heat over medium-high heat until it reaches a consistent 375°F (190°C), using a deep-fry thermometer to monitor.
Carefully add the coated chicken fingers to the hot oil, a few pieces at a time, ensuring not to overcrowd the pan to maintain oil temperature.
Fry the chicken for approximately 2 to 3 minutes per side, or until they are a beautiful golden brown and an instant-read thermometer registers an internal temperature of 165°F (74°C).
Remove the cooked chicken fingers with tongs and place them on a wire rack set over a baking sheet lined with paper towels to drain excess oil.
Immediately after removing from the oil, sprinkle generously with 2 tablespoons of grated Parmesan cheese.
Repeat the frying process with the remaining chicken fingers, allowing the oil to return to 375°F (190°C) between batches for optimal crispiness.
favorite You Might Also Love
Browse All arrow_forwardFour-Ingredient Slow Cooker Beef and Potato Bake Mastery
Dolly Parton Casserole Recipe (Easy 5 Ingredient Meal)
Crispy Black Bean Tacos Recipe (Flavorful & Easy Weeknight)
Crockpot Kitchen Sink Casserole Recipe (Hearty & Versatile)
One-Pan Chicken and Rice Recipe (Comforting Baked)
Chicken Tamale Pie Recipe (Hearty Southwestern Comfort)
Try These Variations
Spicy Kick Chicken Fingers
To add a fiery kick to your chicken fingers, incorporate 1/2 teaspoon of cayenne pepper into the dry flour mixture, or increase to 1 teaspoon for a bolder heat. You can also add a few dashes of your favorite hot sauce to the buttermilk mixture for an extra layer of flavor and spice. Serve with a cooling blue cheese dip. This variation is great for those who love a bit of heat and enhances the traditional chicken fingers experience.
Herb-Crusted Chicken Fingers
For a fresh, aromatic flavor, finely mince 1 tablespoon of fresh rosemary and 1 tablespoon of fresh thyme, then mix them into your dry flour coating. The herbs will infuse the crust with their fragrant notes as they fry, creating a sophisticated twist on the classic. This variation pairs beautifully with a lemon-garlic aioli and a crisp green salad, transforming your chicken fingers into an elegant meal.
Gluten-Free Chicken Fingers
To make these chicken fingers suitable for a gluten-free diet, simply substitute the all-purpose flour with a high-quality gluten-free all-purpose flour blend. Ensure your chosen blend contains xanthan gum or add 1/2 teaspoon per cup of flour to help bind the coating effectively. Follow all other steps precisely for a delicious and crispy gluten-free chicken finger option, maintaining that delightful crunch.
Parmesan-Herb Chicken Fingers
For an even more intensely savory and aromatic chicken finger, double the Parmesan cheese in the recipe to 4 tablespoons, mixing it directly into the dry flour mixture alongside 1 teaspoon of dried Italian herbs. The Parmesan will crisp up beautifully, creating a nutty, cheesy crust that is incredibly satisfying and adds another dimension of flavor to your chicken fingers.
Chef's Pro Tips
The Importance of Patting Dry
Before you even think about dipping your chicken, pat those tenderloins bone-dry with paper towels. Any residual moisture on the chicken’s surface will create a barrier, preventing the buttermilk and flour from adhering properly. This leads to a patchy, less crispy coating that can easily fall off during frying, robbing you of that essential crunch. This is a fundamental step for any fried food.
Why Buttermilk is a Must
Buttermilk isn’t just for flavor; its mild acidity is a natural tenderizer. The lactic acid in buttermilk gently breaks down the chicken’s muscle fibers, resulting in an incredibly juicy and succulent interior. Beyond tenderizing, it also acts as a superb binder for the flour, creating a superior, more even coating that adheres beautifully and fries up extra crispy. Don’t underestimate its power!
Don’t Over-Mix the Flour
When combining your dry ingredients, whisk just until blended. Over-mixing can develop the gluten in the flour, which can lead to a tough or rubbery coating once fried. We want a light, airy, and crispy texture, not a dense one. Gentle handling throughout the breading process is key to achieving the perfect crisp on your chicken fingers.
The Magic of a Wire Rack
After frying, always place your chicken fingers on a wire rack set over a baking sheet, not directly on paper towels. While paper towels absorb excess oil, placing the chicken directly on them can trap steam underneath, making the bottom soggy. A wire rack allows air to circulate around the entire piece, keeping it crispy on all sides as it cools slightly, which is crucial for perfect chicken fingers.
Seasoning the Coating, Not Just the Chicken
The bulk of the flavor for your fried chicken fingers comes from the seasoned flour coating, not just the chicken itself. Ensure your flour mixture is well-seasoned with a generous hand. This creates a flavorful crust that complements the tender chicken inside. Don’t be afraid to taste a tiny pinch of your flour mixture (before it touches raw chicken!) to adjust the seasoning to your preference.
Storage Guide
Refrigerator Storage (Short-Term)
To store leftover crispy chicken fingers, first allow them to cool completely to room temperature. Once cooled, place them in a single layer in an airtight container or wrap them tightly in aluminum foil. Stored this way, they will remain fresh and safe to eat for up to 3-4 days in the refrigerator. For best results and to prevent sogginess, try to separate layers with parchment paper if stacking.
Freezer Storage (Long-Term)
For longer storage, cooked chicken fingers freeze exceptionally well. After allowing them to cool completely, arrange them in a single layer on a baking sheet and freeze for about 1-2 hours, or until solid. This prevents them from sticking together. Once frozen, transfer the chicken fingers to a freezer-safe airtight container or heavy-duty freezer bag. They can be stored in the freezer for up to 2-3 months. Label with the date for easy tracking.
Reheating for Crispiness (Oven/Air Fryer)
To reheat frozen chicken fingers, preheat your oven to 400°F (200°C) or your air fryer to 375°F (190°C). Place the frozen chicken fingers on a wire rack set over a baking sheet (for oven) or directly in the air fryer basket. Bake for 15-20 minutes in the oven, or 10-12 minutes in the air fryer, flipping halfway through, until they are heated through and regain their crispiness. Avoid the microwave, as it will make them soggy.
Avoid These Mistakes
✕ Overcrowding the Frying Pan
This is a cardinal sin in frying. When you add too many chicken fingers to the oil at once, it drastically lowers the oil’s temperature. Lower oil temperature means the chicken takes longer to cook, absorbing more oil and becoming greasy and soggy instead of crispy. Always fry in small batches, giving each piece plenty of space to cook evenly and maintain that crucial oil temperature for optimal crispy chicken fingers.
✕ Not Maintaining Oil Temperature
Frying at the wrong temperature is the quickest way to ruin your chicken fingers. If the oil is too cool (below 350°F / 175°C), the coating will become greasy and soft. If it’s too hot (above 380°F / 193°C), the outside will burn before the inside is cooked through. A reliable deep-fry thermometer is essential to keep the oil consistently at 375°F (190°C), ensuring a perfectly cooked, golden-brown chicken finger every time.
✕ Skipping the Buttermilk Soak
Many home cooks skip the buttermilk soak, thinking it’s just an extra step. However, this is a crucial mistake. Buttermilk’s acidity is key to tenderizing the chicken, making it incredibly juicy. It also helps the seasoned flour adhere better, leading to a more uniform and robust crispy coating. Without it, your chicken fingers will be less tender and the coating may not be as crisp or flavorful.
✕ Not Pressing the Flour Firmly Enough
When dredging the chicken, simply dusting it with flour isn’t enough for the best crispy chicken fingers. You need to firmly press the flour onto the chicken, almost massaging it in. This creates those wonderful little flour clumps and ensures a thick, textured coating that fries up into incredibly crispy bits, providing that satisfying crunch that makes chicken fingers so beloved.
✕ Not Draining Properly After Frying
Immediately after frying, resist the urge to pile your chicken fingers onto a plate lined with paper towels. This traps steam and moisture, making the bottom of your chicken fingers soggy. Instead, always transfer them to a wire rack set over a baking sheet. This allows air to circulate around the entire chicken finger, letting excess oil drip off and preserving that hard-earned crispiness. This step is vital for the perfect crispy chicken fingers.
nutrition Nutrition Facts
Per serving: 1 serving
Nutritional values are approximate and may vary based on specific ingredient brands and preparation methods. These values are calculated per serving for the chicken fingers themselves, not including optional ranch dressing or other sides.
flag Conclusion
There you have it, my friends – the definitive guide to crafting the most incredible crispy chicken fingers right in your own kitchen. This recipe isn’t just about cooking; it’s about understanding the nuances of texture and flavor that elevate a simple dish into something truly memorable. The joy of serving these perfectly golden, juicy chicken fingers to your family and friends is immeasurable. I encourage you to embrace the process, trust the techniques I’ve shared, and savor every moment of your culinary journey. Here at HomeRecipes.com, we believe that every home cook has the potential to create restaurant-quality meals, and these chicken fingers are a delicious testament to that. So go ahead, get frying, and taste the difference that a little chef’s magic can make. Enjoy your delicious homemade crispy chicken fingers and perhaps explore other delicious options like ground chicken recipes for your next meal!
sell Related Topics
Frequently Asked Questions
How can I make my chicken fingers extra crispy? expand_more
The secret to achieving truly extra crispy chicken fingers lies in a few key steps. First, ensure your chicken is thoroughly patted dry before breading. Moisture is the enemy of crispiness. Second, really press the seasoned flour onto the chicken, forming those little flour clumps that fry up into crunchy bits. For an ultimate crunch, consider double-dredging: after the first flour coat, dip the chicken back into the buttermilk briefly, then into the flour again, pressing firmly each time. Finally, maintaining a consistent oil temperature of 375°F (190°C) and not overcrowding the pan are critical for a crisp, non-greasy result. These techniques ensure a robust, textured coating that fries beautifully.
What kind of oil is best for frying chicken fingers? expand_more
For frying chicken fingers, you want a neutral-flavored oil with a high smoke point. This ensures the oil can reach the necessary high temperatures without burning or imparting undesirable flavors to your chicken. My top choices as a chef are vegetable oil, canola oil, or peanut oil. These are readily available in American grocery stores and are excellent for deep-fat frying. Avoid oils with lower smoke points like olive oil for this application, as they will degrade and smoke excessively at 375°F (190°C), affecting both flavor and safety.
Can I bake these chicken fingers instead of frying them? expand_more
While this recipe is optimized for frying to achieve that classic crispy chicken finger texture, you can certainly bake them as a healthier alternative. To bake, prepare the chicken tenderloins as directed, then place them on a wire rack set over a baking sheet. Lightly spray them with cooking spray. Bake in a preheated oven at 400°F (200°C) for 20-25 minutes, flipping halfway through, until golden brown and cooked through to an internal temperature of 165°F (74°C). While they won't be as deeply crispy as fried, they will still be flavorful and satisfying. This method works well for those looking for a lighter take on chicken tenderloin recipes.
What should I do if my chicken fingers are greasy? expand_more
Greasy chicken fingers are almost always a sign that your frying oil wasn't hot enough. When the oil temperature drops, the coating absorbs more oil instead of cooking quickly and forming a crisp barrier. Ensure your oil is consistently at 375°F (190°C) before adding the chicken, and monitor it closely with a thermometer throughout the frying process. Also, avoid overcrowding the pan, as this significantly lowers the oil temperature. Fry in small batches to maintain optimal heat. Draining the cooked chicken on a wire rack set over paper towels also helps any excess oil drip away, further preventing greasiness.
Can I prepare the chicken fingers ahead of time for frying later? expand_more
Yes, you can certainly prepare the chicken fingers ahead of time! After you've coated the chicken tenderloins with the seasoned flour, place them in a single layer on a baking sheet lined with parchment paper. Cover loosely with plastic wrap and refrigerate for up to 2-3 hours. This brief chilling period actually helps the coating adhere even better to the chicken, potentially leading to an even crisper result when you fry them. Just be sure to bring them closer to room temperature for about 15-20 minutes before frying to ensure even cooking.
Community Kitchen